Sunday, 30 June 2013

Currywurst and Fries with Special Sauce


This is a post I'm really excited to share. In Germany, one of their very popular fast food items is called Currywurst. It's really a simple concept. Slice your bratwurst, bathe it in curry ketchup and top with a side of fries (that you dip in the curry ketchup). If you are a big curry fan, don't think of this as a real curry dish, it's not. If you don't particularly like curry (like me), try this. It's really not very curry like. But it's still tasty.

So then in Belgium I had an order of fries. The dutch do fries really well, and Belgium is part Dutch. They eat mayonnaise on their fries over there. Sounds strange (and is strange if you think of it as North American Mayonnaise or worse Mayo or Miracle Whip) but it is a different mayonnaise. It has more tang to it. Which worked for me because I usually eat vinegar on my fries, not ketchup. But it did take a few tries for me to accept it. So they have these little fry stands and you can get all different toppings on your fries. Special sauce, cheese sauce, pickles, red and white sauce (mayonnaise and ketchup), etc. But in Belgium the place I went to their special sauce was mayonnaise, curry ketchup and onions. Very, very tasty.

I'm going to show you the curry ketchup recipe today and then you can make two good dishes out of it.  I will also show the special sauce mayonnaise recipe. It wasn't exactly the same as the ones I ate there, but it works. The curry ketchup though was pretty much identical.

Recipes from Saveur & All Recipes.

Serves 4 (1 1/2 C. Curry Ketchup & 3/4 C. Mayonnaise)
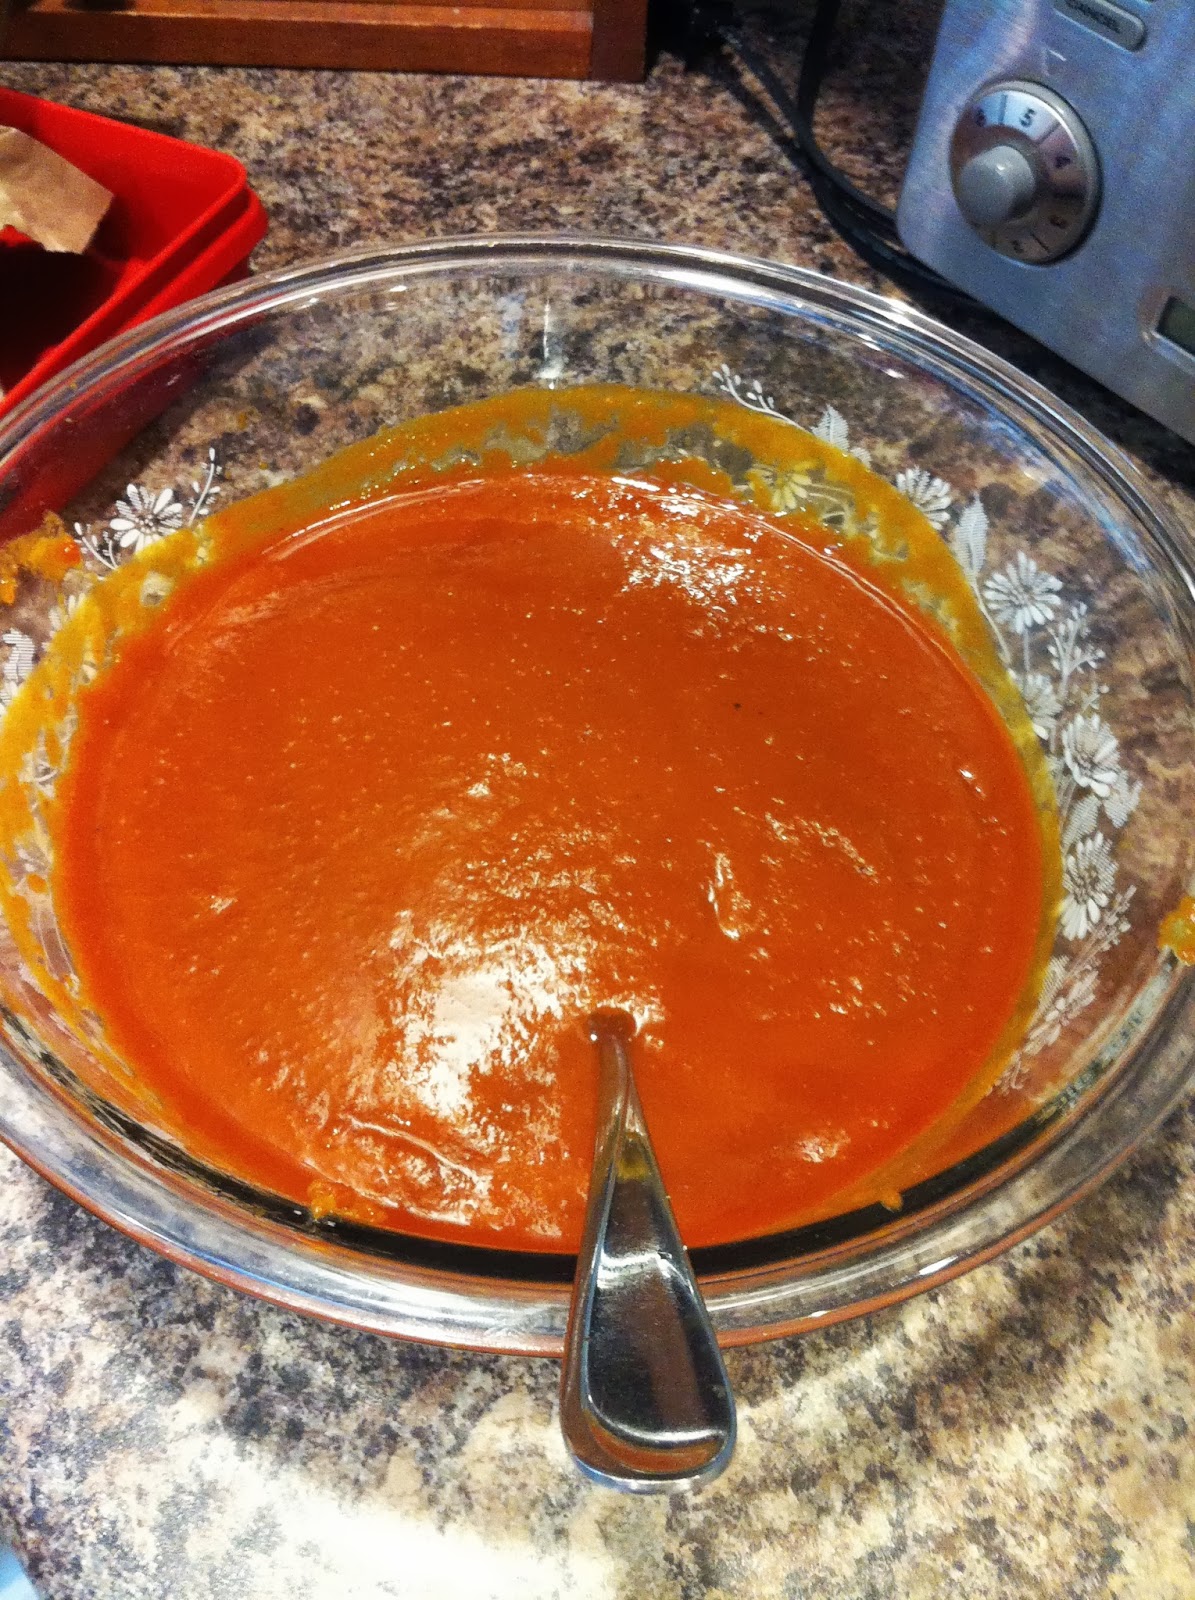
Curry Ketchup

Fry Sauce (Mayonnaise)

Ingredients

Curry Ketchup
2 Tbsp. Oil
1 Onion, finely chopped
2 Tbsp. Curry Powder
1 Tbsp. Paprika
2 C. Canned Tomatoes with Juice, diced or crushed
1/2 C. Sugar
1/4 C. Red Wine Vinegar
Salt
Pepper

Fry Sauce
1/2 C. Mayonnaise
Pinch of Salt
2 Tbsp. Red Wine Vinegar (I probably would just use white vinegar next time)

1/2 Onion, minced
1 Kg French Fries
4 Bratwursts

Directions

Curry Ketchup
~Heat oil in a large saucepan and cook onions until transparent.
~Add curry and paprika, stir and let cook for 1 minute.
~Add tomatoes, sugar and vinegar. Stir.
~Season with salt and pepper to taste.
~Bring mixture to a boil and then reduce to a simmer.
~Stir every so often while simmering for approximately 30 minutes until mixture thickens.
~Put mixture into food processor and puree.
~Run puree through a sieve (to make it authentic you only want the thin ketchup like mixture. I don't know if I'd put the work in though to run it through the sieve. It takes a lot of time and I don't mind chunks of tomato. But then it is more like a curry tomato sauce, not curry ketchup. So you decide).

Fry Sauce
~Combine all ingredients in a container and mix well with a fork to combine.
~Return to fridge until needed.

~Cook bratwurst
~Slice brats into bite size slices
~Bake or fry french fries
~Put brat pieces on plate, top with hot curry ketchup
~Top fries with fry sauce on one end, curry ketchup on the other and a generous topping of minced onion pieces.

Enjoy


Tuesday, 4 June 2013

Gooey S'more Brownies-1st Blogiversary!


I'm back! It felt good to be back in the kitchen after 7 weeks away. Now I can say I was in Europe, and let me tell you, there is two very important things the Europeans don't do well, Brownies & Chocolate Chip Cookies. They have biscuits, and the one brownie I had (no it wasn't in Amsterdam) was supposed to be the 'to die for brownie' but it really wasn't. Kinda disappointing considering I thought I had hit the jackpot when I found it on my Birthday and opted for it over a slice of cake. I made it home and my first day I avoided the kitchen, not because I wanted to, but because I had a lot of stuff to do. Day two though and I was back. I was just going to make some Toll House Cookies, because they had really turned out well the last time I made them in the new oven. But then I started thinking about Brownies, and there really wasn't any further internal debating needed. So S'more Brownies it was because I miraculously had all the specialty ingredients needed and they weren't even old and stale.

But now I'm posting this to you on my one year Blogiversary. Which is pretty cool. If you want the whole sentimental spiel about me and blogging you should check out my 100th post. I really don't have anything else to say that I didn't say there. Especially because I've been out of the loop for awhile now.

They tasted amazing. I would not recommend removing them from the pan though until they are absolutely cooled. The bottom layer even slightly warm was just a mush of brownie pudding. But oh so tasty brownie pudding. I really liked my silicone baking dish for this one though. Because of the marshmallows in it and all the sugars, I figure it might be a bit tricky to get the edge pieces out of a glass dish.

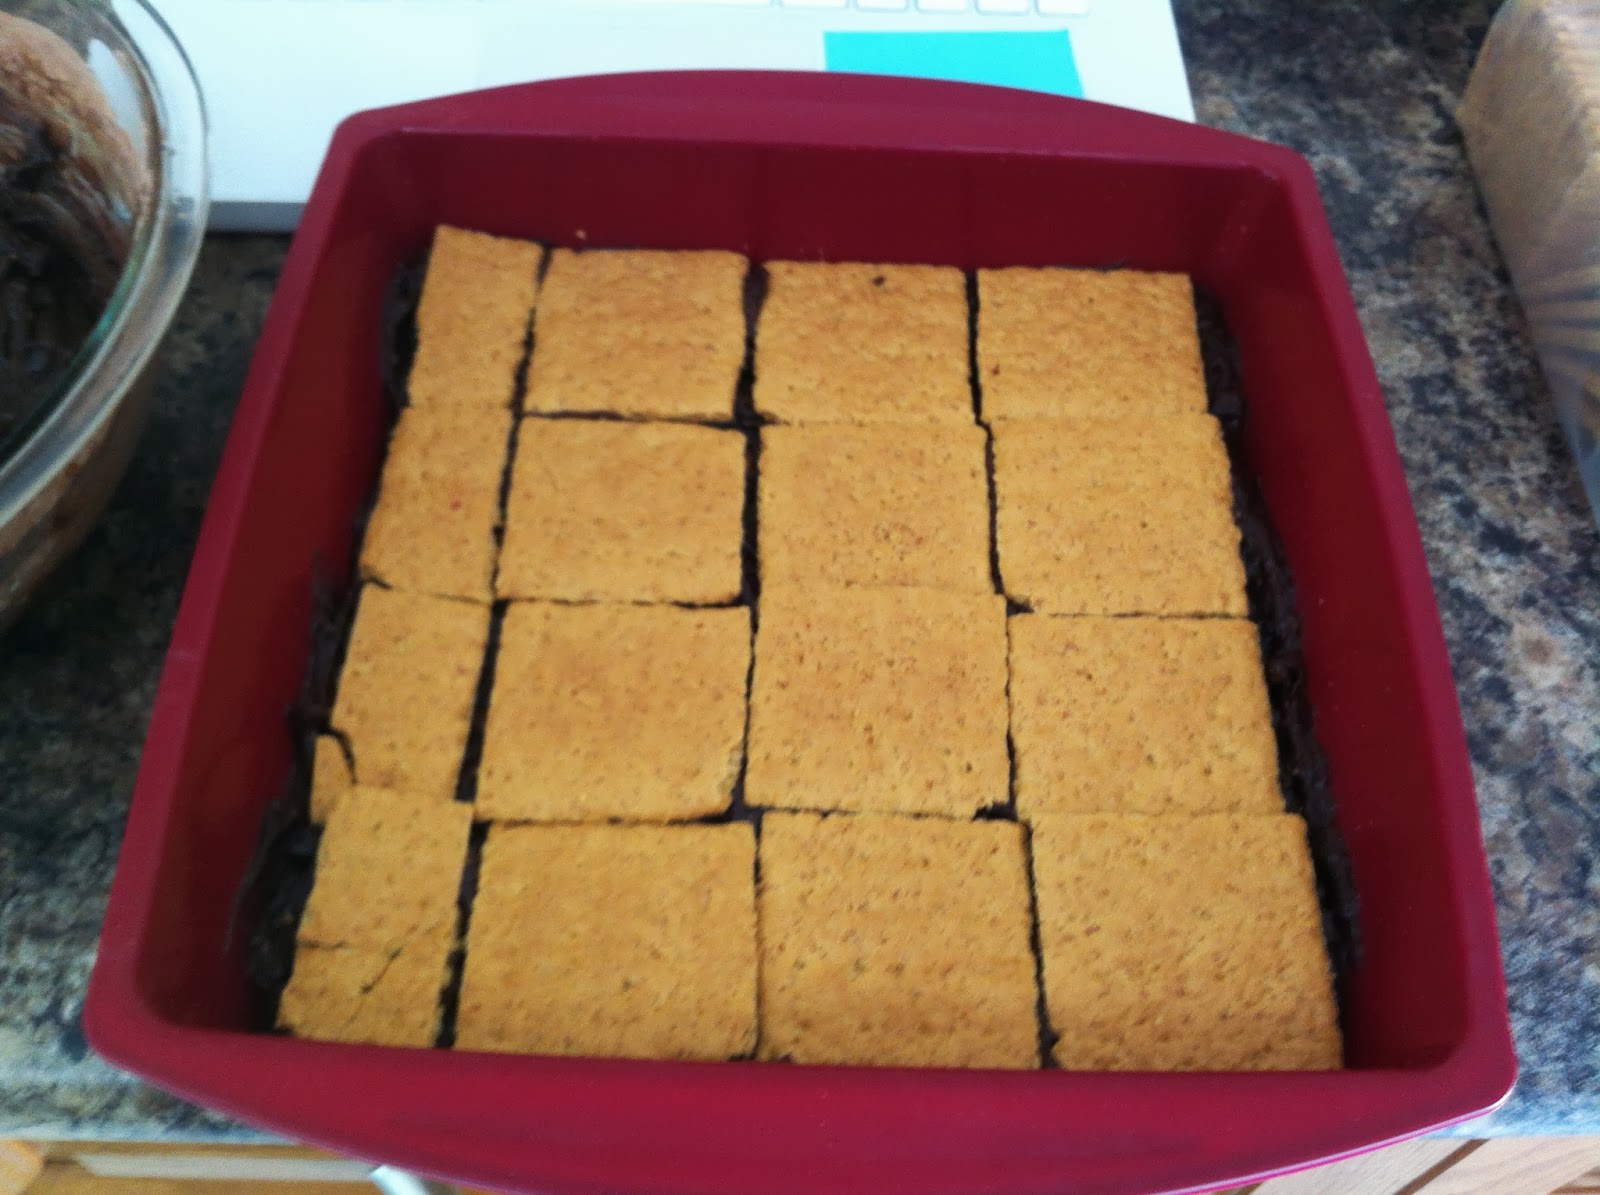
The marshmallows did amazing things. Only in a few places are there still marshmallows left in marshmallow form as you know it. Everywhere else they simply melted into the brownie batter, making a chewy brownie with a really crisp top. One thing I may consider next time is to layer Brownie, Marshmallow, Graham Cracker, Brownie instead of doing Brownie, Graham Cracker, Marshmallow, Brownie. My original thought was that it'll be a lot easier to spread this thick brownie batter on the top layer over smooth graham crackers, than it would be to try and completely cover marshmallows that just want to jump around. I know it'll change the texture of the brownie layers though because the marshmallows would then melt over the bottom brownie layer, instead of under the top layer (the graham crackers softened up perfectly, but never dissolved. They created a border between the two brownie layers). I'm definitely going to have to try this other way and let you know what method I prefer. I have a feeling that it'll make for a completely different textured brownie.

Wow, that was easy. I've been blogging ever night about my trip on a different blog and I've been typing it up on my phone because I didn't take my laptop with me. This post came together so quickly being able to type with a full keyboard. Plus, I've been home for 3 days now and I still can't get over how big my laptop screen feels.

Recipe adapted from The Royal Cook & The Big Green Bowl.

Makes 10x10 pan


Ingredients

1/2 C. Whole Wheat Flour
1/2 C. All Purpose Flour
2/3 C. Cocoa 
1/2 Tsp. Salt
1 C. Butter, melted
2 C. Sugar
3 Eggs
1 1/2 Tsp. Vanilla
1 C. Chocolate Chips (I used mini ones)
2 C. Mini Marshmallows
14 Graham Crackers (14 Canadian ones, they are different than the American, but you can sub the American in just fine, except the number I'm calling for won't be the same)

Directions

~Preheat oven to 350 F.
~In a medium bowl combine flours, cocoa and salt.
~In a large microwave safe bowl melt butter. Stir in sugars.
~Add in Eggs and Vanilla. Stir.
~Pour dry ingredients into wet and stir by hand until just combined.
~Stir in chocolate chips.
~Spread half of the brownie batter into a greased pan (I used a 10x10 silicone dish).
~Top with a layer of (whole, not crushed) graham crackers, followed by the mini marshmallows.
~Spread the remaining brownie batter overtop the marshmallows and carefully try to spread it out and cover all the marshmallows.
~Bake for 26-28 minutes or until top is crispy and centre still feels soft.
~Cool completely (very important, trust me) before slicing and removing from pan.

Enjoy


Sunday, 3 March 2013

Creamy Peppermint Hot Chocolate (Minus the Cream)


I had to think of something last minute to post here. The reason being was I didn't get to say goodbye in my last post. So goodbye.

Okay, so you probably want a little more than that. Well, I'm going on an adventure and am going to be away from this blog for a bit. I'll be back though. I promise.

Anyway, this drink. It does have alcohol in it, and a type of alcohol I bought because I had to try it but was very sceptical about it. Turns out it really really works (for some things). I'm talking about whipped cream vodka (cake batter is the next one on the list to try). It took me a bit to find something I would want to drink with whipped cream flavouring in it but I can now say it is very good for two things: creamsicle screwdrivers (just your typical vodka and orange with an added creamyness to it) and hot chocolate.

With the hot chocolate I do find you have to balance the alcohols out. I love peppermint hot chocolates but the peppermint schnapps makes the drinks taste more bitter (and I like a sweeter, creamier, milk chocolate hot chocolate), and the whipped cream vodka on its own makes the hot chocolate excessively sweet. So do a 1:1 ratio of the two and it perfectly balances the drink out. The amount of each that I use doesn't make a strong drink, it just adds a hint of flavour. So if you want it stronger feel free to increase the quantities. What I really like about the vodka is that it makes my hot chocolates seem thicker and creamier (it's the word of the day) without having to make it with milk. This was a really good thing when I was limiting the amount of dairy I was consuming. Up until figuring this out I would rather have no hot chocolate than one made with water. But make it with water and add in this vodka and it's all good. Really.

So how do you make this wonderful thing I'm bragging about.

Ingredient

3/4 C. Boiling Water
1 Pkg. Hot Chocolate Mix
1/2 oz Whipped Cream Vodka
1/2 oz Peppermint Schnapps
*Optional* Whipped Cream

Directions

~Boil the water and pour into a mug.
~Stir in hot chocolate mix until dissolved.
~Mix in alcohols and stir.
~Top with whipped cream if desired.

Enjoy

Friday, 1 March 2013

Blueberry Lemon Curd Galette


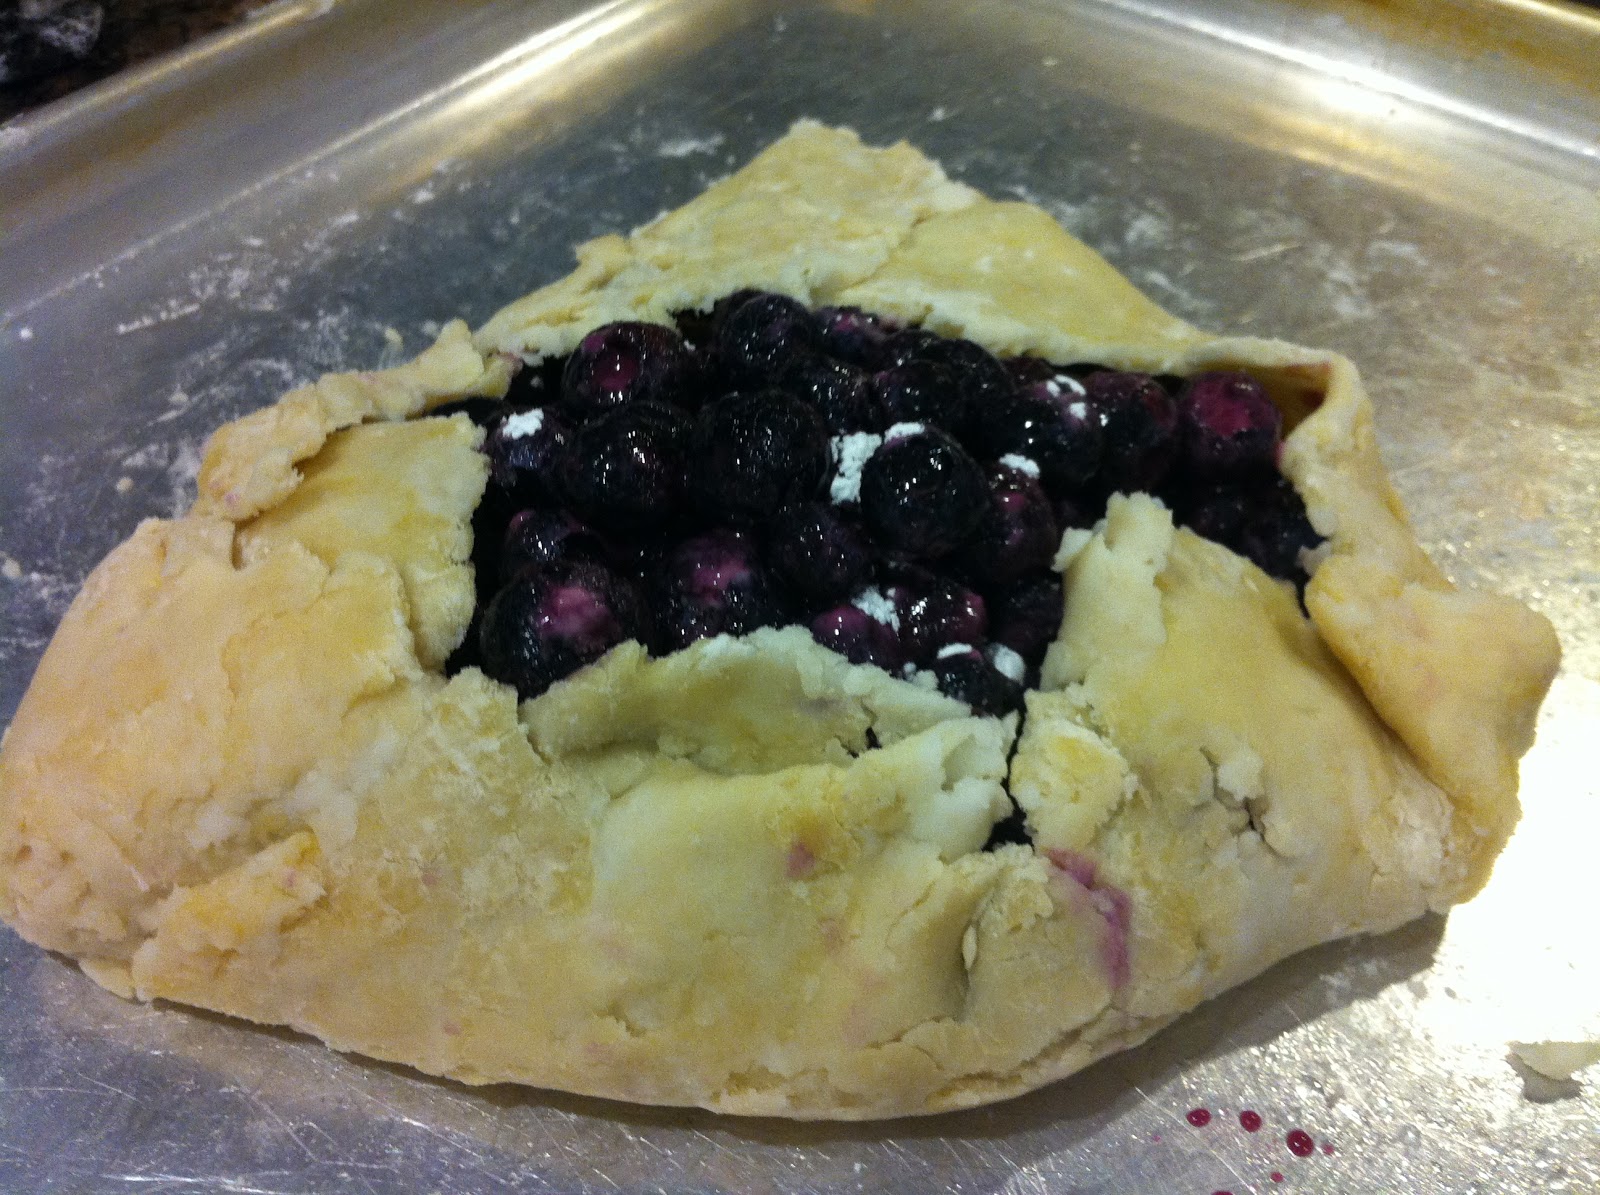
Okay, I know this looks messy and like I ruined my cookie sheet but I can assure you it actually came off the sheet beautifully and once it was on a plate you would never know that all the innards leaked out of it.

The beautiful thing about this is that it looks about as far from perfect as could be, but the rustic look is in right? Right? So really, imperfect is perfect now or at least that's what I'm telling myself. The other great thing about this is that you can really make them as big or as small as you want. Because you aren't limited to the size of a pie pan. I ended up making 4 of these (we cut them into 3 or 4 pieces) and I used about 1/2 - 2/3 of this pastry recipe. It was a great recipe to use up the leftover pastry from the chicken pot pies because I was able to make as many of these as I wanted at the size that I had pastry available for. It wasn't like trying to stretch not enough dough into a pie pan. Plus with my little bit of scraps I was going to throw out at the end I decided to do something with them as well so scroll down to the bottom for that.


The pastry really didn't roll out that well.

But it all tastes the same in the end


Makes 2 Galettes

Ingredients

1/3 Batch of Pastry, divided in 2 
4 C. Blueberries (I used frozen, fresh would work too)
Lemon Curd
5 Tbsp. Sugar
2 Tbsp. Cornstarch
1 Egg
Sugar

Directions

~Preheat oven to 350 F
~Grease a cookie sheet or large baking dish.
~Place 2 rolled out pastry circles onto greased pan (I slid 3 or 4 knives under the edges of the pastry to make it easier to not over-fill it and it helped to just flip the pastry up over the edges when done - see picture above if confused with what I'm trying to say here.)
~Spread lemon curd over the pastry, leaving about an inch around the edge.
~In a bowl combine berries, sugar and cornstarch. Toss to coat evenly.
~Scoop berries on top of lemon curd.
~Flip up edges of pastry over the berries and with your hands press together to seal.
~Bake for 30-35 min. or until pastry is golden.

Enjoy

And this is what you can do with the scraps. Roll it out into a long rectangle, scoop a bit of curd in the centre and fold it up and press the edges together with your hands to seal. Bake with the galette at 350 F but for a little less time (say 25-30 min.), just watch them and when they are golden they are perfect.

Wednesday, 27 February 2013

Pastry


Bear with me while I post this recipe. Like my vanilla ice cream post I just want to have it up here by itself so I can find it easily without having to sift through multiple other steps of more complicated recipes (like the one I'm going to post next). So yes, this post is really just for my benefit (and yours too if you want. I guess I can share).

Recipe from the back of the Tenderflake box.

Makes shells for 3 complete pies with tops and bottoms

Ingredients

5 1/2 C. Flour
2 Tsp. Salt
1 lb Tenderflake Lard
1 Egg
1 Tbsp. Vinegar
Up to 1 C. Water

Directions

~Stir together flour and salt
~Cut in the lard until you get pea sized pieces
~In a measuring cup whisk the egg, add in the vinegar and top up with cold water to a total of 1 C.
~Stir the water mixture into flour mixture, adding a bit at a time and only add enough to make the dough cling together
~Gather dough into balls (6 balls - makes 3 top and bottom pies)
~Dough can be refrigerated if not ready to be used right away (just pull out at least 30 min. before rolling) - don't roll dough until you are ready for it at the end as it won't come off of the counter once it is left for awhile and warms up.
~Roll dough out on a well floured surface.
~Then do with it whatever pastry creation you have in mind.

Tuesday, 26 February 2013

Toll House Cookies


This was my go-to recipe for chocolate chip cookies from the very beginning. I guess you could say it was where my love of baking really began. I'd spent a lot of time leafing through our cookie cookbook searching for the next great thing to make (if only I had known about food blogs then), but I always seemed to find my way back to page 92, nine times out of ten. Even though I haven't made these in probably a year, I did not forget page 92 when I opened up the book this time. I made this recipe for years almost exclusively before I ever knew what a food blog was. Then I kinda got bored of it (too much of a good thing) and started to search elsewhere for a good recipe. Until discovering food blogs I never found one that I liked as much. Since beginning this blog (and getting my KA mixer) I haven't made these cookies. I made other ones and a few recipes I swore hands down were better. More flavour, more chewy, you get the picture. Well I take it all back. Ever since getting our new oven, the two recipes that as of late I would say were the best cookies really haven't been cooking up well. So I decided to go back to my good old faithful Toll House recipe, a recipe I have yet to make in my mixer. Actually I think I tried making this in my first mixer (the one that broke and was way, way, way too small for me), but I don't count that because the mixer didn't get to work it's magic on the ingredients. But my new mixer...I'll say it again, you never know what creaming butter and sugar truly means until you make cookies in a stand mixer. The hand held mixer just doesn't even come close.

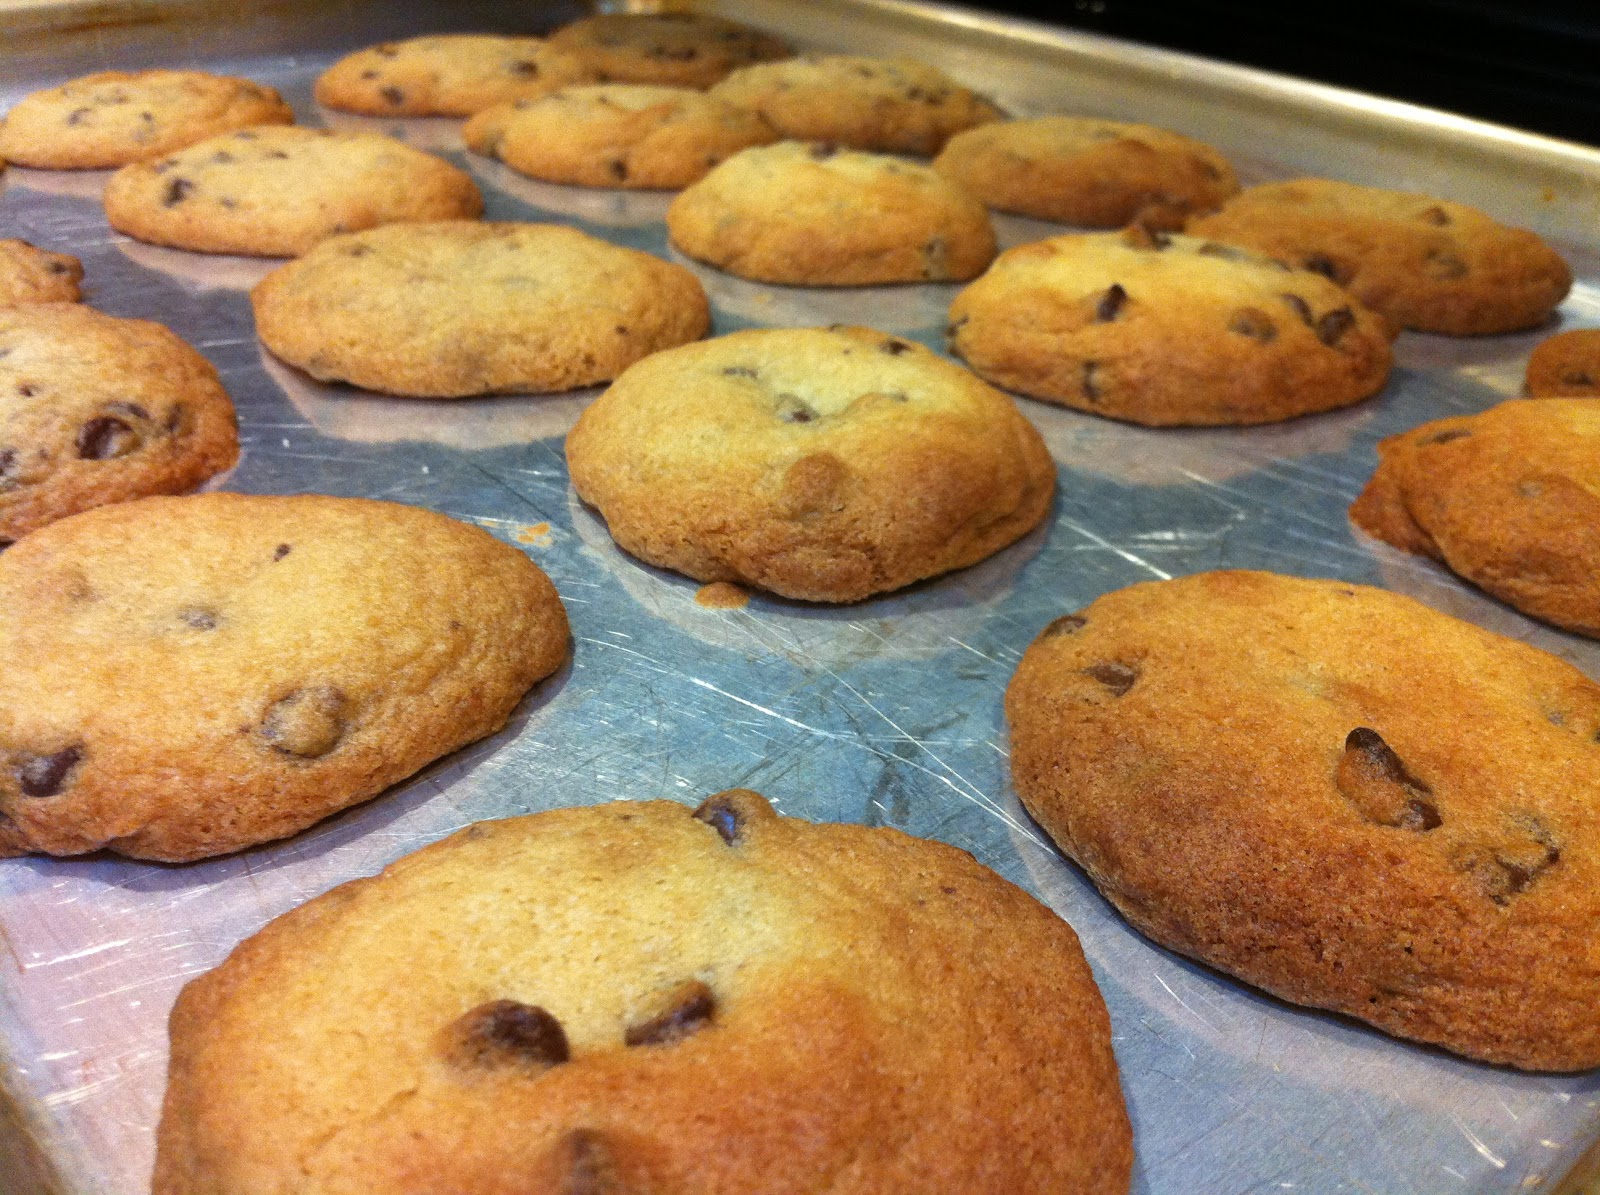
So back to the results of the cookies. They were amazing. I ate some warm and they were the gooiest things I'd ever eaten, they fell apart in my hands. But the dough before baking was amazing. It was silky and light and fluffy (basically whipped is the word to describe it), instead of thick and chunky like my other recipes have been, probably due to their being quite a bit more butter and eggs in this recipe than others (and you bake at 375 vs. 350 so really it is a significant difference from other recipes). So the end result was that these cookies probably tasted close to the same as the recipe I remembered but the texture was so much better. I feel like I've found a whole new cookie recipe. The only think about these cookies was they went pretty flat and almost concave (something I've never really experience with this recipe or other cookie recipes seeing as I usually opt for a chewy and thick cookie recipe), and typically I associate flat cookies with crispy cookies. But as long as you watch your baking time (for my liking, 8 minutes and not a second more was perfect), these cookies are anything but crispy. When the family bit into the first cookie it was asked what recipe it was. When I responded they said they could tell. I guess there's nothing like the original chocolate chip cookie recipe.

One final interesting thing. I was just searching this recipe online (as I got my copy from one of the only recipe books I refer back to time and time again), and found that I really cut back on the chocolate. The recipe in my book is identical to the one on the Nestle website, except mine calls for 1 pkg of Nestle chips and the web version calls for 2 cups. I didn't really know how many cups was in a package so I started by the half cup full and counted up and it looked good at 1 1/2 cups. But I can see why they called for 2. Some of my cookies were amazingly chocolate-filled and others had very little (simply because I had made a double batch and my mixer was pretty close to capacity and wasn't distributing the chocolate quite as well as it should have), so take your pick on the amount of chocolate. 1 1/2 may be enough if you're just making a single batch and you can mix the chocolate in evenly.

Recipe is the Original Nestle Toll House Recipe, from Cookies! A Cookie Lover's Collection.

Makes 4 1/2 dozen medium-large cookies (it's a much larger recipe than other recipes out there).

Can you tell how light and fluffy it is?

Ingredients

1 C. Butter, softened
3/4 C. White Sugar
3/4 C. Brown Sugar
1 Tsp. Vanilla
2 Eggs
2 1/4 C. Flour
1 Tsp. Baking Soda
1 Tsp. Salt
1 1/2 - 2 C. Chocolate Chips
1 C. Chopped Nuts (optional - I've never put these in)

Directions

~Preheat oven to 375
~In a large mixing bowl cream butter, sugars and vanilla. Add in the egg and mix.
~Mix in flour, soda and salt until light and fluffy.
~Stir in chips and nuts if desired.
~Using two spoons, scoop onto cookie sheets (handle as little as possible with your hands, it doesn't matter what the dough looks like on the pan - it doesn't have to be a perfectly shaped ball)
~Bake for 8-9 minutes or until edges are golden and centre still is white and soft.

Enjoy (warm)!


Monday, 25 February 2013

The Non-Balled, Cheese Ball


AKA The Best Tasting, & Easiest Cheeseball Out There!

This thing is amazing. Once you start eating it you just can't stop. Seriously, what's better than garlic and cheese together? Umm, nothing. So, you could theoretically roll this mixture once made into a ball like you would for any normal cheese ball, but we get lazy and just throw it into a bowl and scoop it out with a knife (or by the spoonful if we're too lazy to search for a non-stale box of crackers). I've been thinking lately though that this may be pretty darned good spread on a toasted bagel. After all you put cream cheese on a bagel, and this recipe is just a souped up cream cheese. I was also one night wanting something to put on my baked potato but I didn't feel like making garlic butter or grating some cheese so I just put a scoop of this stuff inside the potato and let it melt and it was again amazing. Garlic and cheese, need I say more? I'm also just being reminded that this was also scooped onto steamed veggies and allowed to melt and was a simple cheese sauce.

There is a lot of fancy cheese ball recipes out there that call for expensive and fancy ingredients. This one calls for some pretty basic ingredients and very little work, and it tastes a million times better than any cheese ball I've ever tasted, and as you can see it's pretty versatile. We typically only make it at Christmas, but this year we bought a two pack of the Imperial Cheese so we had one spare for later.

Recipe (or ingredients list with no directions or quantities) comes from one of the ladies my mom worked with.

Ingredients


1 Pkg. Imperial Cheddar Cheese
Equal Part Soft Cream Cheese
4 Cloves Garlic, minced
1/2 Tbsp. Worcestershire Sauce

Directions

~Combine all ingredients in the bowl of an electric mixer and mix until all ingredients are combined and mixture is fluffy.
~Allow to rest in fridge for at least half an hour (if you can)!

Enjoy