Showing posts with label NO-BAKE. Show all posts

Wednesday, 19 December 2012

Buck Eyes


I know everyone makes these, and everyone has their own special way about going about making them, so ignore this if you are stuck in your ways and consider this a post just for myself as the hard copy of this recipe seems to like to disappear on us and it would be great to have an electronic copy for myself.

The recipe I'm listing is already a doubled recipe. Do not double it again. I repeat, DO NOT! It won't fit in your mixing bowl, even your 5 quart, professional class bowl. I learned the hard way and ended up with 160 Buck Eyes, which took forever to roll and even longer to dip.

This recipe is my Mom's and my Grandma's. I don't know who passed it to who, and were it originated from before that.

Makes 6 1/2 Dozen


See I said I made a lot!

Ingredients

1/2 C. Butter
4 C. Icing Sugar
2 1/2 C. Peanut Butter
1 C. Rice Krispies
1 lb Milk Dipping Chocolate
White Dipping Chocolate

Directions

~In a large mixing bowl, cream butter and then add the sugar and peanut butter and mix until combined.
~Add in the Rice Krispies and process briefly to distribute them
~Roll into balls and place on a waxed paper lined cookie sheet.
~Melt the milk chocolate in a microwave safe dish and dip each peanut butter ball and place back on the waxed paper.
~When chocolate has set, melt the white chocolate and drizzle over top (helps to hide the imperfections in the milk chocolate)

Enjoy


Saturday, 8 December 2012

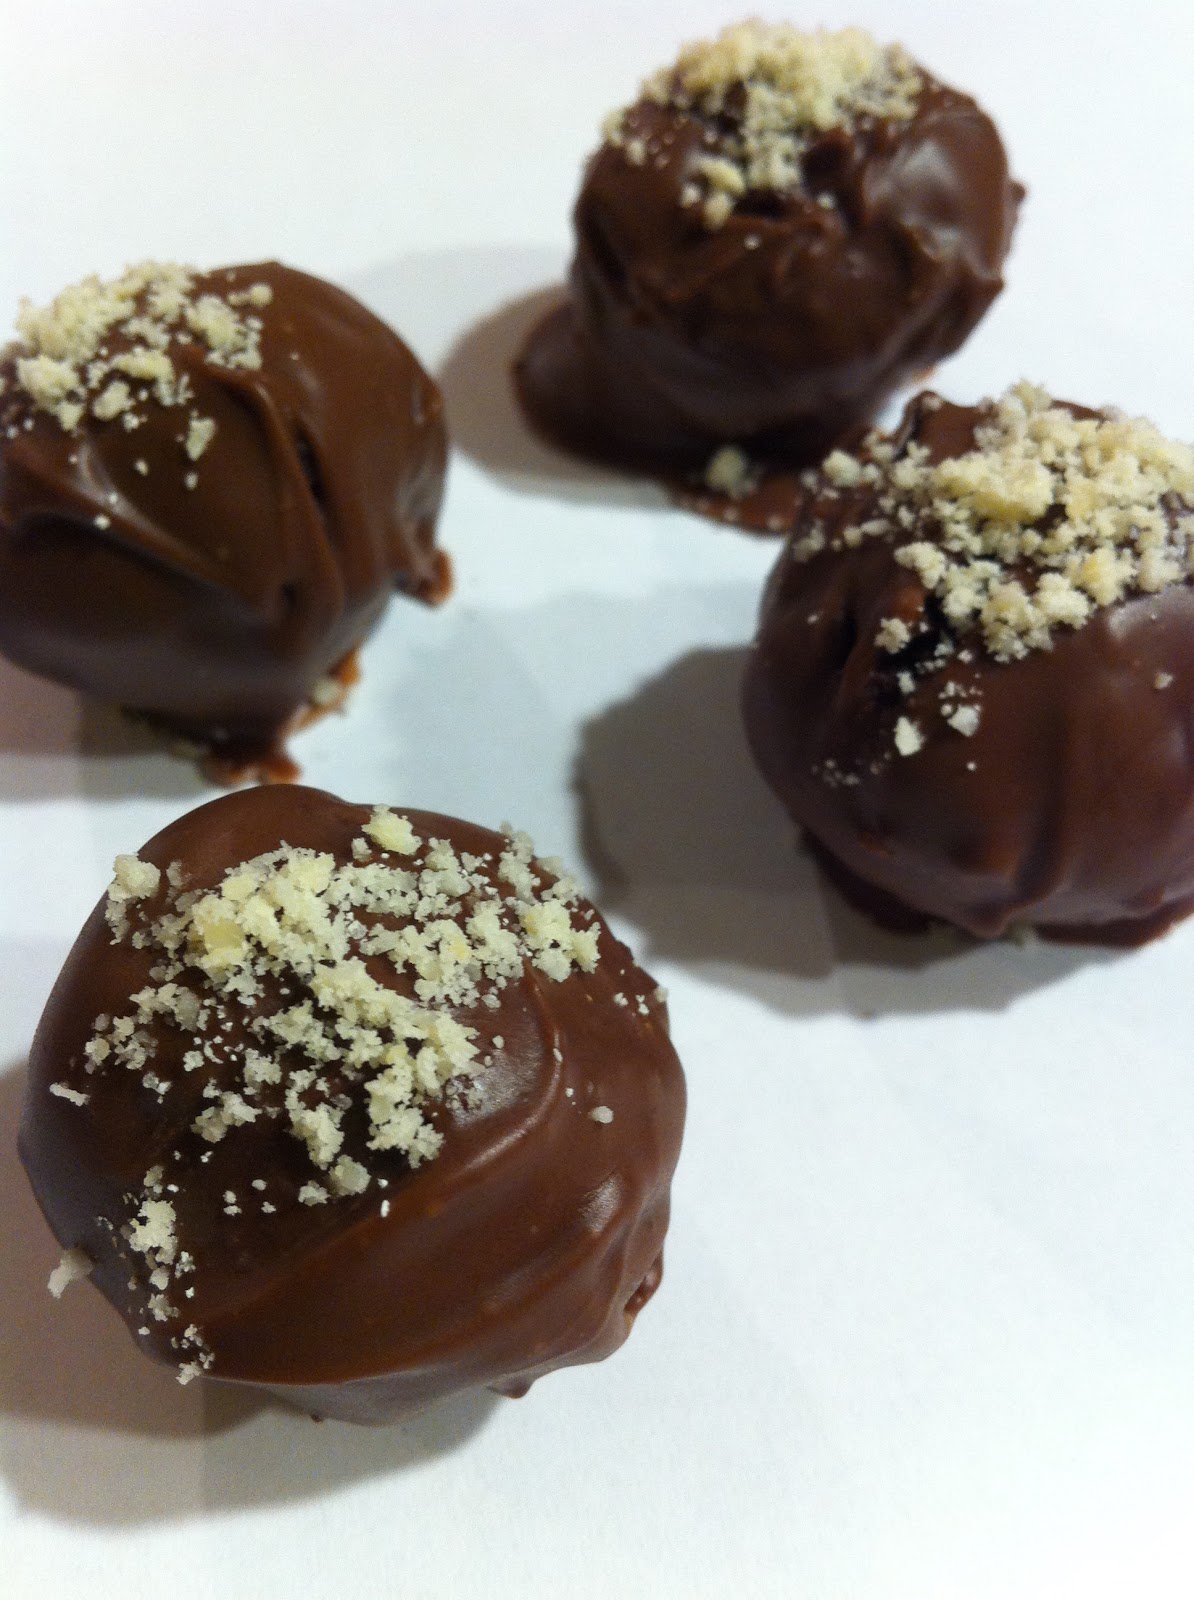
Orange & Almond Brownie Batter Truffles


Every Christmas it seems I crave good truffles. For a long time, I wanted to make a vanilla truffle, but a few attempts later, I think I've given up because I can't for the life of me find a decent recipe. The thing is, every year we make Buck Eyes, and they always look so amazing and professionally done sitting there on the platter. The only problem is I'm not a peanut butter fan, so even though they look amazing, they don't taste amazing to me. So that brings me to the non-peanut butter truffle hunt. Because I want something pretty and professional looking for myself too.

Now, I found this recipe over at Confessions of a Cookbook Queen and put my own little spin on it. It originally called for the truffles to be dipped in almond bark, but as I was not running to the store and only making these because I had a little bit of time to kill and all the other ingredients in my panty, I decided to forgo the almond bark. Instead I just used regular dipping chocolate and added a bit of almond extract into the truffle. Then, that got me thinking. I'd just reached past the orange extract, something I don't normally use often and I love orange truffles so it was an easy 2+2=yummy truffles. Anyway, I just had a dribble left in the bottle, so I used 1 tsp. of the orange extract. Next time if I had a bit more I might increase to 1 1/4 tsp just for good measures. I was going to try that this go, but replace the extra little bit with a bit of orange liqueur, but what do you know, we're all out of that too. Surprise, surprise. Maybe next time a hint of peppermint would bring on the holiday spirit also.

One important thing to remember if you decide to make multiple batches / flavours of these truffles is that once they are dipped you need to put some sort of marking on the outside of them so you know which flavour is which. Get creative, but try to keep things consistent from batch to batch, year to year ie. we always use a white chocolate drizzle on our Buck Eyes.

Some suggestions for the garnish:
~Orange zest (I used this for the orange flavour)
~Chocolate sprinkles
~White chocolate drizzle (I use this for buck eyes)
~A white chocolate dot
~A sprinkle of coconut
~A sprinkle of ground almond powder (I use this for the almond flavour)

One of the greatest things about this recipe is that they were so incredibly easy. No oven, no double-boiler, not stove-top cooking, and all the ingredients will be in your pantry if you ever do even the most basic of baking. Feel free to dabble around in the flavour combinations, or if you just like plain, just use 2 tsp of vanilla as the flavouring.

Makes 2 1/2 Dozen

Almond Truffles
Orange Truffles

Ingredients

Almond Truffles
1/2 C. Cocoa Powder
1 C. Sugar
1/2 C. Flour
2 Tsp. Vanilla
1/4 Tsp. Almond Extract
1/2 C. Butter, melted
Milk Chocolate Dipping Chocolate
Garnish

Orange Truffles
1/2 C. Cocoa Powder
1 C. Sugar
1/2 C. Flour
1 Tsp. Vanilla
1 1/4 Tsp. Orange Extract
1/2 C. Butter, melted
Milk Chocolate Dipping Chocolate
Garnish

Directions

~In a medium bowl, combine the dry ingredients.
~In a microwave safe dish, melt butter. Mix in extracts.
~Pour wet ingredients into dry and mix to combine.
~Roll batter into bite size balls and place on a wax paper lined tray.
~Melt chocolate and dip truffles into chocolate and garnish right away (unless garnishing with the melted white chocolate. You'll have to wait for the milk chocolate layer to set first.)
~Place back on the wax paper lined tray and refrigerate to set.

Enjoy

Thursday, 29 November 2012

Snowballs (No-Bake)


Welcome to Part II of my Xmas baking. These are an absolute favourite of mine either fresh or straight out of the freezer. Either way they are probably my top Christmas treat. As proof of this statement I'm going to let you in on a little secret...I tripled this batch...and this is only one of the many recipes I plan to make for Xmas, and I don't have a lot of people to feed.

This recipe was my Grandma's recipe. It is one of the few recipes of hers that we actually have. Unfortunately, most of them she just kept in her head and never wrote down. I guess it's a good one to have: chocolate, butter and sugar, what more could we ask for? These are very similar to most no-bake cookies / hot rods in their ingredients list, but they taste nothing, I repeat, NOTHING like the typical no-bake cookie. These are amazing and they have a unique flavour all to themselves, that no other no-bake cookie can compare to in my eyes.

Makes 3 1/2 dozen chocolate drops

Ingredients

Bowl #1
3 C. Rolled Oats
1 C. Coconut (flaked)

Bowl #2
1/2 C. Butter
1/2 C. Milk
2 C. Sugar
6 Tbsp. Cocoa
1/2 Tsp. Vanilla

~1 C. Medium or Fine Coconut (additional)

Directions

~Heat the contents of Bowl #2 and stir to combine.
~Add to Bowl #1 and mix.
~Cool for about half an hour and then roll into balls
~In a ziplock bag, toss the additional coconut with the balls (do this as soon as you roll each one, otherwise they will cool too much and the coconut will not stick).
~Allow to finish cooling on a tray before storing.
~Can be stored at room temperature or in the freezer (and can be served at room temperature or frozen).

Enjoy

Wednesday, 28 November 2012

Nanaimo Bars (no-bake)


Ucluelet, Tsawwassen, Esquimalt, Cowichan, Squamish, Sechelt, Qualicum, Haida Gwaii, Zeballos, Sointula, Nootka and Naniamo. Yes, these are actually words, even though my spell check disagrees with me (saying only two of them are spelt correctly). But, they are not just words, they are places. You probably can probably only pronounce one of them though, maybe not even that. But I'm pretty positive though that even if you can't pronounce it (or spell it), you will still recognize it. Yes, I'm talking about Nanaimo, as in the Nanaimo Bar, Nanaimo. While I'm not from Nanaimo I do live not too far from it, and from all the other places I listed as well.

But this post isn't going to be a lesson about small-town BC, no it's about a custurdy, chocolatey, goodness. The recipe that I'm sharing is my Mom's recipe. I have no idea if it's the 'actual' recipe or not. If you go to the City of Naniamo's website, they have a whole page dedicated to one of my favourite treats, but they too don't know the exact origin of it and are asking anyone to come forward that does. This recipe is very close to the recipe that they do have posted on their site. It is the recipe that was decided on by the city as 'the best' Nanaimo Bar recipe. There are several slight variations on this recipe, and then some more extreme ones.

The butterscotch flavour is one of those extreme variations that I am not a fan of. So, that is why I'm making this square now, when I used to be able to get a perfectly good tray of them for relatively cheap at the grocery store.

For most of my life, we never made Nanaimo Bar at home. The local grocery stores made a large tray of it for a good price, and Costco had it on even better. Well, just over 5 years ago, the go-to grocery store closed, and we started buying the bar at other places. For awhile it was good, then I started tasting hints of butterscotch. Well, at first everyone didn't believe me, but eventually people agreed that these other bars weren't as good. But it still wasn't worth making it ourselves because it wasn't all that bad, and the price was still good. Well, we hadn't bought it in awhile and we bought a tray about a month ago. I've never seen Nanaimo Bar hang around for long in our house and usually I devour it myself. I had half a piece and thought I had just wasted my nighty dessert allowance on something that was absolutely flavourless. It was awful, so I decided that this was too simple of a thing to make to warrant buying it's now disgusting store bought variety (unfortunately, I think this is one of the last good home made tasting things that has gone the way of over processed crap (excuse my french). Now it's just another package of Chips Ahoy or Peak Freans or Deep and Delicious Cakes in the grocery aisles.

I'm going to share the single batch version of this recipe, which is to be made in a 7"x11" pan (who has one of those right?). Anyway, I doubled it and thought I could just get away with having a thick batch in a 9"x13" pan, but as I'm realizing now, I usually double an 8"x8" to get a thick 9"x13", that explains why I had way, way too much. Sorry, just typing with my train of thought there. So, what I ended up with was 1 - 9"x9" (square silicone dish) & 1 - 8"x8" tray that were the perfect thickness, as a doubled batch. Or just go with the single and have a thick 8"x8" or scrounge up the mysterious 7"x11" pan. Whew, enough with the numbers now. So, I present to you the first Xmas baking of the season, duh duh duuuhhhh!!!!

Makes: 25 squares


Ingredients

Base Layer
1/2 C. Butter
1/4 C. Sugar
5 Tbsp. Cocoa
1 Egg, beaten
1 Tsp. Vanilla
2 C. Graham Wafer Crumbs
1 C. Coconut ( I used flaked, if you don't want the base as chunky, use medium)
1/2 C. Nuts (I used 2 Tbsp. Ground Almond Powder instead)

Middle Layer
1/4 C. Butter
3 Tbsp. Milk
2 C. Sifted Icing Sugar
2 Tbsp. Custard Powder
2 Tsp. Vanilla

Top Layer
1 C. Chocolate
4 Tsp. Butter

Directions

Base Layer
~Melt the first 3 ingredients in a large saucepan.
~Add egg and vanilla and whisk to help prevent the eggs from forming chunks as you heat the eggs.
~Add in the last 3 items
~Spread in a greased 7"x11" pan, pack it down firmly and put in the fridge to set, while you prepare the next layer

Middle Layer
~Combine all the ingredients in mixer bowl and beat (with paddle attachment on speed 2), until combined and fluffy (I tried to do this by hand and it felt like I was trying to mix cement by hand, so use the mixer please).
~Spread over Base Layer and place in freezer until solid (otherwise the top layer will just mix into the middle layer)

Top Layer
~In a microwave safe dish, melt chocolate and butter together.
~Spoon mixture over the Middle Layer and working quickly as the frozen layers will cause the chocolate to harden, smooth the chocolate.
~With a knife, run tracks through the chocolate where you'll want to cut the squares. This prevents the top layer from cracking when you cut it (or at least helps prevent it)
~When chocolate has hardened, cut into squares.

Enjoy

Saturday, 20 October 2012

Butterscotch Marshmallow Square (No-Bake)

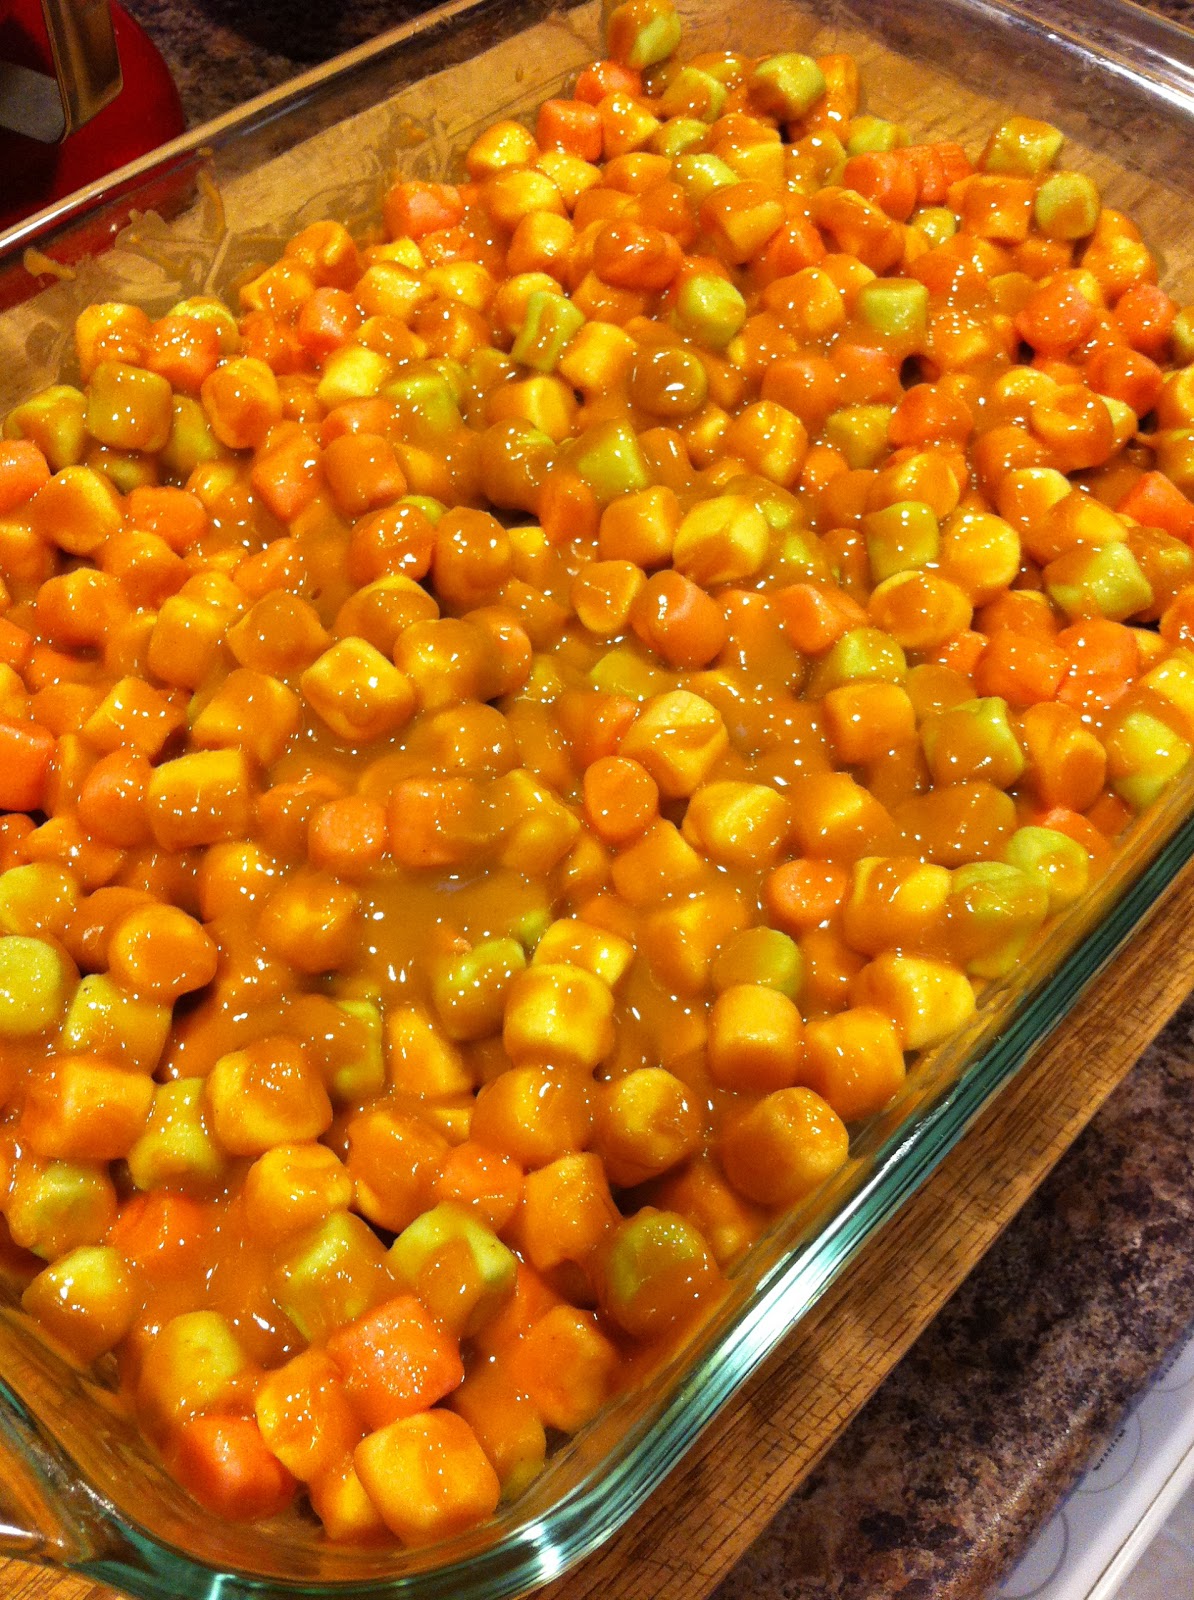
Imagine this as a multicoloured square, not just orange as the picture depicts.

This is that square that I'm sure everyone has seen at some potluck function in the past. The one with all the coloured marshmallows impeded in a strange orangey-brown goop. Or maybe you saw one that was white marshmallows in chocolate (hello rocky road?). Well, this is my Grandma's go-to treat. She doesn't like to bake much, but she does this well and everyone enjoys it (how could you not, it's sugar, sugar and more sugar? Plus it has awesome bright colours.)

Ingredients

1/2 C. Butter
3/4 C. Peanut Butter
1 Pkg. Butterscotch (or Milk Chocolate Chips)
1 Pkg. Coloured Marshmallows (or white if making the chocolate version)
1 C. Rice Krispies

Directions

~Combine margarine and peanut butter in a large microwave safe dish and microwave on high until the butter melts.
~Stir and when smooth, add in the chips and microwave again until chips are soft enough to melt away by stirring.
~When mixture has cooled slightly, stir in the marshmallows and rice krispies until evenly coated.
~Spread into a greased 9x13 dish.
~Place in fridge to set.
~Cut into squares

Enjoy

Thursday, 6 September 2012

Chocolate-PB-Oatmeal (No-Bake) Cookies


Unfortunately, I'm still ovenless. Meaning that I'm also cookieless. I've now officially cleared out the freezer of every extra cookie I had hidden away. So I went on a hunt-a rather difficult hunt actually-to find a no-bake cookie recipe. What I came up with was this one. It seems that basically all the no-bake cookies are only a slight variation from this one. Some use less peanut butter or more or less oatmeal, or a different amount of vanilla, but for the most part they are the same.

I was impressed with these cookies as far as no-bake go, but if I make them again I think I'll substitute in nutella instead of peanut butter. Because even though I can tolerate a bit of peanut butter in desserts, I found it a bit overwhelming of a flavour in these cookies.

I was pleasantly surprised that even though these cookies had a fair amount of oatmeal in them, they were more than just dry, oatmeal filled cookies. I probably won't go out of my way to make these again once my oven is fixed (the PB version...I might make a nutella version), but they definitely satisfied the craving currently.

On another very positive note, I'm now for the most part done with all my plums. So it's back to chocolate time we go.

This recipe is from the Food Network.

Makes: 4 dozen cookies

Ingredients

2 C. Sugar
4 Tbsp. Cocoa
1/2 C. Butter
1/2 C. Milk (I used vanilla low fat soy milk)
1 C. Peanut Butter
1 Tbsp. Vanilla
3 C. Oatmeal

Directions

~In a saucepan, melt the butter, then add the sugar, cocoa and milk. Stirring constantly as you bring it to a boil and boil for 1 minute.
~Add the peanut butter and vanilla, and stir to melt.
~Mix in the oatmeal and reduce the heat. Cook oatmeal until it begins to soften.
~Drop mixture by the spoonful onto a wax paper lined (or greased) cookie sheet.
~Place sheets into fridge to cool and set.
~Remove cookies from cookie sheets when set and store in an airtight container in the fridge.

Enjoy


Friday, 10 August 2012

Peanut Butter Oat Fudge Bars (No Bake)


So as I believe I've already mention, I don't currently have an oven. You think that's bad enough, but I also have a horrible suspicious that I don't actually have a working hot water tank either. As my last 3 showers have ended up being ice cold. Yeah, that may not sound out of the ordinary for some people, but trust me, I've lived here for over ten years and this is the first time I've ever had a cold shower in this house. Not good I tell you.

But back to the no oven issue, because you guys really don't care if I shower right? The one benefit of the internet. So I got all excited that I had an opportunity to make dessert for this weekend for people other than my direct family / coworkers. Then the awful realization hits, that not many good things can be made without an oven. Or so I thought, I have to take that back now, because I've found this recipe. It is utter, pure bliss. Trust me. Too good, and too easy not to try. And you don't even have to turn the oven on, just the stove top (you probably could get away with just using the microwave if you really are anti-heat right now). I'm not anti-heat ever. I just spent the past weekend in what was practically a dessert and loved it, only to have to return home to 15 degree cooler weather and hearing everyone complain about how 'hot' it is at 21 Celsius. Some people just need to go live at the top of Everest, because they obviously missed out when they were being taught geography, because we live in one of the coolest and wettest places around. Hmm, except when it starts raining they complain that the sun doesn't shine. Ever!

...End rant.

Return to food talk...

This recipe is doubled from what the original called for. If you want to half what I have posted here, prepare it in a 9x9 pan.

This recipe is from allrecipes.com.

Ingredients

2 C. Butter
1 C. Brown Sugar
4 Tsp. Vanilla
6 C. Quick Cooking Oats
2 C. Semi-Sweet Chocolate Chips
1 C. Peanut Butter
1/4 C. of your favourite chocolate (I used milk chocolate bar), melted

Directions

~Grease a 9x13 baking dish (or a 12x12 as I did)
~In a large saucepan, melt butter over medium heat. Stir in sugar and vanilla until dissolved.
~Add in the oats. Stir continuously while they cook for 2 to 3 minutes, or until slightly softened.
~Divide mixture into 2 parts. Press half into the bottom of the prepared pan, reserving the other half for later.
~In a microwave safe dish, melt chocolate chips and peanut butter and stir well to combine.
~Spread mixture over top of crust and smooth with a knife.
~Place in fridge for 30 minutes or until chocolate has begun to set.
~Spread the reserved half of the oat mixture evenly onto the chocolate layer. Press gently to adhere it to the layer below.
~Melt remaining chocolate in the microwave on high heat and drizzle over top of the bar.
~Return to fridge for 2-3 hours to set completely.
~Cut into bars.

Enjoy (either straight from the fridge or at room temperature).