Showing posts with label DINNER. Show all posts

Monday, 25 May 2015

Instant Noodle Cups


This is one of the greatest finds of a long time. A friend made them for a group of us and I was hooked. I've been eating these lately like they're going out of style. If you're making them and eating them right away, a jar isn't necessary, just throw everything in a large enough bowl. But if you want to use this recipe for it's greatness (it's take-and-go ability), get yourself a case of 500mL mason jars and make a whole batch. The recipe calls for optional tom yum paste, but as of this point I can't find it anywhere, even though my friend swears she found it at one of the stores, but they don't carry it now. I'll keep looking because it does make a difference if you can find it, but is still good without.

Recipe from The Londoner, and is for one serving in one, 500mL jar.

Ingredients

1 Sheet of Rice Noodles
Assorted Vegetables (I like broccoli florets, small cubes of carrot, green onion and bok choi)
Cooked Meat (chicken, pork, beef, seafood), cut in small pieces

1 Tbsp. Soy Sauce
1 Tsp. Hot Sauce
1 Tsp. Coriander
1 Tsp. Bouillon Powder
1 Tsp. Miso Paste (soybean paste)

Directions

~Bend sheet of rice noodles and slide into jar
~Fill remaining spaces with vegetables and meat
~In a small dish combine soy sauce, hot sauce, coriander, bouillon and miso paste, and mix until smooth
~Add sauce into jar
~Put lid on jar and store in fridge until ready to eat.
~Fill jar with boiling water to the top, screw lid on (careful lid gets hot) and invert jar a couple of time to dissolve sauce.
~Allow to sit for a couple of minutes, then

Enjoy!


Tuesday, 27 January 2015

Hash

This is the meal I was talking about that allowed me to get to eat Hollandaise Sauce at a restaurant, and so I had to make it at home. It's great for leftover meat and potatoes, just fry up some veggies and add potatoes and shred the leftover meat. Ham, chicken, pulled pork, you name it, it works. I haven't listed quantities of ingredients because it really depends on how much leftovers you have. I just eyeball it and go from there, but I usually end up making it in a stock pot because my normal large pot isn't big enough. We eat this for dinner, but the restaurant served it for breakfast.

Ingredients

Oil
Onion, diced
Bell Peppers, diced
Mushrooms, diced
Hot Sauce
Worcestershire Sauce
Potatoes, cooked and cubed
Meat, cut into bite sizes pieces or shredded
Salt
Pepper
Steak Spice

Directions

~In large frying pan or pot, heat oil and add onions, season with hot sauce & Worcestershire Sauce and cook until translucent
~Add in mushrooms and bell peppers and continue to saute
~Add in potatoes and meat.
~Stir gently and allow to heat through.
~Season with salt, pepper, steak spice and addition hot sauce or Worcestershire to taste.
~Serve with Hollandaise Sauce to top

Enjoy

Friday, 18 July 2014

Butter Chicken


Recipe from Damn Delicious, & my very modified garam masala is from All Recipes.

Ingredients: Garam Masala

1 Tbsp. Cumin
1 Tbsp. Black Pepper
1 Tsp. Fennel
1 Tsp. Mustard Powder
1/2 Tsp. Cloves
1 Tsp. Chili Peppers
1 Tsp. Cinnamon
1/2 Tsp. Nutmeg

Ingredients

2 Tbsp. Coconut Oil
8 Cloves Garlic, minced
2 Onions, diced
2 Cans (14 oz each) Coconut Milk
2 Cans (6 oz each) Tomato Paste
1/4 C. Flour
7 Tsp. Garam Masala
4 Tsp. Curry Powder
1 1/2 Tsp. Chili Powder
1/2 Tsp. Ginger Powder
Salt
Pepper
6 Pounds Chicken, cubed

Basmati Rice

Directions

~Cook rice according to package instructions
~Saute onion and garlic in oil until translucent.
~Stir in coconut milk, tomato paste, flour & spices.
~Stir until there are no lumps and sauce starts to thicken.
~Simmer sauce.
~Cook chicken in a separate frying pan.
~Once chicken is cooked, add into sauce and stir to coat.
~Serve chicken and sauce over rice.

Enjoy!


Tuesday, 15 April 2014

Chow Mein

This recipe is amazing. Not much more to say than that. Other than this disappears at alarmingly fast rates and it honestly tastes better as leftovers the next day once all of the flavours have blended. It's even good cold, or hot, or anything in between.

Even though I've made this multiple times, I can't say I have a picture of it. Maybe the next time.

While I've used for the most part the same ingredients as the original recipe, the steps to make it I've really changed around to fit how I typically make stir fry's. So this recipe is adapted from Canadian Living.

Ingredients

1 - 400g pkg Chow Mein Noodles
1/4 C. Oyster Sauce
2 Tbsp. Soy Sauce
1 Tbsp. Sesame Oil
1 Tbsp. Oil
1 Onion, thin strips
3 Cloves Garlic, minced
2 Tsp. Ginger, minced
1/2 C. Chicken Stock
Optional
*Vegetables (snow peas, peppers, broccoli)
*Meat (chicken, pork, beef)
*Bean Sprouts

Directions

~Cook noodles according to package instructions, drain & set aside.
~In a bowl, combine oyster sauce, soy sauce & sesame oil. Set Aside.
~Heat oil in a large skillet and saute onion until transparent. Add garlic & ginger and cook for 1-2 minutes.
~Add noodles, chicken broth and sauces to pan and stir until heated through.

Optional
~Before adding noodles to onions, add in and stir fry your choice of vegetables, then add noodles.
~If adding in any meat, stir fry in a separate skillet and once cooked, add into onion mixture with the noodles and sauces.
~Sprinkle finished product with bean sprouts

Enjoy!

Monday, 22 July 2013

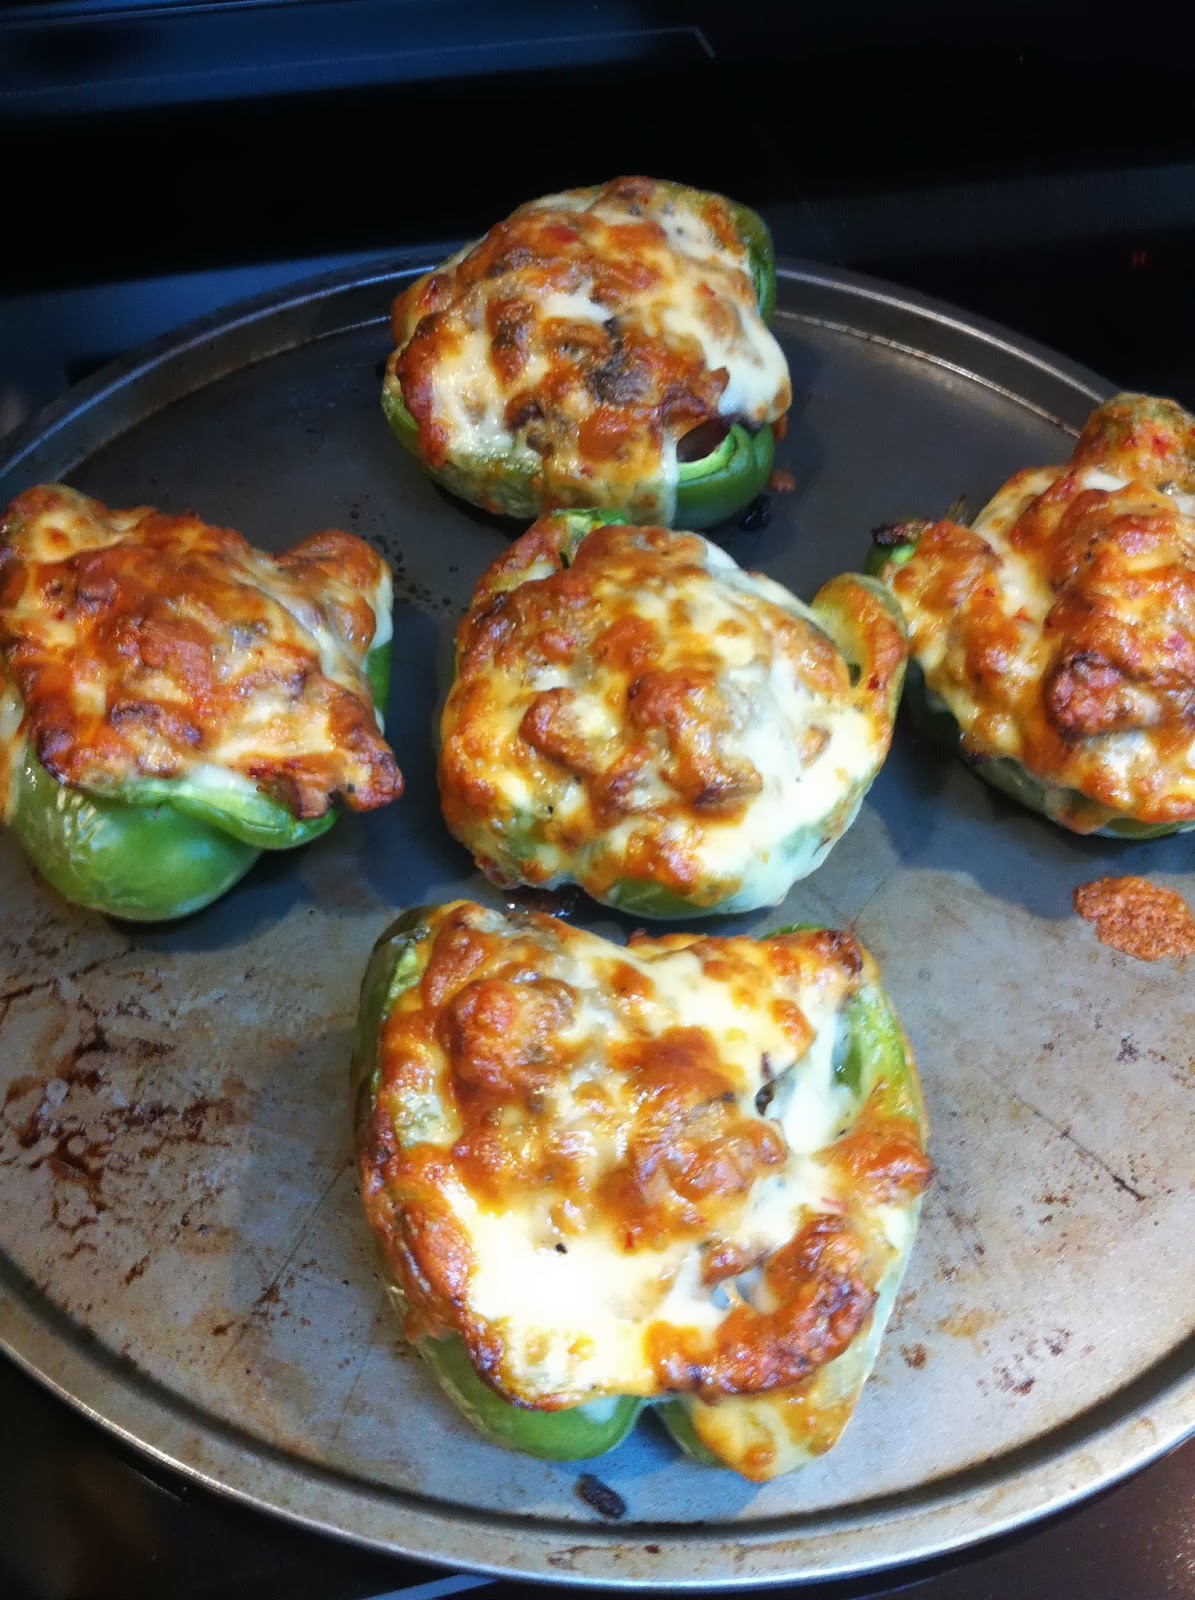
Philly Cheese Steak Stuffed Peppers


These were a success. Like a really, really big success. Usually only some of the more unique things I make, pass the 'would I make this again test?'. This one passed with flying colours and everyone seemed kind of shocked that this slightly bizarre concept could taste so amazing.

Recipe from Quick & Easy Recipes.

Ingredients

8 oz. thinly sliced roast beef (or leftover steak)
8 Slices Provolone Cheese (I used a spicy Monterey Jack and it was amazing, don't use havarti it just melts away to nothing)
2 Green Bell Peppers
1 Onion, diced
1 C. Mushrooms, sliced
2 Tbsp. Butter
2-3 Cloves Garlic, minced
Salt 
Pepper

Directions

~Preheat oven to 400 F
~Slice peppers in half lengthwise and remove the seeds and stem.
~Place a slice of cheese in side each half of the pepper
~Combine onion, mushrooms, butter, salt & pepper in a heated skillet and saute until softened.
~Add in beef slices and stir long enough to heat.
~Add garlic and cook, stirring constantly.
~Scoop mixture into each pepper.
~Top with another slice of cheese.
~Bake for 15-20 minutes, or until the cheese on top is bubbly and golden.

Enjoy

Sunday, 24 February 2013

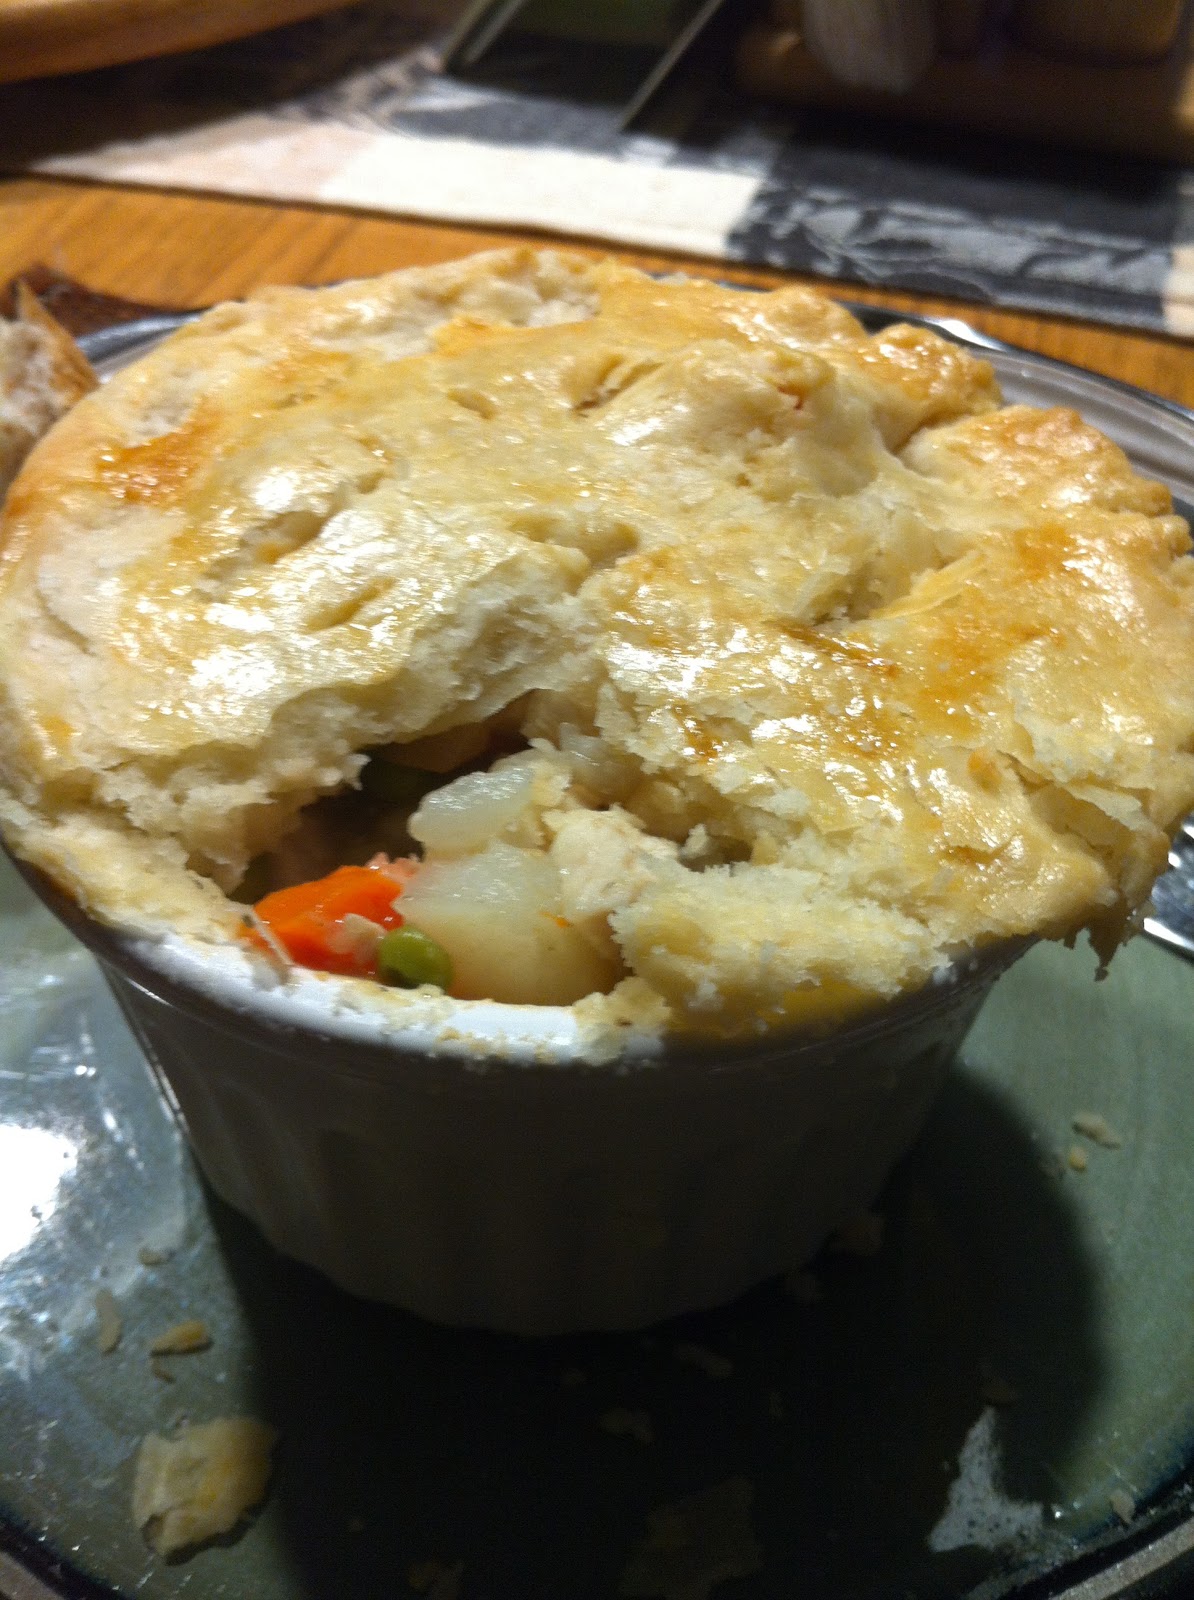
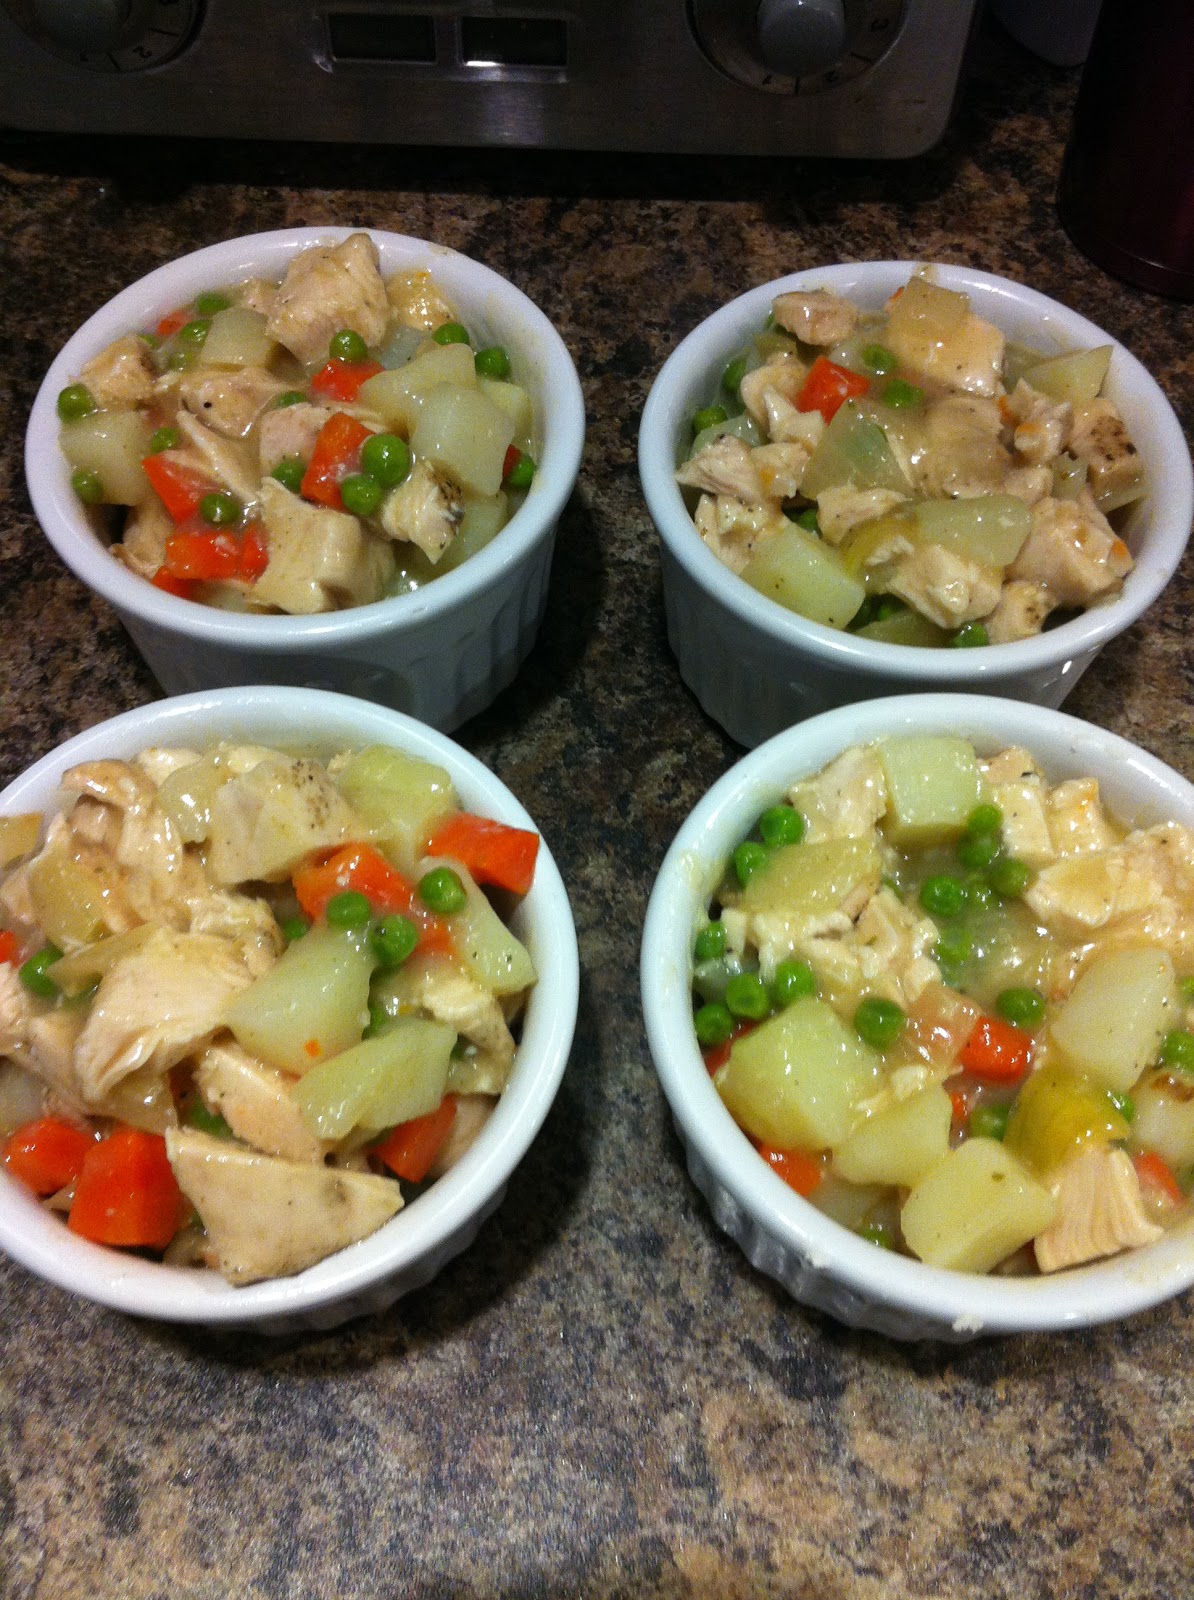
Chicken Pot Pies (Dairy Free)


These were quite a bit of work because we had nothing prepared ahead of time and we made the pastry from scratch. You could buy some pre made pastry sheets or use some leftover chicken and veggies from the previous nights dinner to take out a few of these steps. But, the homemade pastry was so worth it. It may not have been pretty (I've only ever made pastry one other time and that was years ago) but it was so incredibly flakey and delicious. I've not ever been a pie lover, it's something I'll eat but it's typically not the first (or second) thing I'd pick for dessert, but I now know why. When the pastry tastes like this, pie is so worth eating.

Pastry recipe is the one off the Tenderflake box.

Makes 5 individual ramekins and 1 regular sized pie

Ingredients

1/2 Recipe of Pastry
             5 1/2 C. Flour
             2 Tsp. Salt
             1 lb Tenderflake Lard
             1 Egg
             1 Tbsp. Vinegar
             Up to 1 C. Water

6 Chicken Breasts
Salt
Pepper
1/2 Tsp Poultry Seasoning

3 Carrots, peeled and diced
4 Medium Potatoes, peeled and diced
1 1/2 C. Frozen Peas

1 Tbsp. Butter
1 Large Onion, diced
4 Cloves Garlic, minced
5 C. Chicken Broth
5 Tbsp. Flour
1 Tsp. Salt
Pepper
1 Tsp. Poultry Seasoning

1 Egg

Directions

~Make pastry
        ~Stir together flour and salt
        ~Cut in the lard until you get pea sized pieces
        ~In a measuring cup whisk the egg, add in the vinegar and top up with cold water to a total of 1 C.
        ~Stir the water mixture into flour mixture, adding a bit at a time and only add enough to make the dough cling together
        ~Gather dough into balls.
        ~Dough can be refrigerated if not ready to be used right away (just pull out at least 30 min. before rolling) - don't roll dough until you are ready for it at the end as it won't come off of the counter once it is left for awhile and warms up
        ~You'll only need about half of this recipe, so reserve the rest in the fridge or freezer for later projects.


~Season chicken breasts with salt, pepper and seasoning and bake in oven until almost cooked entirely. 
~Allow chicken to cool slightly and cut into cubes.
~Cut carrots & potatoes. Place carrots and peas in one pot and potatoes in another and cook until tender. Drain.
~In a large saucepan melt the butter and saute the onions until golden on medium-high. Near the end, add in the garlic and cook.
~Add in 4 cups of the chicken broth, reserving the remaining 1 cup, stir and lower temperature to medium.
~Pour the 1 cup of broth into a mug and whisk in the flour 1 tbsp at a time until all lumps are gone. Add into the saucepan, whisking constantly.
~Season with poultry seasoning and continue to whisk until mixture thickens. Remove from heat.
~Preheat oven to 425 F
~Grease the dishes.
~In a large bowl combine chicken cubes, carrots, peas & potatoes. Pour in the sauce and mix to distribute.
~Scoop mixture into dishes.
~Coat top lip of dish with a bit of egg wash.
~Roll out pastry on a floured surface and lay over top of each mixture filled dish. Trim edges and press to seal around edges.
~Brush top of pasty with egg.
~Bake for 40-45 minutes or until pastry is golden.

Enjoy


Monday, 18 February 2013

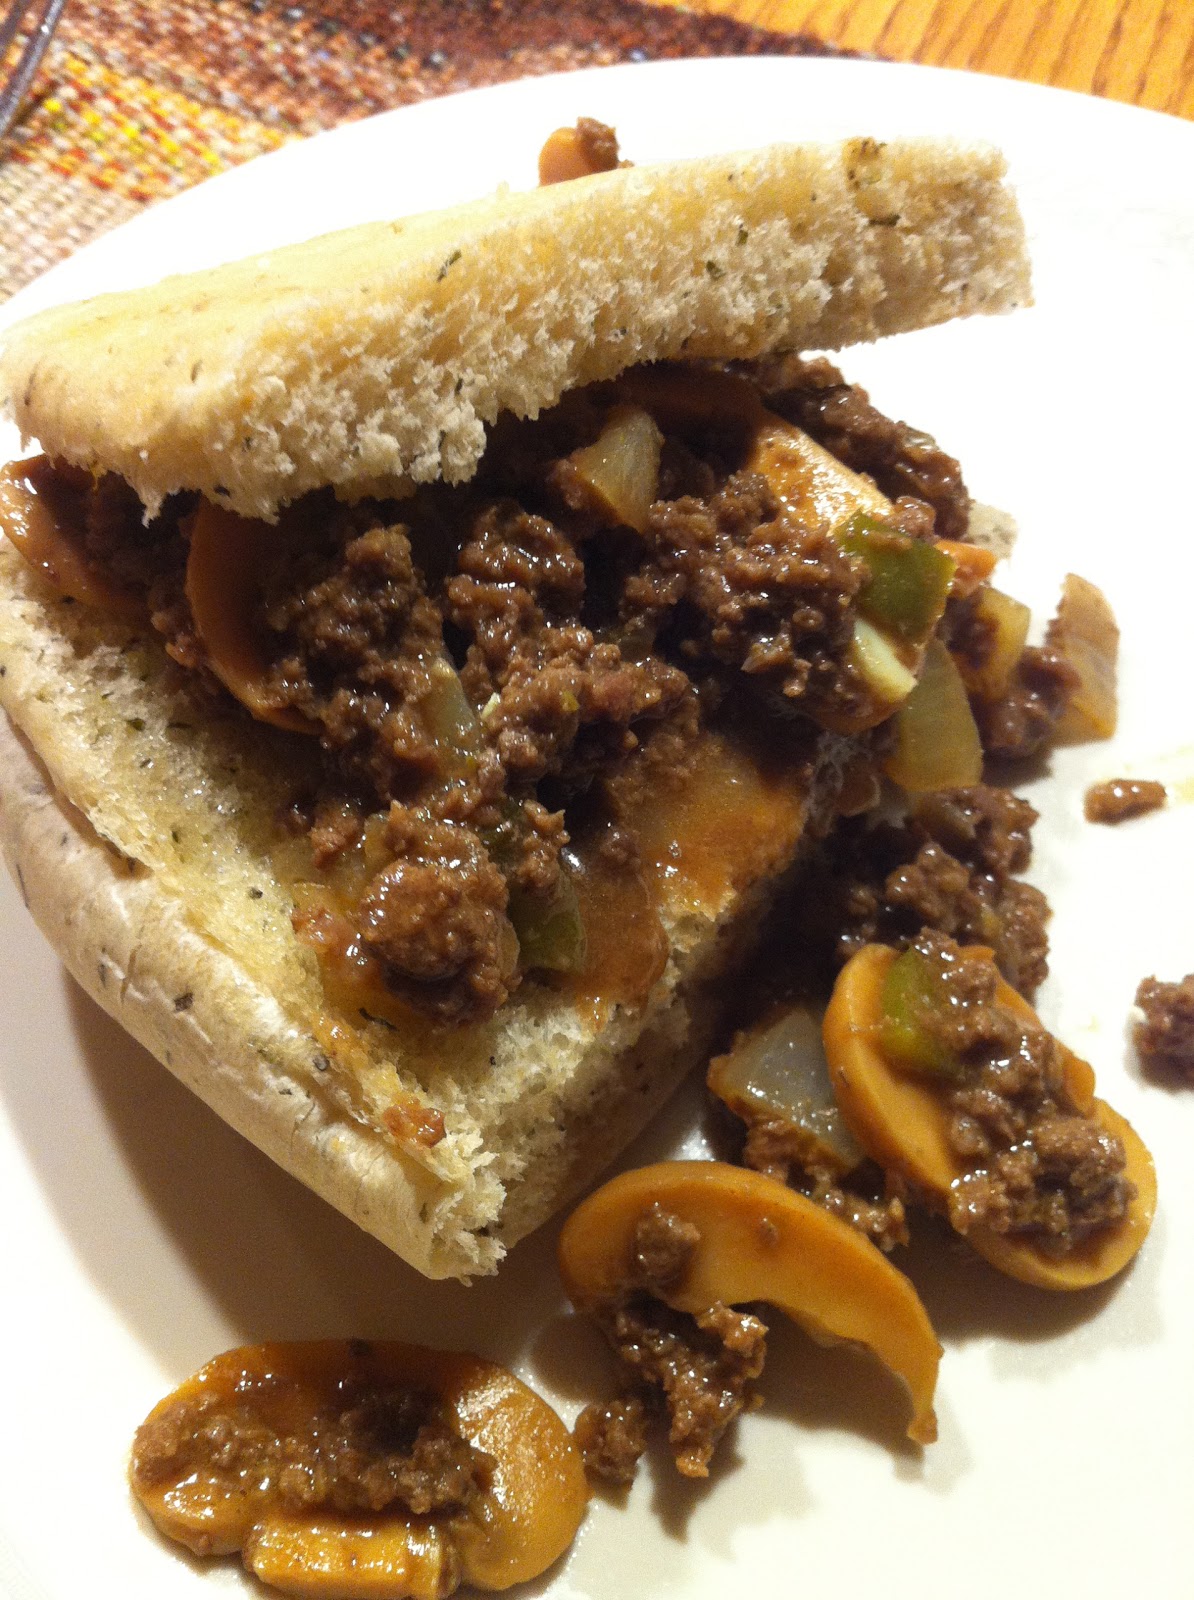
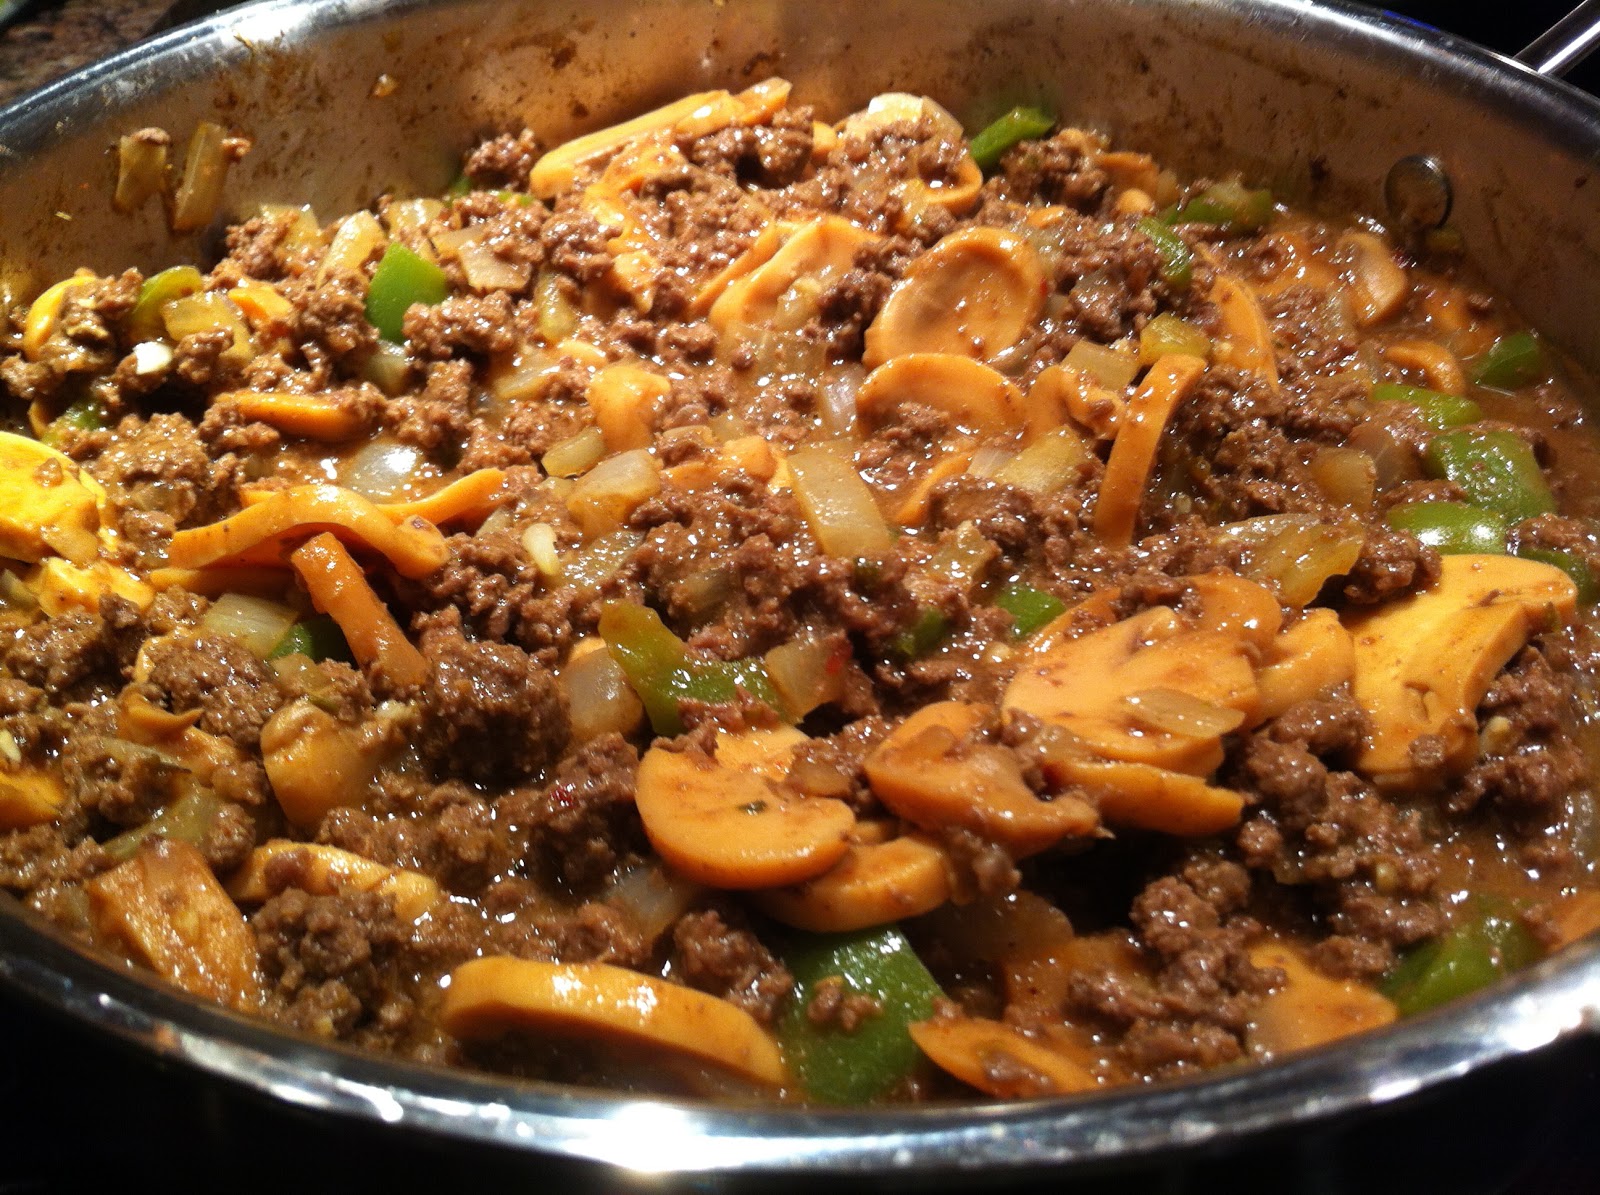
Cheeseburger Sloppy Joe (Tomato-Free)


Forgive me for what I'm about to do. I'm going to share a Sloppy Joe Recipe that is a little bit different. It has no ketchup and no tomato paste. Gasp! You'll survive, and you'll like it trust me. After looking at a few different recipes I came to the conclusion that the ketchup in the recipes was used as an ingredient to make a sort of BBQ Sauce, as it is mixed with spices and mustard, etc. And the tomato paste appeared to be a thickener. So, I cut straight to the chase and just added BBQ Sauce, and thickened it with flour and it worked beautifully.

The reason for calling it Cheeseburger Sloppy Joe (even though we didn't actually put any cheese on it at all - but you could and I'm sure it would be amazing) is because as it was simmering it smelled just like the smells I associate with hamburgers. Red meat, BBQ sauce, onions, mustard & spices. I think it was mainly the BBQ sauce & mustard combo that did it though. But, when you tasted it, it actually tasted nothing like it smelled which for me was a good thing because we just had had hamburgers the night before and I wanted something different and it was. I'm sure we'll be making this again which excites me because up until this point I have never eaten a sloppy joe.

Recipe adapted from Kayotic Kitchen.

Serves 6-8

Ingredients

2 lb ground meat

Salt
Pepper
1 Large Onion, diced
1 Green Pepper, diced
3 Cloves Garlic, minced
1 Can Sliced Mushrooms, drained
1/4 C. Yellow Mustard
1/3 C. BBQ Sauce
1 Tbsp. Brown Sugar
Dash or Two Tabasco
1 1/2 Tsp. Worcestershire Sauce
1 Tsp. Oregano
1/2 Tsp. Cumin
1/2 Tsp. Paprika
1/4 Tsp. Chili Powder
1 C. Water
1-2 Tbsp. Flour
Buns
Butter

Directions

~In a large skillet season meat with salt and pepper to taste and brown
~Add in the onions & peppers and cook until veggies have softened and meat is cooked
~Add in the garlic and stir just until cooked.
~Add in the mushrooms. Stir
~Reduce heat to a simmer and add in mustard, BBQ sauce, sugar, tabasco, worcestershire and spices. Stir to mix.
~Add about half of the water. Stir. If sauce is looking watered down, whisk flour into remaining water and add mixture to skillet. Stir. (Really just play it by ear. The moisture content is really going to depend on your cut / type of meat so if it's too runny add less water / more flour, and if it's not saucy enough add some more mustard / BBQ sauce / water. Find your happy medium.)
~Simmer for 15-20 minutes.
~Butter the buns and warm them in the oven until butter has melted (don't let the buns go crispy, just want them warmed)
~Scoop meat mixture onto buns

Enjoy!


Friday, 15 February 2013

BBQ Chicken Pizza Wrap

You're probably thinking, not another wrap recipe! Just like you probably say the same thing when I post another muffin recipe. But bear with me, this was very, very good.

I regret to inform you that there is no picture for this post. The only explanation for this sad fact is that I'd worked all day, gone to the gym and then shopping and I was ready for dinner. And by ready, I mean I inhaled 3/4 of this and then my brain caught up and I thought, man that was really good, oh no I didn't take a photo of it. My exact train of thought. So here it is, I'm sharing it, because it was kinda a use up the leftovers sort of thing and so I don't know if or when we'll have the stuff to make it again. Meaning, I might forget to post it in the future, or even make it again if it's not in writing. So, I'm posting it now and hopefully it will remind me to make it again and take a picture. But seriously, I don't know how much of a loss it will be. Just go look back at any other post on here about wraps and this one will look basically identical. Except, it doesn't taste identical. It is so amazingly awesome in it's own unique way. I think it's the BBQ sauce. It sweetened it, whereas I usually try to add a bit of spice to my wraps.

After I finished eating it I realized that all the ingredients that I had thrown into this out of the fridge were actually the ingredients on our favourite type of pizza. So there you go. It made this wrap taste like a better dinner than some of my other wrap recipes that are more lunch tasting.

Makes 1

Ingredients

1 Soft Tortilla
1 Tbsp. BBQ Sauce
1/2 Chicken Breast, cooked & sliced
1/4 C. Pineapple, diced
Red Onion, sliced (to taste)
1/4 C Cheese, shredded
1/4 C. Peppers, diced

Directions

~Lay out all ingredients down the centre of the wrap.
~Roll up.
~Grill in panini press or grill until crispy on the outside. (If no grill available, you could microwave all innards before placing in wrap, to get a warm wrap with melty cheese).

Enjoy
 

Wednesday, 13 February 2013

Cheesy Italian Quinoa Bake

I've been looking forward to making this for a few weeks now and was happy to finally get around to it. I did kinda change it up a bit, and decided that the recipe I had, had some of the basics for an Italian Style Dish, so I went with it and this was what I ended up with. It has an incredible smell to it, but I didn't find that the flavour quite measured up to that smell. Everyone else who ate it said it was better than the Quinoa Mac & Cheese I made a week or so ago, but I had to disagree. All a matter of opinion though I guess. I was also told to stop with the quinoa for awhile, so oh well. 

Recipe adapted from Dinner, Dishes & Desserts who got it from The Healthy Apple.

Serves 8-10 people

Ingredients

1 1/2 C. Quinoa, uncooked
1 1/2 C. Water
1 1/2 C. Broth
3 Eggs
2 Tsp. Basil
1/4 Tsp. Sage
1 Tsp. Oregano
Salt
Pepper
6 Cloves Garlic, minced
1 1/2 C. Onion, diced
1 C. Tomatoes, diced
1 C. Mushrooms, diced
1 1/2 C. Mozzarella Cheese (I only had Aged Cheddar on hand), grated
2/3 C. Parmesan, divided
Marinara Sauce

Directions

~Rinse quinoa and cook in the water and broth in a saucepan until all the moisture has been absorbed. Allow to cool until it is just warm.
~Preheat oven to 375 F
~Meanwhile, whisk eggs in a large bowl.
~Season eggs with basil, sage, oregano, salt & pepper to taste, & garlic.
~When quinoa has cooled enough, mix into the egg mixture.
~Add onion, tomatoes, mushrooms, cheese and 1/3 C. Parmesan. Mix to combine.
~Transfer mixture into a greased 9"x13" baking dish. Sprinkle top with remaining 1/3 C. Parmesan
~Bake for 20-25 minutes or until top is golden and crispy.
~Serve by itself or topped with marinara sauce.

Enjoy


Monday, 4 February 2013

Quinoa Mac & Cheese


This was good and will definitely be added to my make-again list. Even the one that hates anything to do with healthy, wholesome eating (aka eating quinoa) went back for seconds and ate it as a midnight snack as well. I feel this incredible sense of accomplishment for this.

The thing for me about quinoa is I've always liked the idea of it, but never really found anything I could make at home that tasted half decent. Until now that is. I think the answer may be as simple as cooking it in stock instead of water, or maybe just adding lots and lots of cheese to it. Cheese always makes anything better (or is that supposed to be chocolate?).

Recipe from Baking Serendipity who adapted from Monica Nelson Fitness.

Serves 6-8

Ingredients

1/2 Zucchini, chopped into small pieces (about 1/2-3/4 C.)
1 Medium Onion, diced
2 Garlic Cloves, minced
2 Tbsp. Oil
1 1/2 C. Quinoa, rinsed & drained
3 C. Chicken Stock
2 Eggs
1 C. Milk (we used unflavoured almond milk)
2 C. Aged Cheddar Cheese, shredded and divided
3/4 C. Parmesan Cheese, shredded and divided
1/2 C. Panko

Directions

~Chop vegetables and saute in oil in a large skillet until soft.
~Add in the rinsed and drained quinoa and saute for approximately 3 minutes.
~Pour in stock, stir and reduce heat and simmer until all the liquid has absorbed and quinoa is cooked.
~Meanwhile preheat oven to 350 F.
~In a large bowl, combine eggs, milk, 1 1/2 C. Cheddar & 1/2 C. Parmesan. Stir to combine.
~When quinoa is cooked, scoop into egg mixture and mix to evenly coat.
~Put mixture into a greased 9x13 baking dish (or to make individual versions, use muffin tins), sprinkle top with remaining cheeses and panko.
~Bake for 15-20 minutes or until top is crispy and golden and inside is hot.

Enjoy


Monday, 21 January 2013

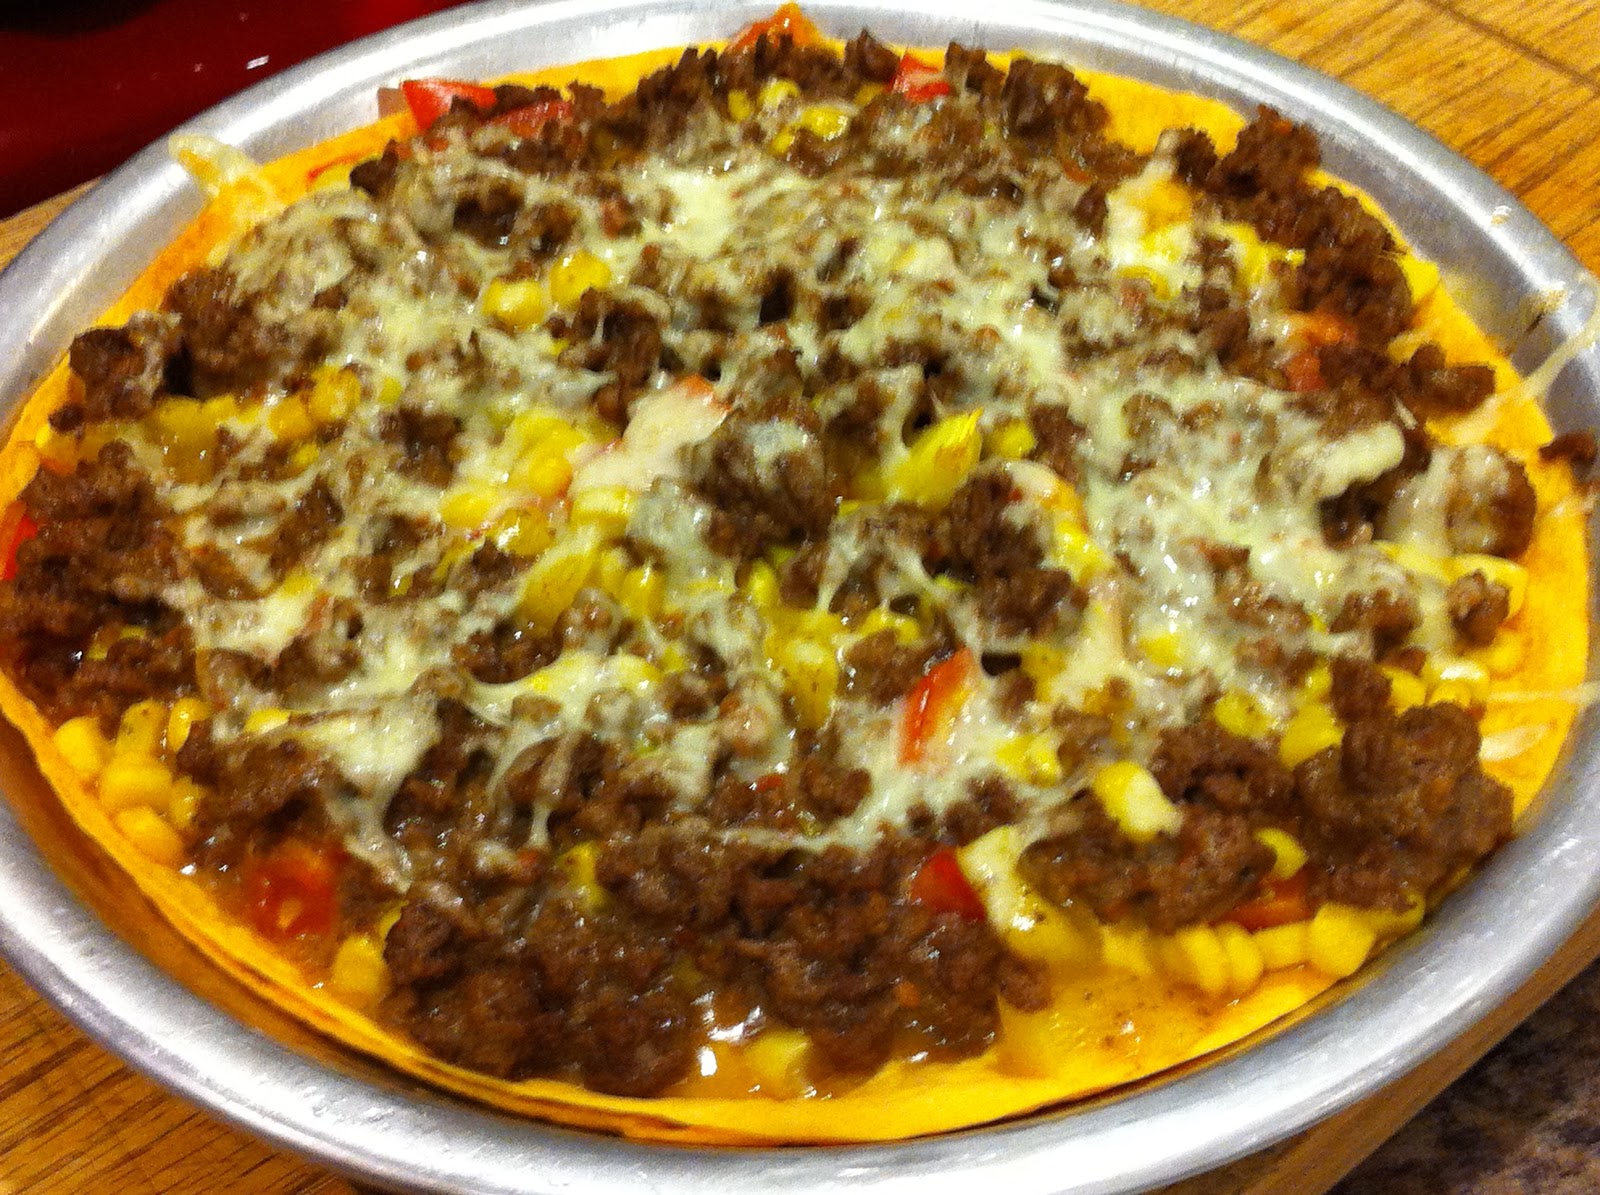
Taco Pie


So this pie is basically the same thing you get in the Old el Paso Taco Pie box. But, it has more vegetables in it and it doesn't contain that scary taco seasoning that I'm sure is just sodium. It does contain that awful cheese sauce though in the form of Salsa con Queso. Unfortunately, this last time I made this I didn't enjoy it as much. They've changed the cheese sauce that I normally buy and much to my surprise, when I sampled it, it had absolutely no flavour. So, my dish was a bit bland to say the least. But, maybe it was just a faulty jar (at least that's what I'm telling myself, instead of that they changed their recipe). I might have to resort to making my own sauce at some point, but for now I'm going to try stick with the jar stuff simply for convenience. Not that it would be hard to combine velveeta and salsa to make the sauce myself.

Anyway, turns out I didn't have an adequately deep round pan to get the required four layers in. So my pie may look slightly strange because it only has two layers (I had to split it up into two shallow pie pans), but it still works just as well.

After I made this dish this past week I got to thinking that you could easily make this into a vegetarian option (not that I have any desire to go vegetarian), but using black beans instead of the beef. Just a thought.

So, the idea for this comes from Old el Paso, but really everything else is my own creation.

Serves 5

Ingredients

1 1/2 lb. Ground Beef
1/2 Onion, diced
1 1/2 C. Salsa con Queso (or whatever cheese sauce you decide upon)
1 1/4 C. Salsa
1/2 Tsp. Cumin
1 Tsp. Chili Peppers
4 Soft Tortillas
2 Tomatoes, diced
1/2 Bell Pepper, diced
1/2 C. Corn Kernels
1 C. Cheese, grated

Directions

~Heat skillet and cook beef and onions until cooked through.
~Add in cheese sauce, salsa, cumin & chilis
~Preheat oven to 350 F.
~Place 1 tortilla into a greased round dish (make sure the tortilla fills the dish)
~Layer with 1/4 of the beef mixture, vegetables and cheese.
~Top with another tortilla and repeat until you have four layers with the meat, veggies and cheese on top.
~Put in oven and bake until heated through and cheese is bubbly, approximately 15 minutes.

Enjoy


Monday, 7 January 2013

Buffalo Cauliflower 'Wings'


Okay, these are good. And by good I mean I think I took the top layers of skin off of my tongue. Yes folks, these are very hot. But good, oh so good. I had requests to make them two nights in a row.

So as I said, these are hot, hot, hot but they taste exactly like hot wings, but not so much like buffalo wings but that could easily be remedied by using the buffalo flavoured Frank's Hot Sauce instead of the original.

Serves 6 people

Source Tasty Kitchen

Ingredients

1 Head Cauliflower, in florets
1 C. Milk
3/4 C. Flour
3 Garlic Cloves, minced
1 C. Hot Sauce
2 Tbsp. Butter

Optional ** Blue Cheese or Ranch Dressing for dipping

Directions

~Cut cauliflower into florets.
~Preheat oven to 425 F
~In a medium bowl whisk together milk, flour and garlic
~Dip each piece of cauliflower into mixture and let excess drip off.
~Place on a greased cookie sheet
~Spray tops of cauliflower with oil
~Bake for 20 minutes until fork tender
~While baking, in another medium microwave safe bowl melt butter then add hot sauce.
~Heat mixture just before tossing the baked cauliflower in it.
~Serve immediately as it cools very quickly.

Enjoy

Friday, 30 November 2012

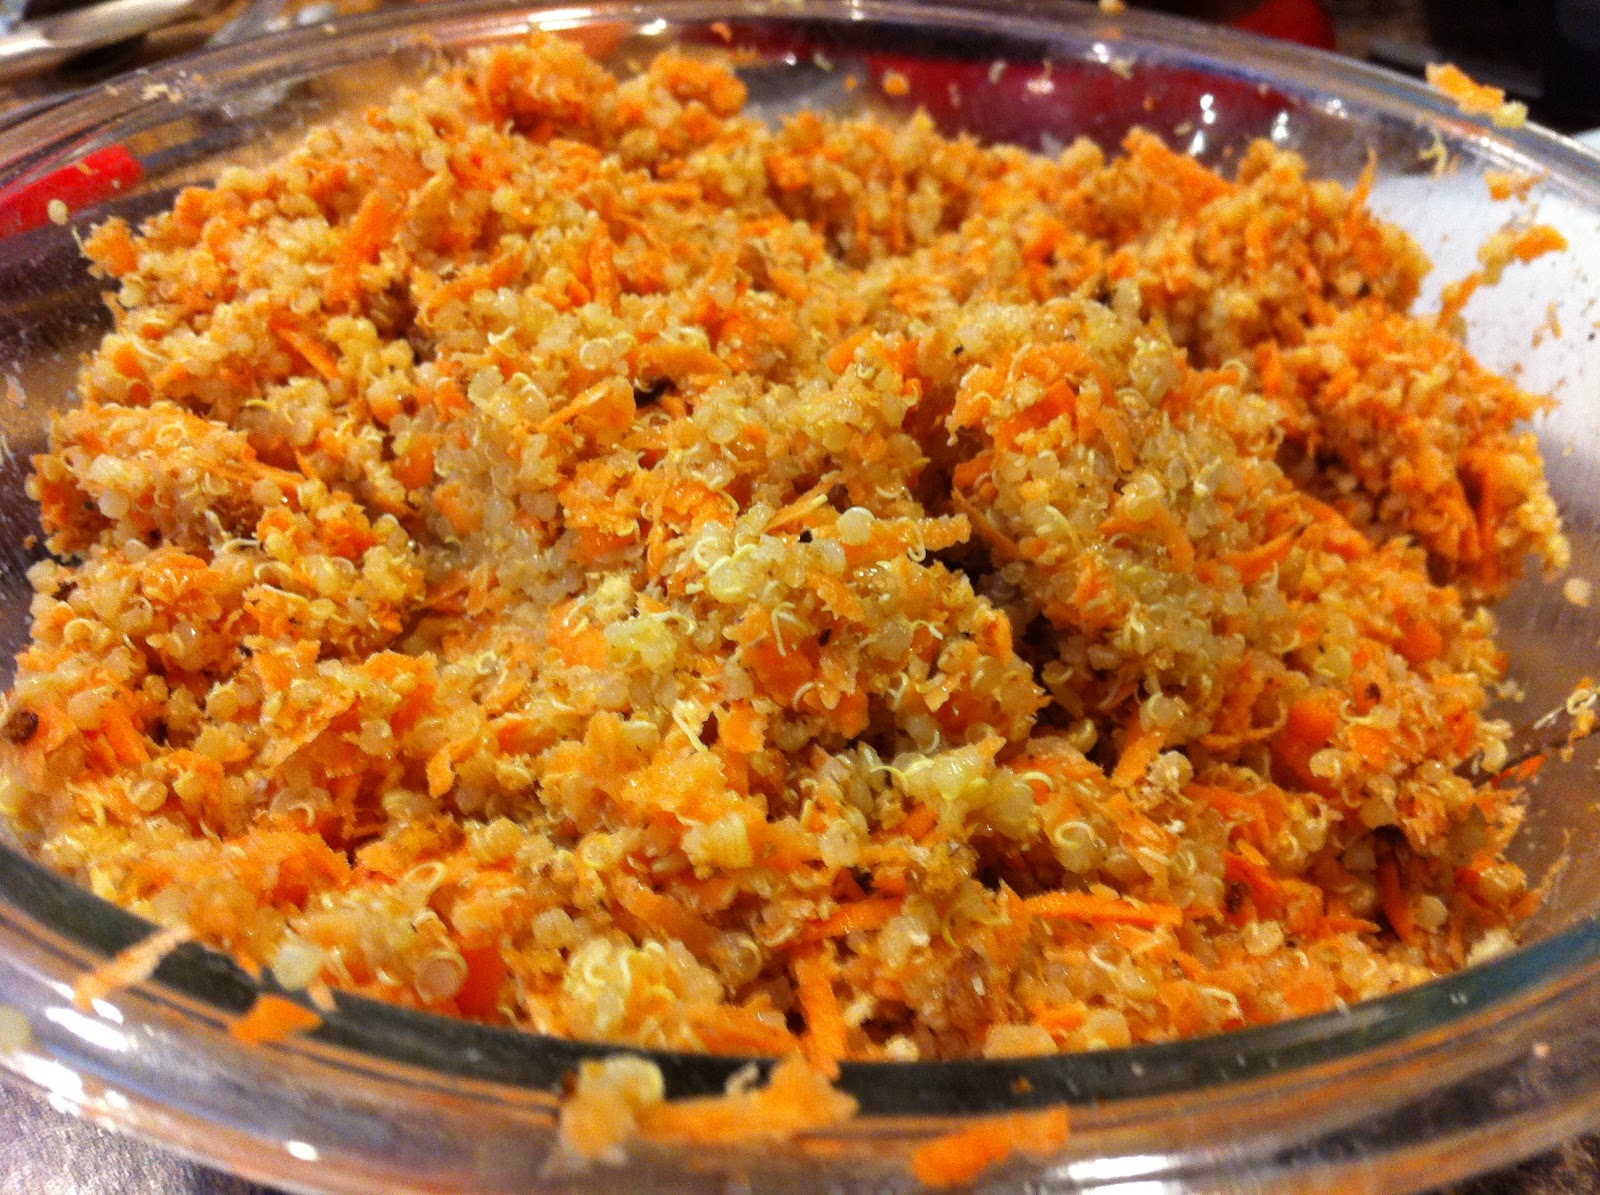
Quinoa Yam Patties


These didn't really form like I had expected them to. Nor did they taste like I had expected either. That's not to say that they were bad (we wouldn't have eaten them for 3 nights straight if they were bad), they were just different. I had originally decided to make them one morning. It seemed like a great idea (but they seemed to take all day to make, so a bit time consuming to say the least), and I really would have liked them to be ready for lunch, but they weren't. So dinner rolled around and I must admit, dinner time is when I always confirm that I could never be vegetarian. I don't need bacon or sausage for breakfast, or sandwich meat for lunch, but I do think dinner should contain meat. So, I didn't truly enjoy these the first night. But I do have to say, they were quite filling and had some decent flavour going (then again I just ate it by itself on a plate with a bit of thai sauce as we didn't have buns or burger fixings.)

The key thing to remember for this recipe is to let it cool completely in the fridge before trying to form patties. I didn't at first and that's what caused my nightmares. They went together much better the next day after they had sat.

So I guess the main question is, would I make these again? And I would have to say I honestly don't know. I really liked the idea of them, but what I imagined them to taste like, wasn't what they actually tasted like. So, even though they didn't taste bad, it's sometimes hard to overcome something that is different.

I adapted this recipe from In Sock Monkey Slippers. The idea to add the tahini came from Made to Create.

Makes 5 Patties


Ingredients

1 C. Water
1/2 C. Quinoa
1 1/2 C. Yams, shredded (about 1/2 large yam)
1 Egg, beaten
1/4 C. Bread Crumbs
1/4 C. Bran
1 Clove Garlic, minced
1/2 Tsp. Tahini
Salt 
Pepper
Olive Oil

Directions

~Rinse the quinoa and place into a pot of boiling water (1 C.)
~Simmer on low heat until all the water is gone (times vary depending on brand of quinoa), 10-15 minutes
~Allow quinoa to cool.
~Peel and shred the yam with a cheese grater.
~Place the yam in a piece of paper towel and squeeze out the extra liquids (isn't it an amazing colour??)
~In a large bowl, combine the quinoa, yam, egg, bread crumbs, bran, garlic, tahini, salt and pepper.
~Mix well and then place bowl in refrigerator to cool.
~When cool, form into patties.
~Heat skillet (or grill) and the oil, and cook burgers until they are golden on both sides and crispy.

Enjoy

Never would have thought Yam Juice would be this vibrant and solid of a colour. Just thought I'd share :)

Tuesday, 30 October 2012

Green Bean Casserole


I've never really had any desire to make this dish until we went to Costco and bought a huge bag of these Crispy Fried Onions. They were little shavings of onions that had been fried and then packaged up to be used on salads, burgers or casseroles. So, that's what brought me to making this dish. I found it okay, not great, but okay. But that could have been because the beans we got were kind of rubbery and not so stellar. Others that tried it really liked it. But, I like vegetables just as vegetables, they don't need to be all dressed up for me to like them, so that may have been another reason.

The recipe for this came from Campbell's.

Serves 6

Ingredients

4 C. Cooked Green Beans
1 Can Condensed Cream of Mushroom Soup
1/2 C. Milk
1 Tsp. Soy Sauce
Pepper
1 C. French Fried Onions, divided

Directions

~Wash beans and snip the ends off.
~Boil beans until tender in a pot of water, then drain
~In a medium bowl, combine the soup, milk, soy sauce and pepper to taste. Stir.
~Mix in 2/3 C. of the onions and the beans.
~Spoon mixture into a greased 1 1/2 quart casserole dish.
~Bake in the oven at 350 F until mixture is bubbling (20-25 minutes).
~Sprinkle with remaining onions and return to oven for 2-5 minutes (watching that it doesn't begin to burn).

Enjoy


Monday, 22 October 2012

Sweet Potato Casserole


This was something I just 'had' to make. I meant to make it for Thanksgiving Dinner, but we ended up making 10 gallons of mashed potatoes, so this dish wasn't exactly needed. So I made it tonight, because I didn't know how it was going to turn out and so I made it because we had some leftovers in the fridge from last night incase it turned out to taste awful. The other option was to simply scrape the marshmallows off if it wasn't good. I never expected the marshmallow topping to be good, but again, I just 'had' to try the full blown sweet potato casserole. Anyway, just plain mashed yams taste amazing (no butter or milk or sugar needed), this dish tastes pretty darn good and the marshmallow topping just adds that little something extra (without making it too sickly sweet like I had expected it to), no need to scrape it off or turn to the leftovers.

I've never had the need to buy pumpkin pie spice, mainly because I don't like pumpkin pie, but this recipe called for 1 tsp. of it. Instead I used the cinnamon, all spice, nutmeg and ginger combination I listed below. Take your pick for which version you prefer.

Unfortunately, I copied this recipe down from a food blog some time ago before I had ever considered the possibility of food blogging myself. As such, I never copied down the source of this recipe and I was unable to find it by searching through google. So to the unknown blogger out there, I apologize and I thank you for this great tasting recipe.


Serves 12

Ingredients

4 lbs Sweet Potatoes (or yams as we call them here), 4 large or 6 if they're regular sized
1/4 C. Butter
1/4 C. Milk (I used vanilla almond milk)
2 Eggs
1/4 C. Brown Sugar
3/4 Tsp. Cinnamon
1/8 Tsp. All Spice
1/8 Tsp. Nutmeg
1/8 Tsp. Ginger
1/2 Tsp. Salt
2 C. Mini Marshmallows

Directions

~Scrub the yams clean, prick with a fork and bake until soft either in the microwave or in the oven (just as you would bake a regular potato).
~Once the yams are soft, allow them to cool (important step...don't make the same mistake as me, my fingertips were in rough shape because I skipped this step) and then remove the skins.
~Place the peeled yams in a mixing bowl and mash or process with the paddle attachment of your stand mixer.
~When smooth, add in all the remaining ingredients except the marshmallows. Mix until well combined and smooth.
~Scoop mixture into a greased 8x8 baking dish (or two loaf pans) and bake for 30 minutes at 350 degrees, or until heated through.
~Top with marshmallows and return to the oven for 5 minutes, or until marshmallows have melted.

Enjoy!

Wednesday, 17 October 2012

Dairy Free, Creamy Scalloped Potatoes


I feel like I just accomplished the impossible. We just ate scalloped potatoes that had a rich and thick creamy sauce, without any cream in it. Plus, it looked exactly like what normal scalloped potatoes look like, minus some stringy cheese, but big deal. This was so cool.

I'm going to say Happy Easter now, just like I did when we sat down to eat. Yeah, I know I'm about 6 months too late (or early) but when you're sitting down to ham and scalloped potatoes what else can you say.

The texture of this dish was bang on and the flavour was there as well (which truly boggles my mind considering some of the ingredients that are listed to be used: tahini, rice vinegar??). You actually don't taste any of these 'different' ingredients when it's all said and done. They just blended in to give the right texture to the sauce. One thing I might do differently next time is add 1/2 tsp of salt to the sauce as it cooks (instead of just sprinkling some over the top before cooking), or a couple of cloves of garlic. Because it's missing the cheese it just needs a bit of something else to go with the 'cream' flavour. This is definitely a keeper.

I used the exact recipe that I found at Tessa the Domestic Diva and I added in my suggestions as optional ingredients.

Serves ~6

Ingredients

1 3/4 C. Chicken Broth
1/4 C. Mayonnaise
1 Tbsp. Nutritional Yeast
1 Tbsp. Tahini
1 Tsp. Rice Vinegar

*Optional* 1/2 Tsp. Salt

1/4 C. All Purpose Flour
5 Large Potatoes, peeled (I used Russets)
1 Onion, chopped finely
*Optional* 2 Cloves Garlic, minced
Paprika
Pepper

Directions

~Preheat oven to 350 F.
~Slice potatoes thinly using a mandolin, slicing attachment on a food processor or a knife.
~Chop the onion finely and mince the garlic.
~Arrange the potatoes, onion and garlic in a greased 9x13 baking dish.
~In a medium saucepan, combine all the ingredients from the chicken broth through to the salt and stir until smooth.
~When mixture begins to heat, whisk in the flour a little bit at a time, making sure to whisk out all of the lumps before adding more.
~Continue to whisk until mixture thickens and starts to bubble.
~Pour mixture over top the potatoes, and sprinkle with paprika and ground pepper.
~Bake for 1 - 1 1/2 hours or until fork tender and bubbly (cooking time will be dependent on how thin you sliced the potatoes, so watch carefully).

Enjoy


Wednesday, 10 October 2012

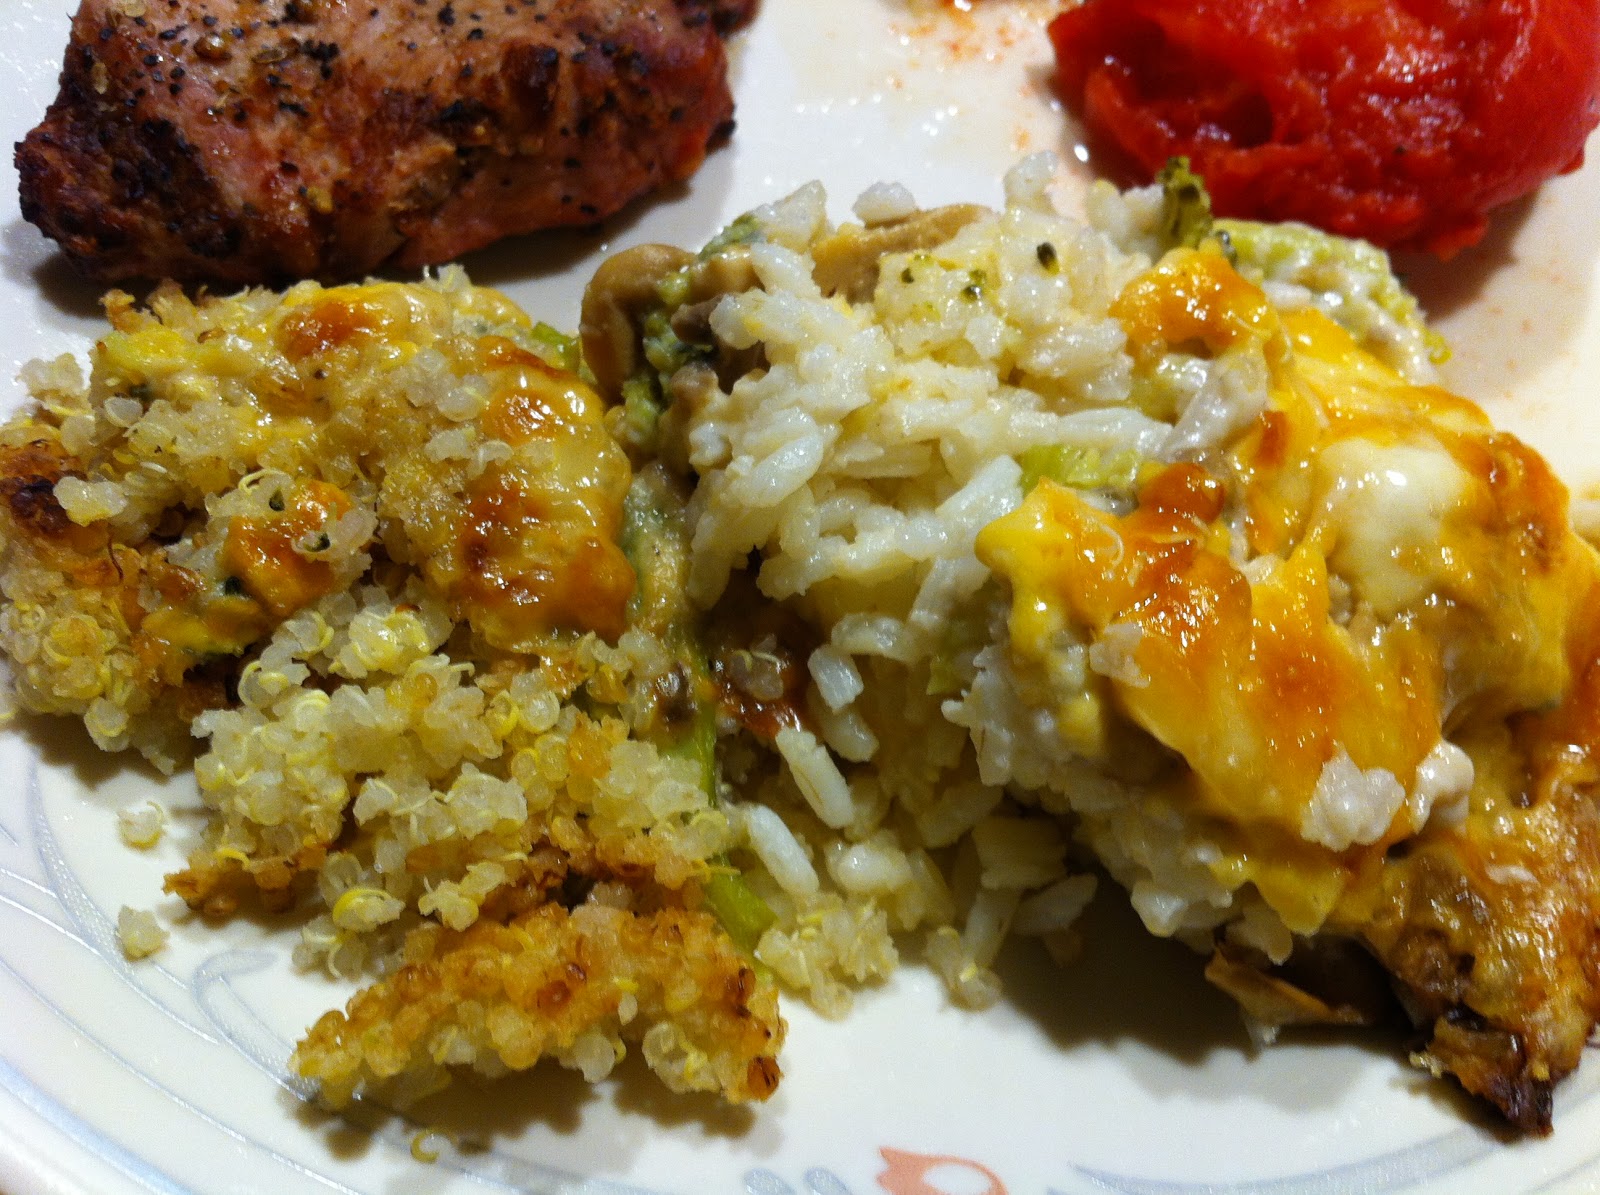
Cheese Rice Casserole (or Quinoa)

Quinoa on the left : Rice on the right


My family has never been (and will never be) a casserole family. Mainly because of the fact that 99.99% of casseroles started out as Campbell's Recipes, meaning that all 99.99% of the casseroles call for a condensed soup in some form or the other. Condensed soup = a lot of cream = bad news for lactose intolerant. Despite the fact that this casserole not only contains soup, but a lot of cheese as well, you would think it would be the worst type of offender. Yup, no! This is what we make in our house when we've eaten plain rice for 3 days and still have mountains of it left. It's great. Just not for the lactose intolerant among us.

When I was away at university, my mom took it upon herself to bring me a couple of my favourite dishes. This being one of them. The only problem? To transport it easier she froze it. Let me tell you, rice doesn't freeze. So do yourselves a favour and enjoy this straight from the oven (or if you must, reheat it in the microwave after it's been in the fridge). Oh, and she added carrots...the nerve. While I love carrots, they don't belong in this dish, so please, please, please don't mess with the broccoli. Trust me. As a little kid I did not like broccoli, but I still loved this dish, so do me a favour and just try it.

As you can see, I'm not fond of anyone changing this dish. It is not meant to be changed. BUT...the last time we had it, we substituted in quinoa for the rice and I have to admit, it was pretty decent.

We call this recipe my Mom's Recipe, but really I think she stole it from my aunt. Were it came from before that is unknown but like I said earlier, I'd assume it originally came off a can of Cream of Mushroom Soup.

Ingredients

1/2 lb. Aged Cheddar Cheese, grated
2 Heads Broccoli (~2 lbs)
1 1/2 C. White Rice (or quinoa)
3 C. Water (to cook the rice / quinoa, or use the amount specified on the packaging)
2 Cans Cream of Mushroom Soup (the condensed version)
*Optional* 1 Can Sliced Button Mushrooms, drained

Directions

~Cook rice according to package directions
~Steam broccoli until crunchy (do not cook until soft because they'll be overcooked by the time they come out of the oven).
~Mix soup, cheese (reserve enough to sprinkle over the top) and mushrooms in a large glass bowl.
~Preheat oven to 350 degrees.
~In a greased casserole dish, layer the rice, broccoli then the cheese-soup mixture. Repeat.
~Sprinkle the top with the remaining cheese.
~Bake at 350 degrees for 1 hour.
~During the last couple of minutes, switch the oven over to broil so the cheese goes crunchy on top.

Enjoy!


Monday, 8 October 2012

Marinara Sauce


Back at the very beginning (of blogging I mean) I made a dairy-free, tomato free pasta sauce. Before I made that exact recipe, I had tried one that had used a high ratio of carrots to peppers. Now I like carrots (my parents when I was a toddler would beg to differ, and claim that I was obsessed with them and turning a bit orange for a while there) but I never thought they had that much flavour. So as the sauce experimentation continued, I pretty drastically decreased the amount of carrots. This time, I actually was making a tomato sauce because our plants although they had a rough start, actually gave us a lot of good tomatoes. The only problem again was the carrots. The original recipe called for 1/2 carrot and 1/2 a stalk of celery. Well I'm not a fan of celery, so what do you think I did? Yup, I substituted the celery for the other 1/2 the carrot. Next time I'll just use 1/2 a carrot and omit the celery all together. Who new that one carrot, intermixed with onions, tomatoes, garlic and spices would shine through so much. (I might even omit it all together, but I'll try the 1/2 a carrot before taking that drastic measure). *Update* When I tried the sauce the following day after it had sat in the fridge, you can actually taste a lot more flavours than just the carrot. Sure it's definitely still there (there's no getting rid of it), but there is now a million other flavours competing for top slot in the sauce. It really is a complex tasting sauce. But I have to admit, it took a bit of getting used to on my spaghetti as I typically make my Mom's spaghetti sauce which isn't just a marinara sauce, it is loaded with meat, onion chunks, pepperoni, tomato paste and mushrooms (I'll share it with you some day soon). So as you can imagine, a marinara is slightly less chunky and less of a heavy sauce. Definitely good, but definitely different.

This recipe made ~3 cups of sauce. So, if I had to buy the tomatoes, it definitely would not be worth it to make it. But I had the tomatoes lying around, over-ripening so big deal. Plus, it was really fun to pop my first tomato in the hot water and then be able to peel the tomato with ease (amazing!!). One final note, I did have to use dried herbs, because my fresh herbs are done and this was a last minute decision to make this sauce and so I didn't have time to pick up some more.

Recipe adapted from Smitten Kitchen.

Makes ~3 Cups of Sauce (enough sauce for the average sized package of spaghetti)


Ingredients

1/2 Carrot
1 Small Onion
4 Cloves Garlic
16 Medium Tomatoes
2 Tbsp. Olive Oil
Salt
Pepper
1/2 Tsp. Chili Peppers (gives it a bit of heat, use less if you don't want this)
1 Tsp. Basil
1 Tsp. Oregano

Directions

~Put a medium sized pot of water on to boil filled enough to submerge a tomato in.
~Peel carrot and then mince, grate or put through the food processor the carrot, onion and garlic. Set aside. (I recommend using the food processor here.)
~With a knife, slice an 'X' in the bottom of each tomato.
~Dip each tomato one at a time into the pot of boiled water and blanch the tomatoes for 10-30 seconds, then pull the tomato out and quickly run it under cold water or into an ice bath. The skin will now pull easily away from the flesh, starting at the 'X'. If the skin doesn't peel easily, dip the tomato back in the hot water and repeat. (This actually works...so cool!)
~Cut the peeled tomatoes into quarters and squeeze out the juice and seeds into a sieve over a bowl. Reserving the juice.
~Heat a skillet (or large bottomed pot) on medium-high and add the oil.
~When the oil is hot, cook the carrots, onions and garlic for approximately 10 minutes until they have softened.
~Add in the tomatoes and reduce the heat to medium-low. 
~Use a potato masher (or an immersion blender if you're all techie like that) to mash the tomatoes into a sauce.
~Season with a generous amount of salt and pepper, chilies and the herbs. Stir.
~If the sauce is too thick, you can add in some of the tomato juice that you reserved when deseeding the tomatoes. 
~Let sauce simmer for 40-45 minutes, stirring occasionally to ensure it doesn't burn.

Enjoy, on pasta or get creative!


Monday, 24 September 2012

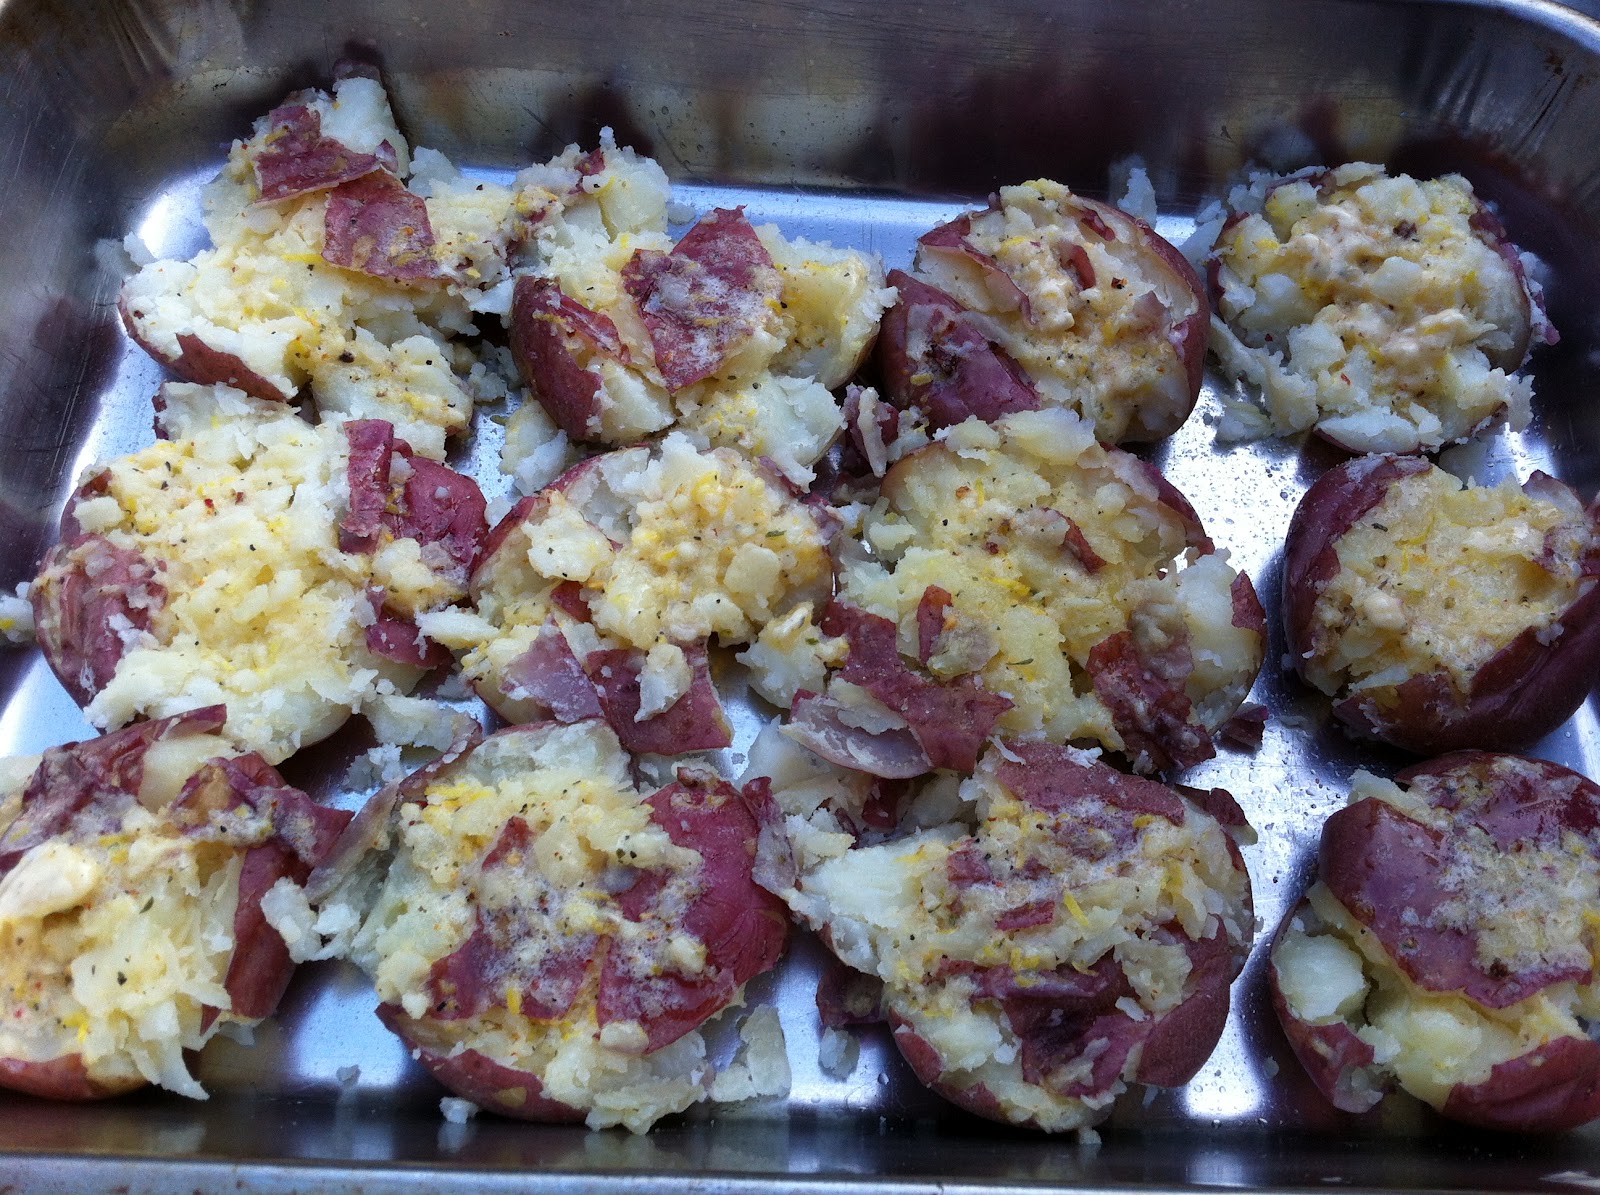
Smashed Potatoes with Herbed Butter


I've made these once before. The first time instead of using the greek spices I used fresh dill. Unfortunately, the time for fresh dill has come and gone and I was left staring at the dried spice drawer trying to come up with a substitute. I briefly considered some Montreal Steak Spice (which would be very good I'm sure), but not exactly what I was hoping for, for tonights dinner. So, I went garlicky and lemony and let me tell you, it has been hours now since I ate and my mouth is still burning from the garlic. What I'm trying to say is, if you aren't a huge garlic fan (let me slap some sense into you...kidding) you might want to reduce the number of garlic cloves in this. Then again maybe not, as I was using amazingly fresh and crisp (not rubbery in the slightest, hallelujah), local farm garlic. So I think it may have had a bit more of a kick than the grocery store variety would have.

The idea for smashing the potatoes has come from multiple blogs. The herbed butter is my own creation.

Makes 8 servings


Ingredients

16 medium Red Potatoes
1/2 C. Butter
Zest of 1 Lemon
1 Tsp. Lemon Juice
1/2 Tsp. Hot Sauce
5 Cloves Garlic, minced
1 Tsp. Greek Spice Blend
Salt
Pepper

Directions

~Bring a large pot of water to the boil and place potatoes in the pot.
~Meanwhile in a small bowl, whip the butter until it is smooth.
~Zest the lemon and add it in to the butter along with the lemon juice, hot sauce, minced garlic and greek spices.
~Mix well to combine.
~Place into fridge while the potatoes boil, allowing for the flavours to develop.
~Boil potatoes until they are fork tender. Then drain.
~Preheat oven to 375 F.
~Grease a cookie sheet and line up the potatoes on it.
~With a potato masher, gently press evenly on the top of each potato to crush it just enough so the whites of the potato are visible.
~Place a dollop of the butter mixture on top of each smashed potato and then spread so it covers the entire top surface.
~Season with salt & pepper
~Bake potatoes in the oven (or on the BBQ as I had to do) until the top surface begins to brown and crisp (10-12 minutes).
~Serve with a dollop more of the herbed butter.

Enjoy (and don't think of all the cholesterol)!


Wednesday, 12 September 2012

Beef Udon with Peanut Sauce


In the past I've attempted to make Thai / Asian Food, and it usually turns out less than stellar. This recipe on the other hand was anything but mediocre. Plus, as an added bonus, it looked pretty (it actually looked exactly like the dish I had last weekend at the local Japanese Restaurant that cost me $12. So score for restaurant quality looking food). I think what made it look so professional was that the carrots were cut into matchsticks, and the beef was cut really fine (instead of chunked liked we normally cut meat), and we used cabbage. I know you're probably thinking eww cabbage, and I typically think that way, but it really worked in this recipe.

One thing I may do for next time I make this is slightly reduce the peanut butter measurements and increase the thai sauce amount to compensate, because when it was really hot I didn't notice so much, but as it cooled down I found that the peanut butter began to become a bit sticky. Not that that's really a bad thing or anything, it's just for me that doesn't like peanut butter (I sure seem to be using it a lot lately though, ironically), I found it a bit strong. But, I think the main thing I don't like about peanut butter is the after taste, and this recipe did not have that after taste, so I enjoyed it. Also by reducing the peanut butter proportion, you'll be saving a lot of calories. I never really though about it when I was making it, but the original recipe didn't call for any meat and the reason why is because the peanut butter probably supplies what protein you need for the meal. So with both the peanut butter and meat in this dish, you're looking at a wopping 43g of protein per serving (hmm, I guess I do protein dishes well. I come by it naturally though, I always tell my Mom she's a protein addict.) Unfortunately, the calories and fat are also wopping numbers in this dish, but it tastes good (and it is your whole meal after all, so you shouldn't feel the need to consume any additional calories on top of this).

It's recipes like this one that make me with I had 6 hands so I could be manning all the different frying pans and woks at the same time, but even more so I wish I had a bigger stove. I've never understood people's obsession with gas ranges (because I cook on one at my cabin and I just never thought it was that great. Then again, we make toast and boil water on the stove at the cabin, we never stir-fry, etc. there so I guess that's why), that is until I start making recipes like this. More importantly, I understand why people want the extra wide, 6 burner ranges. A little 4 element electric stove just isn't good enough when you have 1 wok and 2 frying pans going (or trying to go) at the same time.

Recipe adapted from Damn Delicious who adapted from Recipe Girl .

Serves 4

Ingredients

1/2 C. + 1 Tbsp. Water
6 Tbsp. Reduced-Fat Creamy Peanut Butter
3 Tbsp. Brown Sugar
3 Tbsp. Soy Sauce
3 Tbsp. Rice Vinegar
1/4 Tsp. Ground Ginger (or 1 1/2 Tsp. Fresh Ginger, grated)
5 Tsp. Olive Oil (divided)
1 Tsp. Cornstarch
1 Tbsp. Thai Sauce
4 Cloves Garlic, minced
3 (7 oz) Packages Udon Noodles
1 C. Carrots, julienned
1 Small Onion, diced
1 C. Green Cabbage, shredded
1 C. Mushrooms, diced
1 lb Beef, sliced thin
*Optional* Sesame Seeds

Directions

~Prepare your vegetables and meat, set aside.
~In a large sauce pan, combine water, peanut butter, sugar, soy sauce, vinegar, ginger, 2 Tsp oil (reserving the rest), cornstarch, thai sauce and garlic, and bring to a boil. Whisk to get rid of the lumps as you heat.
~Cook udon noodles according to package instructions (or if they just need heated like mine, skip this step and place the noodles directly into the hot sauce and heat there.)
~Place noodles into sauce mixture and heat on low until mixture is heated through.
~Meanwhile, heat a wok and place part of the remaining oil into the hot wok. Add your carrots and stir-fry for ~30 seconds.
~Add the onions to the carrots and fry until they begin to soften.
~Next add in the mushrooms. After a quick stir, add in the cabbage. Keep on the heat until everything has just started to soften, then remove from the heat.
~Heat a frying pan, and add in the remaining olive oil. When oil is hot, cook your meat until it is cooked through.
~Transfer meat and vegetables into the noodle and sauce mixture and stir to combine.
~Serve with a sprinkle of sesame seeds if desired.

Enjoy


Nutrition Facts (per serving)
Serves: 4
Calories: 673
Carbs: 72g
Fat: 26g
Protein: 43g