Showing posts with label DESSERT. Show all posts

Tuesday, 21 April 2015

Mississippi Mud Bars


I think I have about a dozen different Mississippi Mud Recipes saved to my computer. I don't think one of those recipes is similar to the next one, so I honestly don't know what the 'true' Mississippi Mud Bar recipe is. All I know is these are good. Quite good really and really worth making again.

When I made these, I didn't have pecans and as an afterthought I added chopped cashews to the top, but the frosting had kind of set and so I had to squish them down to keep them from rolling away, so it's best to put them between the marshmallow and frosting so they stay in place.

Recipe from Real Mom Kitchen.

Ingredients

1 C. Butter
1/2 C. Semisweet Chocolate Chips
2 C. Sugar
1 1/2 C. Flour
1/2 C. Unsweetened Cocoa Powder
4 Eggs
1 Tsp. Vanilla
3/4 Tsp. Salt

1 Bag (10.5oz) Mini Marshmallows

1 C. chopped pecans (optional), or any other desired nuts

Frosting:
1/4 C. Butter
2 1/2 Tbsp. Unsweetened Cocoa
2 1/2 Tbsp. Milk
2 C. Icing Sugar
1/2 Tsp. Vanilla

Directions

~Preheat oven to 350 F
~Melt butter and chocolate chips in a large pot over low heat, stirring until smooth
~Remove from heat and add in sugar, flour, cocoa, eggs, vanilla and salt. Stir to combine
~Pour batter into a greased 9x13 pan
~Bake for 20 minutes
~Remove from oven and sprinkle marshmallows over and return to bake for 5 minutes until marshmallows have puffed
~Remove from oven and sprinkle with nuts if desired
~In a large saucepan, combine butter, cocoa and milk, and heat until combined
~Beat in icing sugar and vanilla until smooth
~Spoon into a piping bag or freezer bag (snipping the corner) and pipe over bars (while marshmallows are still warm (but not right out of the oven, wait approximately 10 minutes)
~Cut into squares

Enjoy!

Saturday, 24 January 2015

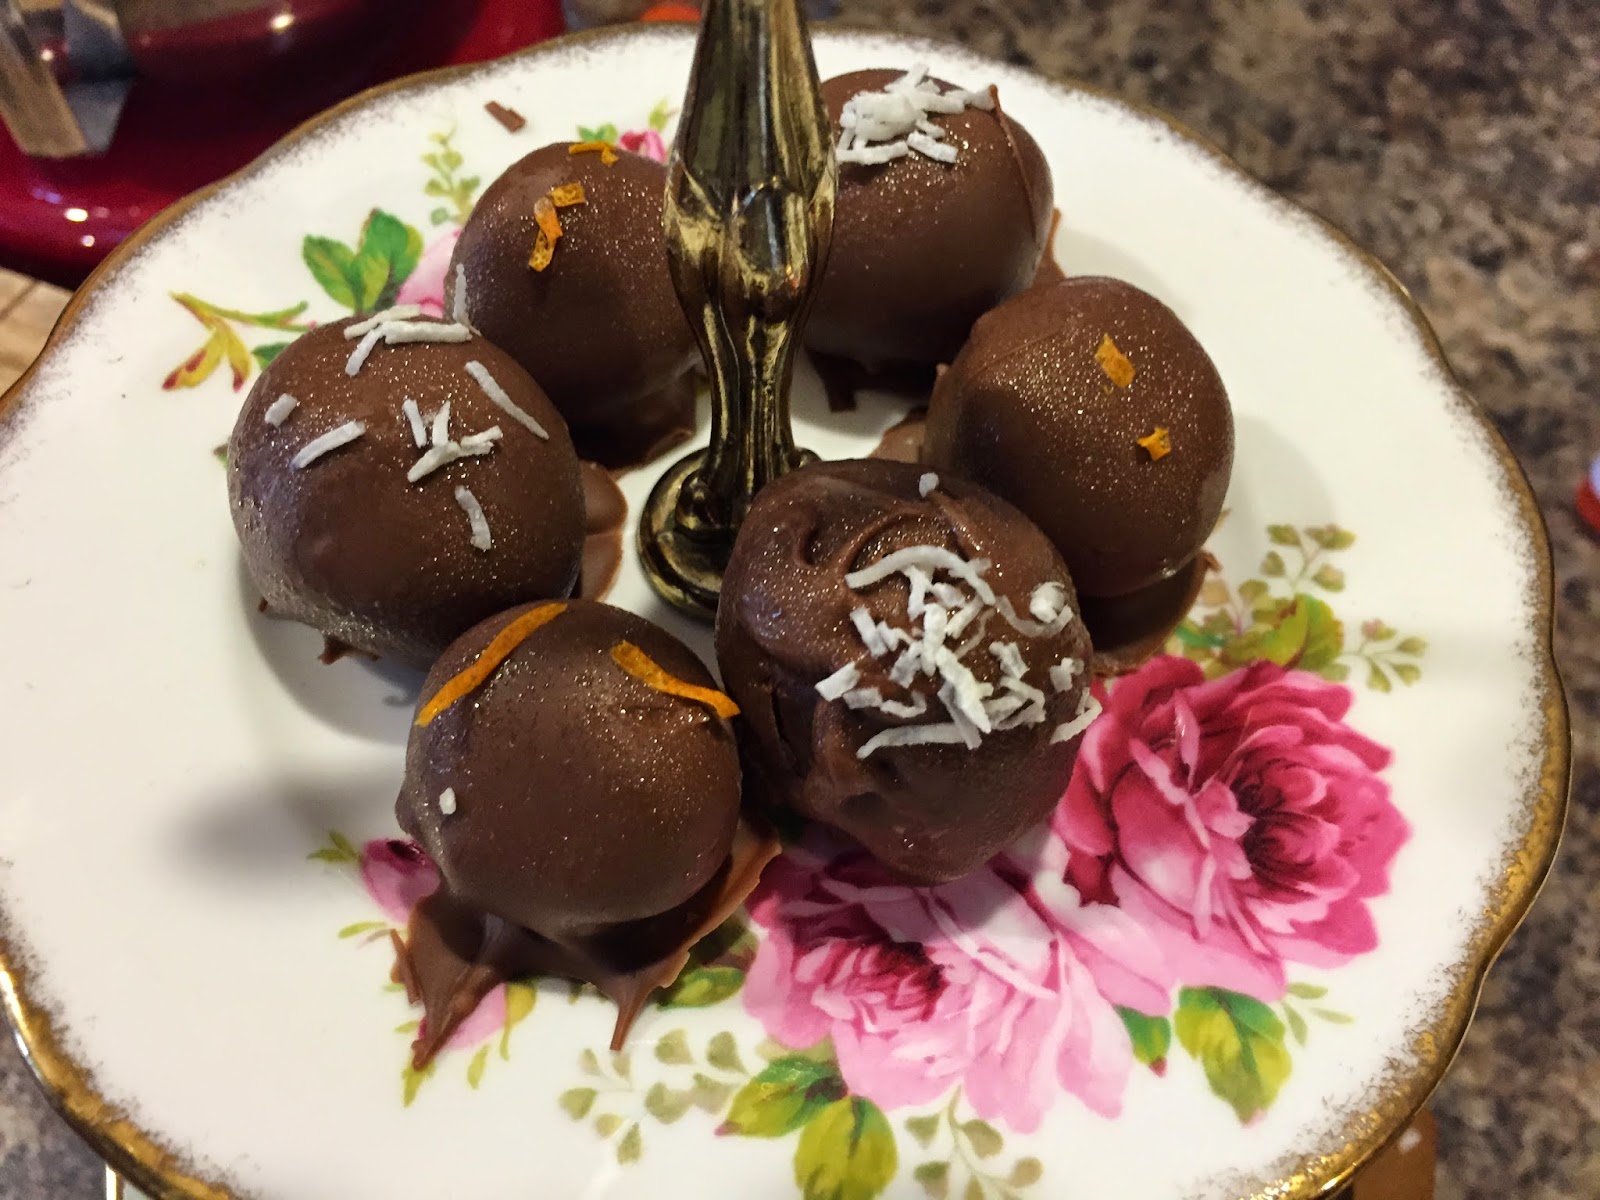
Truffles


Recipe from Anna Olson, Food Network.

So did I tell you about the time my guard dog failed to guard and my chocolates were stolen by a horrible thief?

Nope, well here it is.

Fridge space is very very hard to come by at my house. When Christmas rolls around you are taking your life in your hands to open the fridge and freezer door. Make sure your feet are way back or they could get squished by some falling container. So we have to resort to putting things in coolers in the garage. If we're lucky enough it's cool enough to put things out on our deck where we have a glass table. After Christmas dinner this table can be entirely filled with platters of food. If it snows we've been known to put milk jugs, juice cartons and beer bottles into the snow to cool.

Our typical winter temperature are usually around 5 Celsius and rain, but we can get a cold spell for a week or two a year where we get -10 Celsius and snow. We hope for around Christmas time we don't get a Pineapple Express that brings us 10-15 Celsius temps because then our natural refrigerator is not possible and we have to fight with coolers in the garage.

So anyway, the first time I made these we were having one of those cold spells. I made the chocolates and put the cookie sheets out on the outside table and covered them with towels to keep any bugs off them. While our house backs onto the forest, we've never had any animals up on our deck, as it's a second story deck and they'd have to climb a flight of stairs. Simply put, we'd never had a problem leaving food outside.

We went to bed that night and woke up the following morning to see that the towels had blown off the cookie sheets. When we went outside we saw that the truffles were no longer lined up in neat rows on the sheets, but instead were all scattered like they'd been blown around. Upon closer inspection we realized that chocolates were missing.

We'd had many days of heavy frost in a row and it looked like a light dusting of snow had laid on the deck and when we walked over to the stairs we could see little foot prints tracking up and down the stairs.

Yup, a racoon walked up the stairs, stole my truffles, walked back down and then turned around and did it all again. Or at least that's what their tracks say.

Now we keep everything on the chest freezers in the garage when the weather turns cool enough to keep things cool.

The first time I made, I could not get these to roll. The original recipe called for 1 to 1 heavy cream to chocolate, but they would not harden enough for me to roll. I just picked them up in my hand and got an instant pool of chocolate mush. I ended up rolling them standing outside in -10 Celsius weather trying to not let them warm up. Then the racoon happened so I had to make them again.

Second time I decided to reduce the cream, realizing that the chocolate was the only thing hardening, so I needed to have more of that than 1:1. If you used bittersweet chocolate like the recipe originally called for, I'm sure the 1:1 ratio would work because bittersweet chocolate is harder.

Third time I did these, I did some reading I changed up the method again to be what I've listed here.

The first time I made these the racoon happened.
The second time I made these I had dipping chocolate that I've always used but the quality of it had really decreased and the inside of the truffles tastes so good and of a high quality and the outside was just not good.
Now I use good chocolate outside and it makes all the difference.
Technically truffles don't need to be dipped, but I find that these become way too soft if you don't and just become a pool of mush. I've rolled them in cocoa instead, but cocoa is so bitter on it's own and it really doesn't work. I'd recommend mixing the cocoa with powdered sugar if you're rolling instead of dipping. But I like to dip because you can decorate them differently with different toppings / designs so you can identify what each flavour is.

How I flavour mine / mark them:

Orange extract with grated orange zest sprinkled on top right after dipping
Frangelico Liqueur with coconut sprinkled on top right after dipping
Vanilla extract with a dab of white chocolate on top of milk dipped chocolates

I really want to try a raspberry flavoured one next.

But flavouring isn't essential and you could just leave them as is. The flavour isn't overpowering though, so it doesn't take away from the chocolate flavour. The vanilla is pretty mild and I found that I really couldn't differentiate between the vanilla flavoured and the unflavoured ones.

Try this link for some hints on flavouring truffles.

The easiest method I've come up with through a lot of trial and error to dip chocolate is to place each chocolate individually into a bowl of melted chocolate and scoop from underneath with a carving fork (one with two long prongs). The chocolate perches on top and the space between the two prongs allows excess chocolate to drain away with a bit of a tap on the edge of the bowl. I then transfer to fork to the cookie sheet and using a toothpick (or the long metal toothpicks we have for sealing up a turkey / checking cakes to see if they're cooked) scoop from underneath the truffle and ease it off the fork. This gets the most undisturbed sides and tops of the truffles, so no holes or scuffs on the sides like have happened with other methods for me.

I really see why chocolate shops charge $1 per truffle. These take an incredible amount of time to make and using good ingredients is pricy. Ingredients along cost me probably $0.30 a truffle if not more and that was with watching for chocolate to go on sale. So it's cheaper than buying truffles at a specialty shop, but the time might make it not such a good deal. Then again, I'd never go out and buy 5 1/2 dozen specialty truffles to give away because of price, so I feel like it's a good return for these to give as gifts. I also made little boxes to put these in with Xmas wrapping paper, and then little mini Xmas muffin cup liners to place each individual chocolate in.

Makes 5 1/2 Dozen Truffles

Ingredients

1 3/4 C. Heavy Cream
16 oz. Semi-Sweet Chocolate (I use 2 boxes, Baker's Semi-Sweet Chocolate)

1 Tbsp. Liqueur or Extract (Optional)
~Orange
~Raspberry
~Vanilla
~Hazelnut

Good quality chocolate for dipping.

Directions

~Chop chocolate finely and place into large bowl
~Bring cream to a simmer, while being careful not to burn.
~Pour over shaved chocolate.
~With a spatula, mix together. It takes a bit, but continue to mix. Chocolate will begin to melt and eventually cream and chocolate will combine together into a smooth ganache.
~If flavouring, divide equally into separate bowls. A whole batch of this needs 1 tbsp of flavouring. So 3 bowls would each need 1 tsp of flavouring
~Cover with plastic wrap and chill
~Once chilled, bring one bowl at a time out of fridge and using two spoons, scoop out a small dollop of ganache and form into a rough ball shape and place on a wax paper lined cookie sheet. Work quickly so it doesn't warm up.
~If you have a second person, they can roll the rough balls into formed balls with a quick roll of their hands, making sure to limit the time in your hands. If working alone, place tray back into the fridge and chill before rolling into formed balls.
~Repeat with remaining bowls of ganache
~Place finished truffle balls on cookie sheets into freezer and freeze through.
~Melt dipping chocolate and bring out truffles in small batches to dip.
~Dip and place onto fresh waxed paper lined cookie sheets. Cool in fridge to set.

Truffles should be stored in refrigerator and can be eaten chilled or brought to room temperature before serving.

They do freeze and taste good frozen, but you don't get the creamy / gooey effect when biting into them, and they have a habit of sweating upon thawing which sometimes occurs and sometimes doesn't and it really has seemed to depend on the type of chocolate / humidity levels at the time. So test before relaying on them to look perfect out of the freezer. 

Enjoy!!

Monday, 14 July 2014

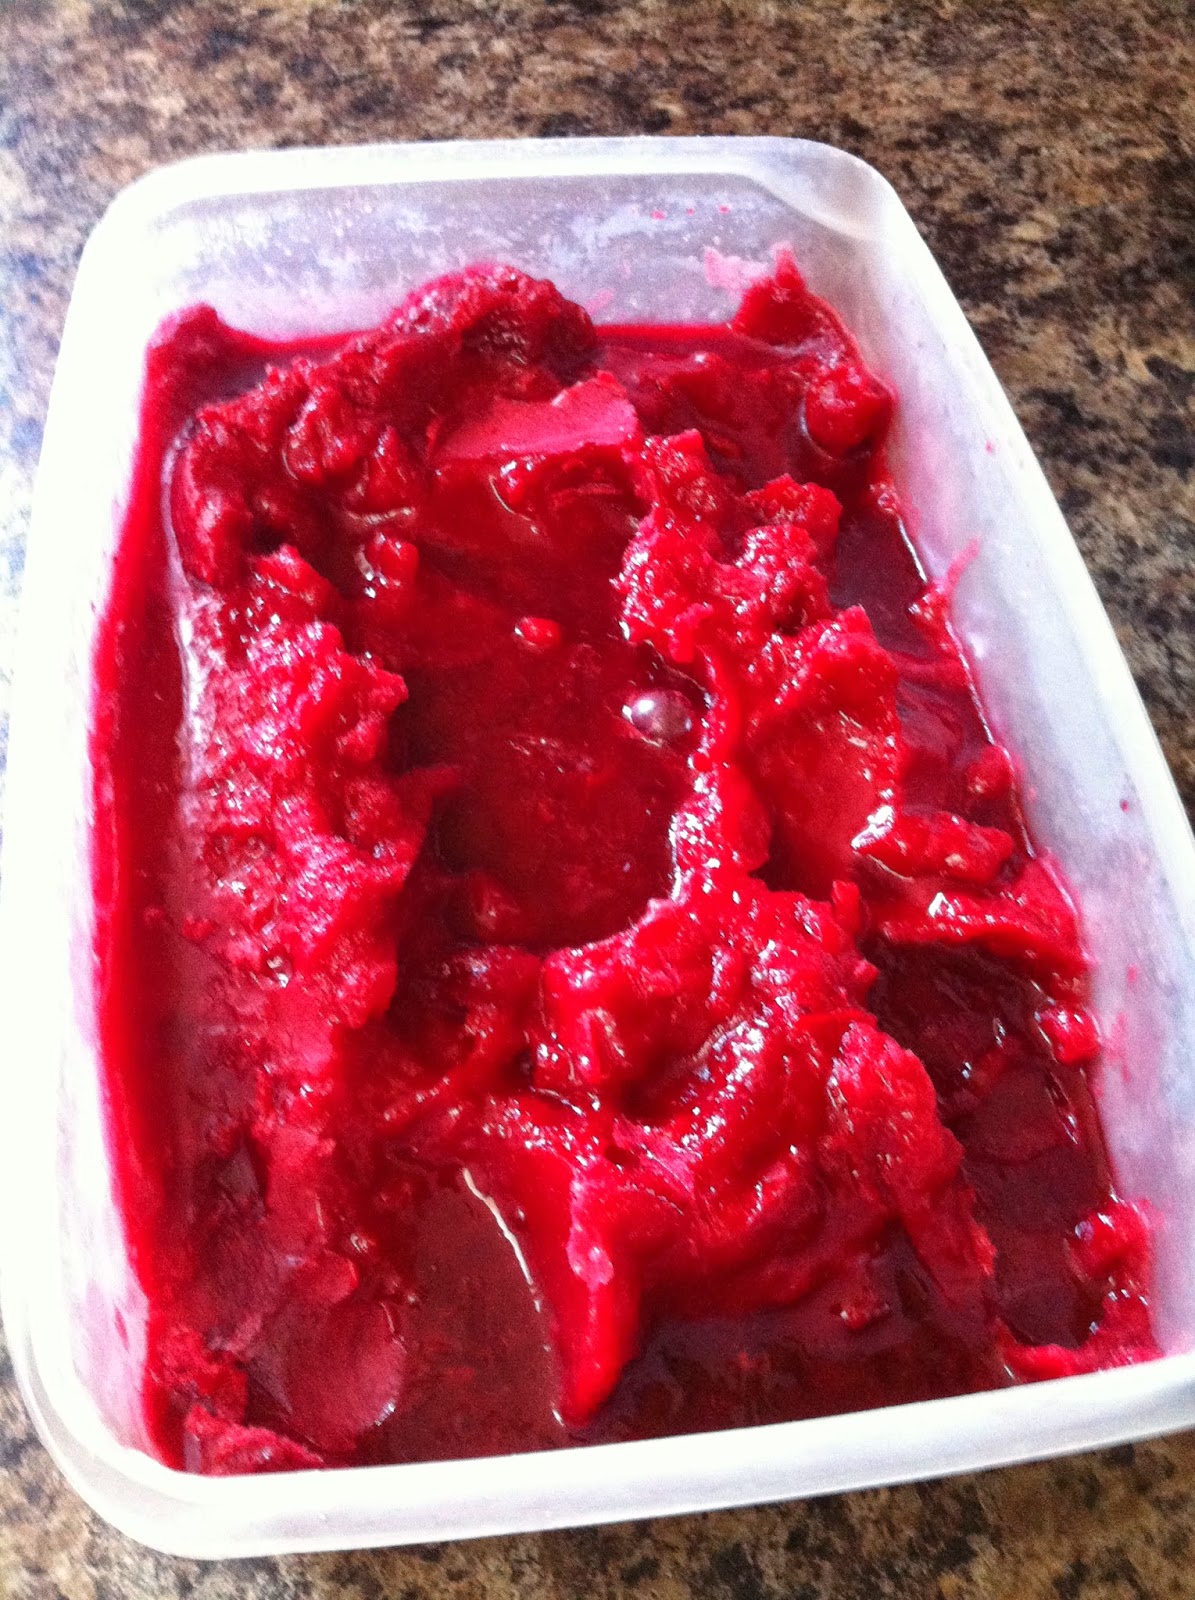
Blackberry Sorbet (dairy free)


This had so, so, so much flavour and I don't think there's anything more to say about this other than that.

Oh, and...Part II of my impromptu blackberry-like berry series.

Recipe from Williams-Sonoma

Ingredients

3 C. Water
2 C. Sugar
6 C. Blackberries
6 Tbsp. Lemon Juice 

Directions

~In a medium saucepan, combine water and sugar, and heat until sugar dissolves.
~Add in berries and cook until rendered down.
~Push mixture through a fine sieve, saving the juice and discarding the seeds and pulp.
~Chill mixture (I sped this up by placing in freezer for ~1.5 hrs).
~Proceed according to ice cream maker instructions.

Enjoy! So delicious and fresh!

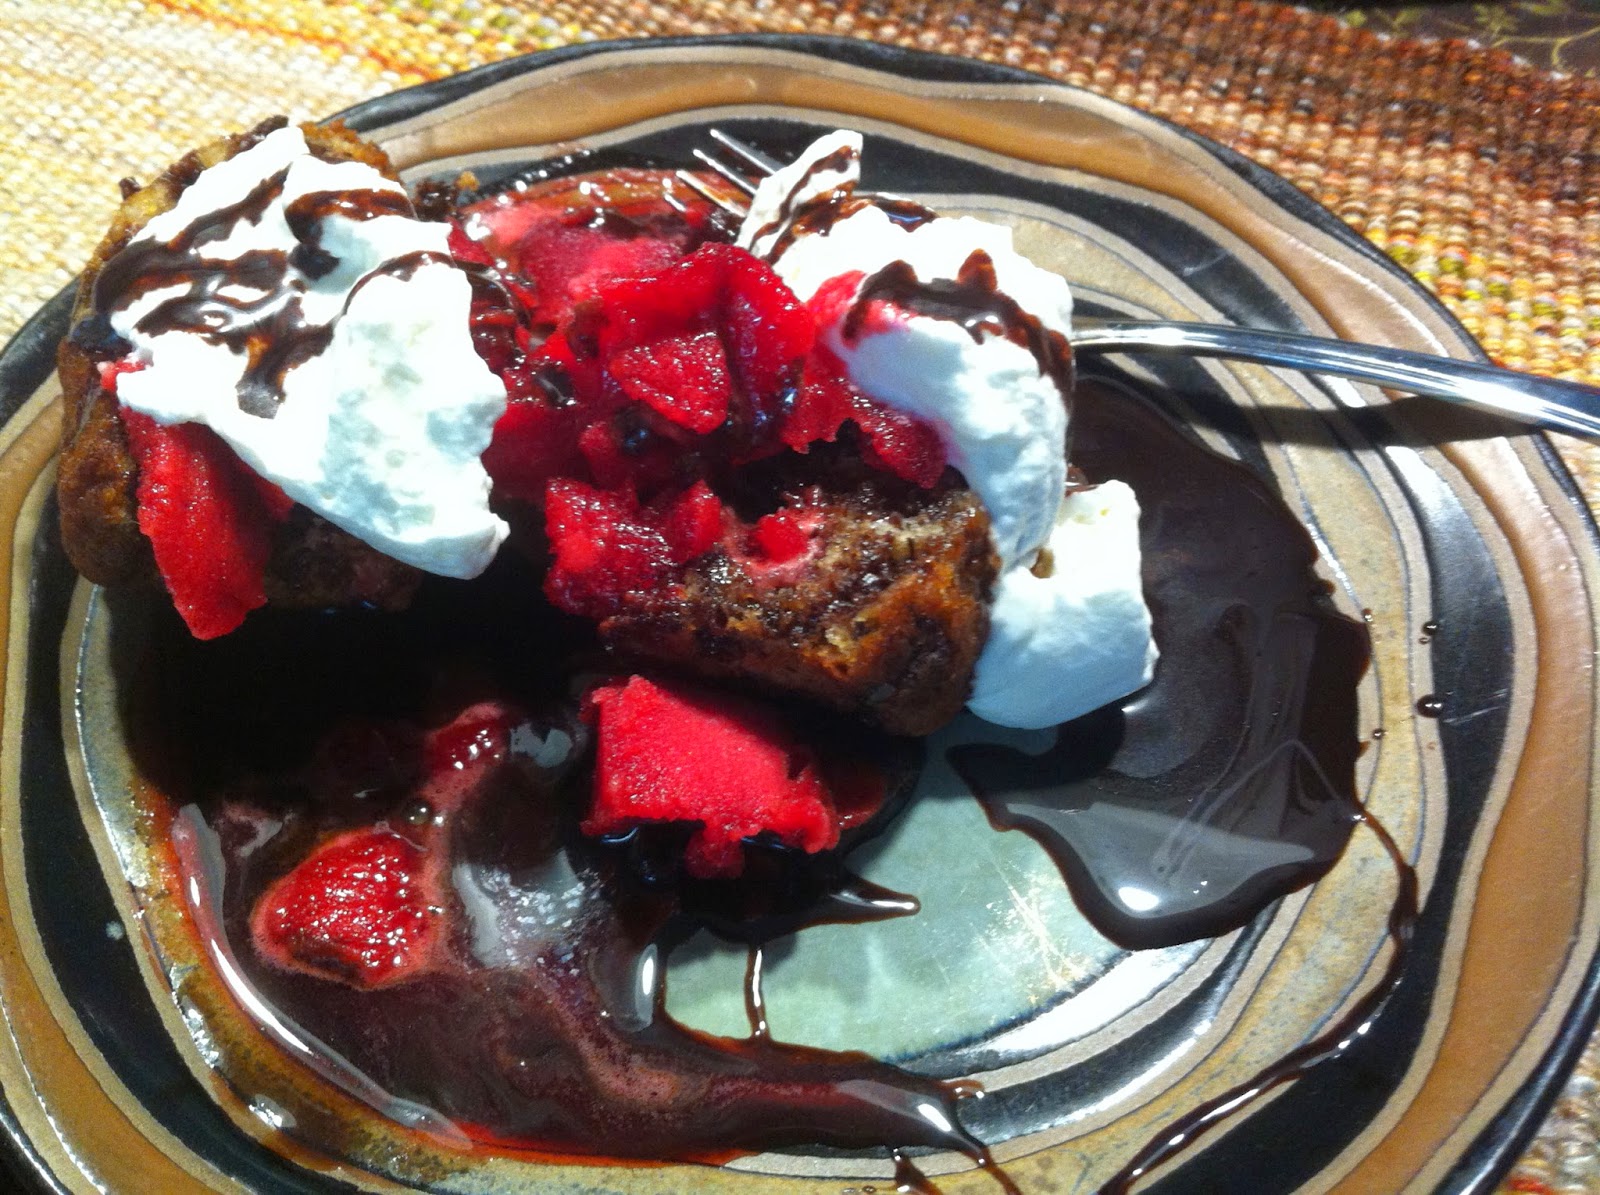
Now this picture doesn't really do this justice. Banana Chocolate Chip Muffins, topped with this sorbet, some fresh whipped cream and chocolate sauce (can be found in here)

Tuesday, 8 July 2014

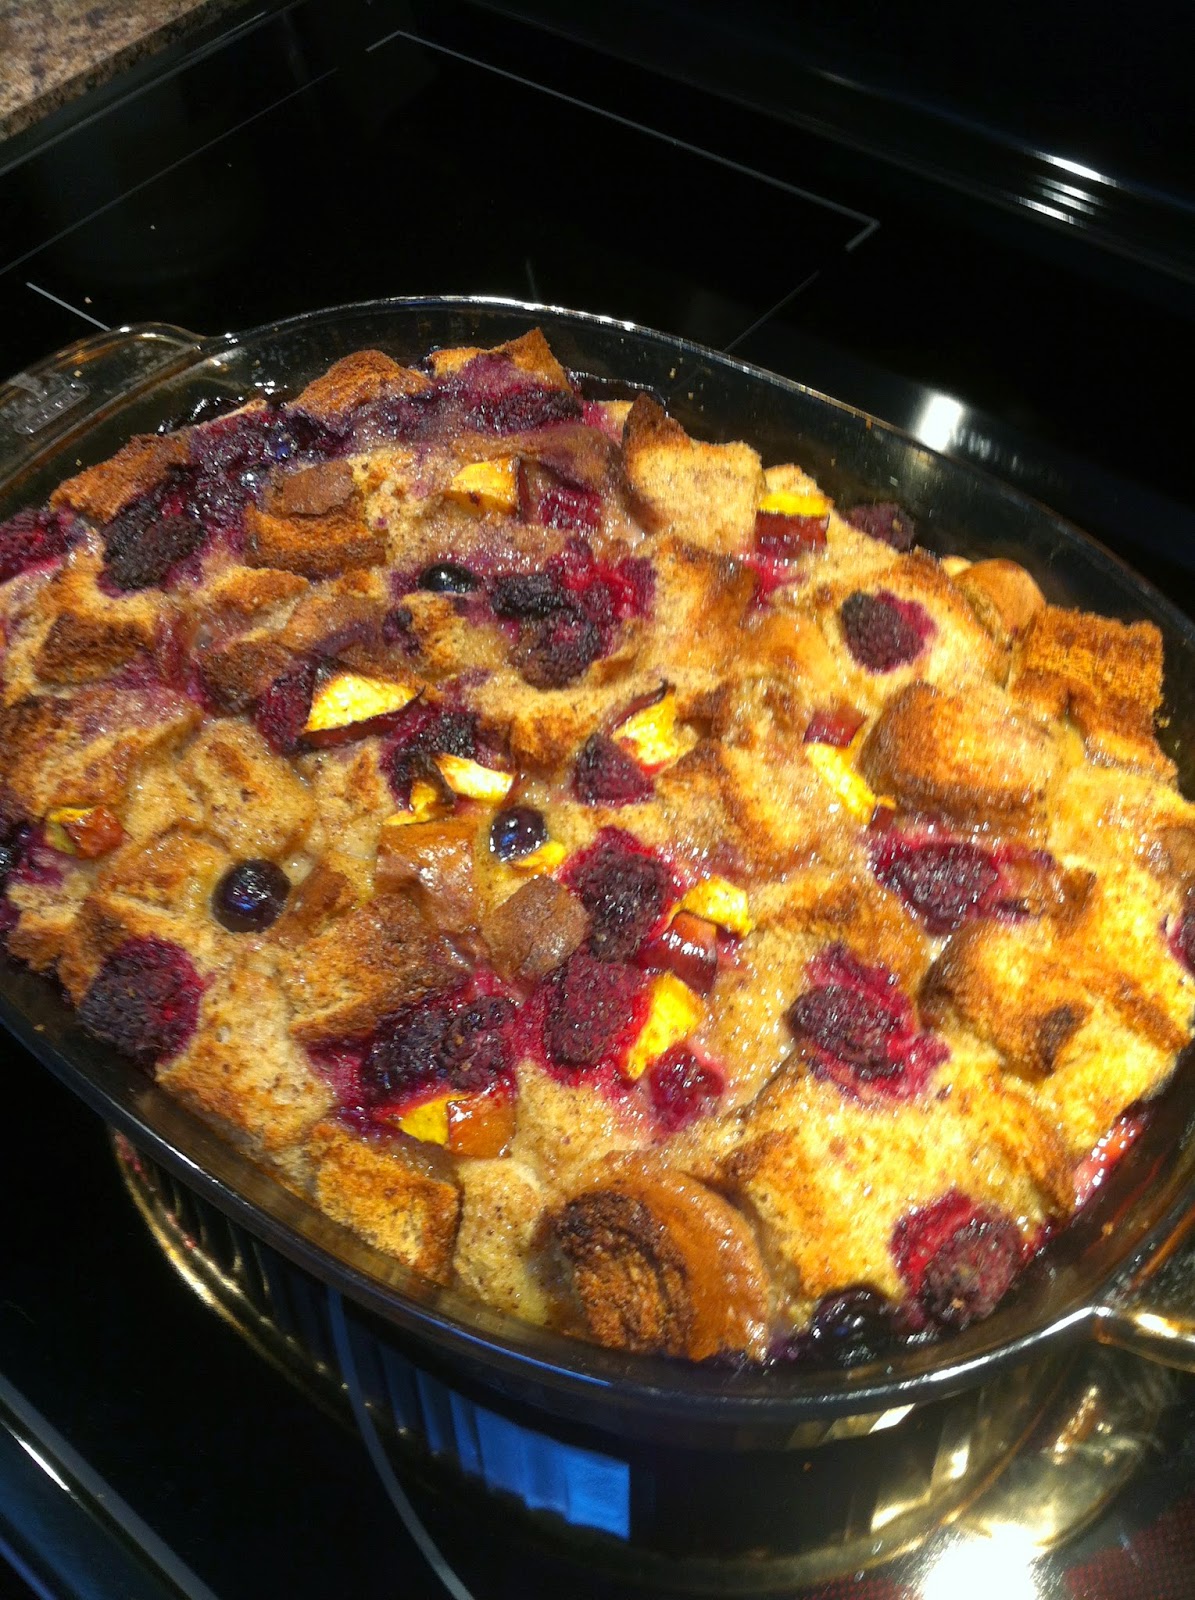
Blackberry French Toast Bake (dairy free)


The place I got this recipe from called it bread pudding and stated they served it for dessert. I wanted french toast however and the recipe looked no different than what ingredients would go into an overnight french toast casserole, so it became breakfast.

We had a surplus of blackberry-like berries and so I had a day of figuring out ways to use them up. This was the first method of the day and it turned out pretty great. I did increase the fruit and decrease the sugar content however. I was expecting to need to put some butter or maple syrup over the top of it, but it was absolutely unnecessary. The only problem was because it needed to be dairy free, I had to use soy milk/almond milk instead of cream / half and half. It wasn't a big deal, but there was just a little bit extra liquid that sat in the bottom because it wasn't as thick of a custard. With the leftovers we just scooped the bread out of the excess moisture, put it in a container and microwaved it the next day and it was great. Not soggy at all.

If you don't want to go dairy free / low fat, check out the original recipe at A Spicy Perspective. Otherwise, just substitute any milk / cream product to a total of five cups. So skim milk, coconut milk, whole milk, whatever works for you.

After eating this, I got to thinking and as great as this was, I tend to have a surplus of sweet breakfast recipes in my arsenal, simply because while I love bacon and fried potatoes, etc. I hate eggs. Omelettes, bennies, scrambled, I can't do it if it's an egg dish. French toast on the other hand, while it has eggs, it is baked into bread, so is more liked a baked good and there is no resemblance to egginess.

So this thinking resulted in me thinking up what I'm going to do next with this recipe. Savoury bread pudding! Some green peppers, onions, mushrooms, maybe some ham or bacon crumbled in and omit the vanilla / cinnamon / nutmeg and replace it with some italian seasonings or poultry seasonings. The poultry would make it very much like my Mom's stuffing however. So we'll see how it goes.

A couple of hints with this recipe though, the recipe I found called for good quality, bakery bread. This was a spur of the moment thing though and I only had two half loaves of sandwich bread in the freezer and it worked just fine. It was even good that it was frozen, because the fluffiness can make it hard to cube, and cutting it frozen worked great.

Also, as for the sugar, I'm thinking it might be good to divide the sugar up and do 1 C. white, 3/4 C. brown or some combo like that. Just to try it out for next time.

Final also...while this may fit in a 9x13 baking dish, I have a bigger casserole dish that I used. It's not as long or wide as it's kind of oval shaped, but it's deeper and it worked well for this. I don't know the exact volume of it, but I just use it when I'm concerned that something might puff up in a 9x13 and spill out.

Serves 8

Ingredients

1 lb Bread, 1 inch cubes
1 1/2 C. Blackberries
1 Nectarine, cubed
1 C. Blueberries
5 C. Milk (see note above. I used 4 C. Almond milk, 1 C. Fat Free Vanilla Soy Milk)
8 Eggs
1 3/4 C. Sugar
1 Tbsp. Vanilla
1 Tsp. Cinnamon
1/2 Tsp. Nutmeg
1/4 Tsp. Salt

Directions

~Preheat oven to 350 F
~Place bread, fruit and berries into baking dish and toss to evenly distribute
~Combine the rest of the ingredients in a separate bowl and whisk until frothy.
~Pour mixture over bread and fruit
~Bake for 1 hr, 15 min. Centre may still look moist, but not soggy
~Let stand for 10 min.

Enjoy

Friday, 4 July 2014

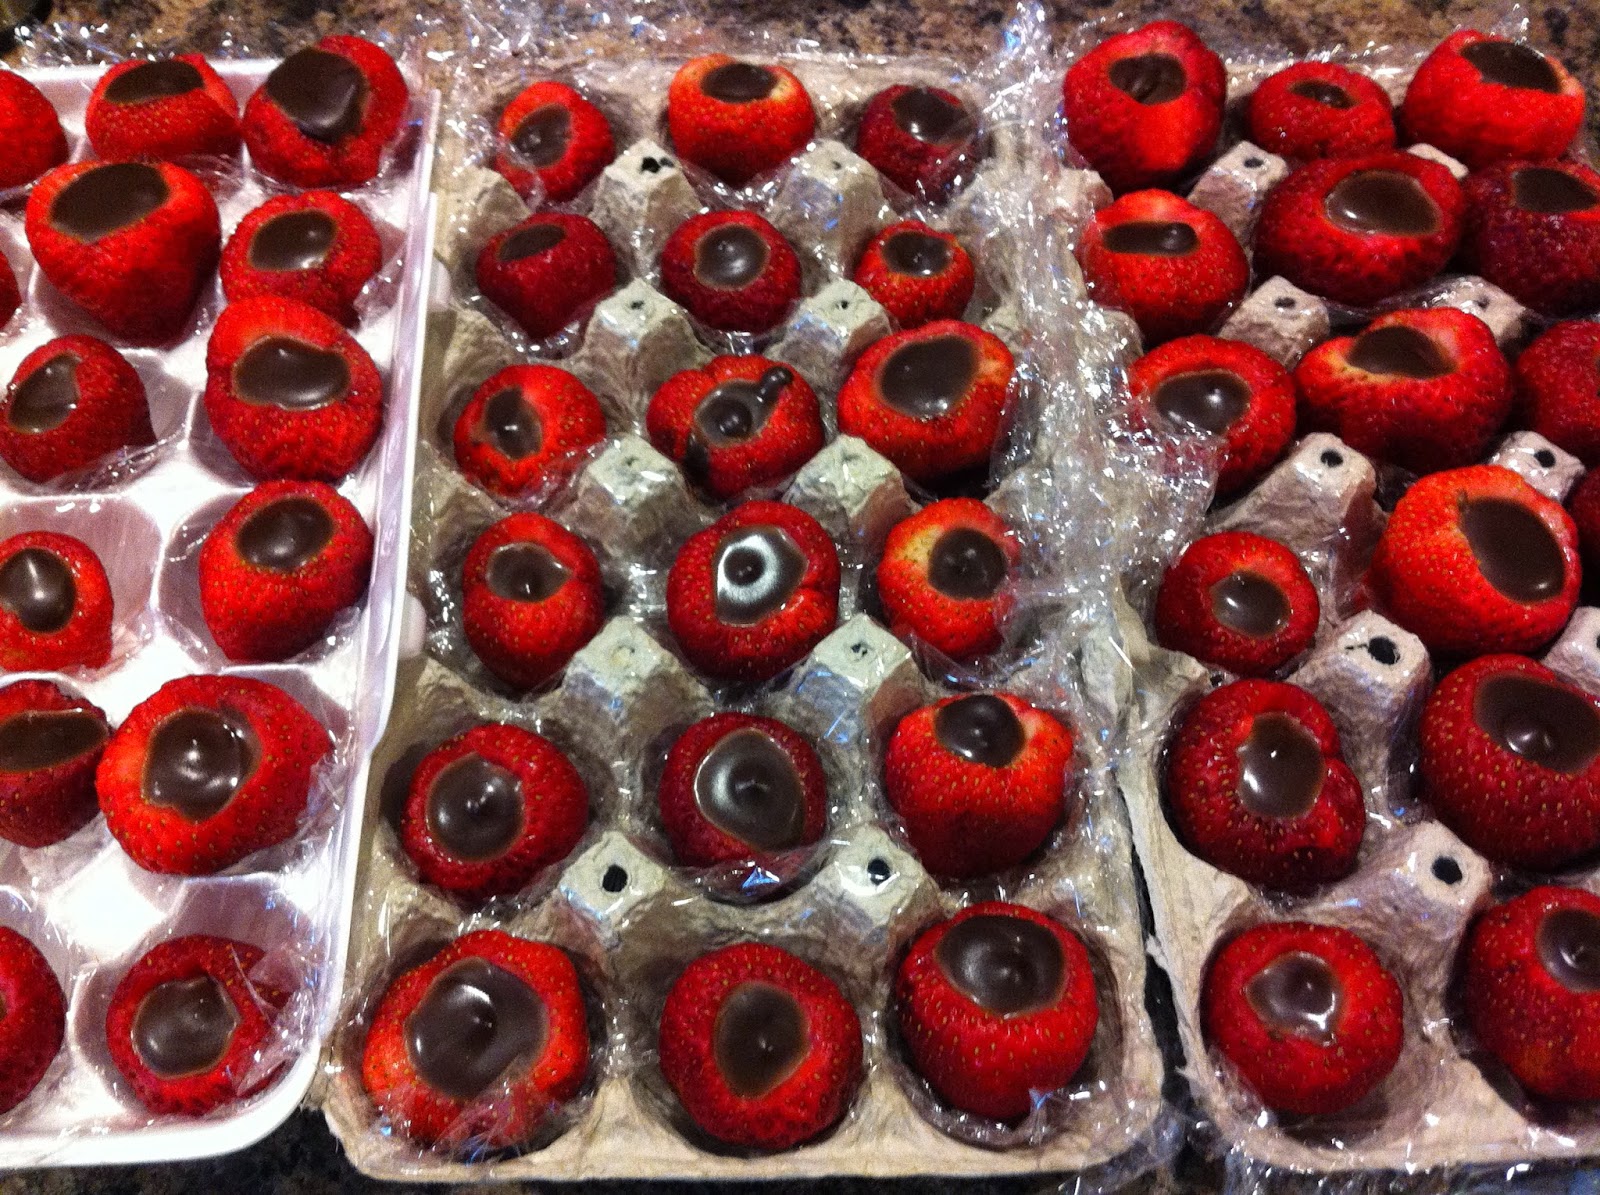
Chocolate (Truffle) Stuffed Strawberries


Well, I feel like a broken record saying this yet again, but our oven broke AGAIN! They are just such useless junk. In under a year and a half, we've had SIX ovens rotate through our kitchen (and four dishwashers but that's a story for another day). Anyway, in between number five which was the one we'd had for maybe 16-17 months (and it never worked properly from day one, I might add), and it blowing up, and number six (the loaner from the appliance store while they put on every imaginable brake so they could delay fixing the oven for the 3rd time), I had to take something for a potluck. Unfortunately, unlike the last stretch of 5-6 months without an oven, it was just that, no oven. We still had a functioning stove top. This time however it fried everything and nothing would work. So long story short, I guess technically now we've had seven ovens move into the kitchen (they finally fixed ours and it's back) and these strawberries are amazing. Which is really all anybody cares about right?

I was originally going to do chocolate dipped strawberries. Then I saw a Pinterest post on how they did reverse chocolate strawberries, where they filled the inside with the chocolate. One thing lead to another and I eventually saw truffle stuffed strawberries on some google treasure hunt. So I used my go-to truffle / ganache recipe that I discovered last Xmas (I don't think I've posted it yet but that's probably because there is most definitely a story to go with that one, and I've been lacking enough time lately to do it justice). Until that time however, the recipe is a slight modification on Anna Olson's Truffles.

Standing each berry up in a plastic wrap lined egg carton was the easiest way to fill these when the ganache was still liquidy. Just spoon it into a piping bag and pipe away. Once it's set though, we just took a spoon and scooped out the hardened truffle and crammed it in (with force) into the hollowed out berry. This way wasn't as pretty, but by that point it was my leftovers and I wasn't presenting them to anybody but myself.

One warning, I made these the night before and then day of had them sit out of the fridge for a couple of hours in a fairly warm room. The juice from the strawberries and the cream created a brown juice that pooled in the bottom of the egg cartons and while they hadn't turned or tasted off in any way, it just wasn't as pretty looking.

On a side note, to provide some contrast I also had some raspberries. In the centre of each one I'd inserted a single chocolate chip upside down (pointed side sticking into the berry) and they looked lke mini versions of these strawberries.

Ingredients

8 oz. Semi-Sweet Chocolate
3/4 C. + 2 Tbsp. (Total 7/8 C.) Heavy Cream
1/2 Tbsp. Vanilla
4 Doz. Strawberries (medium-large), washed and hulled

Directions

~Finely chop chocolate and place in a medium glass bowl
~Heat cream until it just begins to boil.
~Pour cream over chocolate and stir until it melts and is combined
~Allow to cool slightly, while you hull and wash the strawberries
~Line egg cartons with plastic wrap
~Pat strawberries dry and place one in each hole in the egg carton
~Using a piping bag, pipe ganache into each strawberry
~Place in fridge to set

Enjoy!


Sunday, 21 July 2013

Peach Cobbler


This is a Paula Deen Recipe that is absolutely amazing. In our household, we've always made crisps or crumbles. That's all we've ever known. Throw the fruit in the pan and top with some sugar and oats. That sort of thing. The odd time I'd comment that I wanted to make a cobbler and my Mom would whip out so and so's blackberry cobbler recipe. Fruit on the bottom, biscuit like dumplings on the top. Then one day things changed...

I wanted a cobbler. Something different you know. I made a couple attempts at finding a really good cobbler recipe, but nothing really seemed to be out there. A couple of times I combined a couple and came up with my own doughy topping, but it never was what I was looking for.

The whole time this was happening I kept finding these really odd recipes that were calling for a lot of butter to be melted in the bottom of a pan. Batter added next. Followed by fruit on top. How was this supposed to work? I dismissed them every time. To me this just didn't seem possible. How would you get a perfect layer of fruit on the bottom, when you put it on the top?

Finally one recipe convinced me it might be possible (plus logic that heavier things sink helped out), but the recipes all seemed to look like you had fruit on the bottom (dry, ungooey fruit) and a cake (dry again) on the top. Not what I wanted. So again I passed over these recipes.

Until I decided to trust Paula Deen's recipe. Because if she can't make a good cobbler, I don't know who could. And it was magical. Why did every recipe I found fail to mention that the cakieness on the top is anything but dry? As it moves up through the gooey peaches it gets all these amazing flavours. Then once it arrives at the top it has just the right sugar and butter amounts to caramelize and have an almost candy like coating over the top. All the while, the fruit on the bottom is so syrupy and delicious.

Verdict: Delicious. Amazing. So worth it. When can I make it again?

I didn't have enough peaches on hand (or so I thought). I wanted to double this recipe (wasn't necessary, it puffed up A LOT and almost overflowed the dish). So I used half peaches, half rhubarb (also because I had a lot of rhubarb to get rid of). So I just subbed out half of the peaches for rhubarb. Easy peasy. What I didn't expect to happen was for the rhubarb to completely vanish, and the peaches to stay whole. Of all things. If you were to hold a piece of peach and a piece of rhubarb in your hand, it would seem like a no brainer to say that the peach would dissolve and vanish during cooking. It is just so juicy and soft and moist, whereas the rhubarb is so hard. But that is not what happened. So my fruit layer was very much a white gooey syrup with a few peaches throughout. I can't wait to try this with all peaches though. Can't wait.

Ingredients

4 C. Peaches, peeled and sliced
2 C. Sugar, divided
1/2 C. Water
1/2 C. Butter
1 1/2 C. Self Rising Flour  (make own: 1 1/2 C. Flour, 1 Tbsp. Baking Powder, 3/4 Tsp. Salt)
1 1/2 C. Milk
*Optional* Ground cinnamon (for sprinkling)

Directions

~Preheat oven to 350 F
~In a saucepan, combine peaches, 1 C. of the sugar and water and bring to a boil and simmer for 10 minutes. Stirring often.
~Meanwhile, place butter in a 9x13 pan and place in oven until melted
~In a large bowl, combine remaining 1 C. sugar, flour and milk. Mix until clumps are gone.
~Pour flour mixture over melted butter (DON'T STIR).
~Place fruit on top (DON'T STIR)
~Pour syrup (from fruit) gently overtop (DON'T STIR)
~Sprinkle with cinnamon (I don't think this is absolutely crucial. Up to you. The topping has so much flavour already.)
~Bake for 30-45 minutes (I can't remember what my exact time was) until top is dark golden and crispy.

Enjoy

Thursday, 18 July 2013

The Brownie Recipe - Chewy, Ooey, Gooey

Sorry, no picture for this one (is one really needed for a brownie anyway? We all know exactly what they look like, or rather, what they are supposed to look like). By the time I realized that this was the exact recipe I was looking for to call my best brownie recipe, the brownie was no longer worthy of being photographed. I mean, I guess I could go and snap a picture right now of the one remaining corner piece, but I think that saying that there is only one piece remaining says a lot more than a picture ever would.

I just wanted a basic brownie recipe. Was that too much to ask for? One that was gooey and fudgey and had very little flour and cakeyness to it. I also didn't want to add anything to it to make it gooey, like marshmallows. I just wanted a brownie. Well I found it!

I looked through the dozens and dozens of brownie recipes I have saved, to come to two conclusions. 1) 99% of the brownie recipes I have saved, all have something special done to them. Oreos, s'mores, rocky road, nutella, etc., and 2) the two recipes that were just plain old brownies, happened to be the exact same recipe. So armed with the knowledge that at least two people found this recipe to be worthwhile and posted it, I set out to make them, and I'm glad I did. It was so good. Like make your teeth hurt sweet, which is absolutely perfect.

I did change up the sugars a bit, like a lot of the reviewers commented they did. Instead of using 3 C. of white sugar, I did half and half of brown and white. I'm sure it would be great any way, but I know this way was delicious.

Recipe from All Recipes

Ingredients

1 C. Butter, melted
1 1/2 C. Sugar
1 1/2 C. Brown Sugar
4 Tsp. Vanilla
4 Eggs
1 1/2 C. Flour
1 C. Cocoa
1 Tsp. Salt
1 C. Chocolate Chips

Directions

~Preheat oven to 350 F and grease a 9x13 pan
~Combine butter, sugars and vanilla and whisk to combine. Add in eggs and whisk until incorporated
~Stir together flour, cocoa and salt in a separate bowl.
~Add dry into wet and stir until mixed.
~Stir in chocolate chips
~Spread into pan
~Bake for 30 minutes

Enjoy

Wednesday, 17 July 2013

Pudding Cookies


This is another one of those recipes I have copied down from two different spots at two different times and go back to find out they are the same recipe.

I double this recipe and so that means you use two packages of pudding. The recipe calls for vanilla, but I usually don't have two of the same flavours on hand at the same time. So I have ended up making vanilla-lemon one time, and vanilla-chocolate another. Both good, but I think I'll stick with the vanilla-lemon or vanilla-vanilla combo, just because the cookies are supposed to be chocolate chip cookies with a kick. As soon as you add the chocolate pudding, it makes them look like you've added cocoa to them, and in my eyes, that's a totally different cookie.

It's taken me awhile to type this up, and I'm realizing I didn't mark down how many cookies this made (it was a lot) or how much chocolate chips I added. Oops. The original recipe calls for a 12 oz bag of chips, so I'll just put that, but because I scoop from the Costco size box, I always measure in cups not bags. So I'm guessing it was somewhere between 1 and 2 cups, but that's completely dependent on chocolate preference, etc. Just do what you want. I'm also realizing that there is no salt in this recipe. Which is really strange. Hmm

Recipe from Kraft Foods

Ingredients

1 C. Butter
3/4 C. Brown Sugar
1/4 C. White Sugar
1 Pkg. (4 serving size) Instant Vanilla Pudding
1 Tsp. Vanilla
2 Eggs
2 1/4 C. Flour
1 Tsp. Baking Soda
1 12 oz Bag Chocolate Chips

Directions

~Preheat oven to 375 F
~Cream together butter and sugars.
~Add in pudding and vanilla, then the eggs.
~Mix in the flour and baking soda
~Stir in the chips
~Drop onto cookie sheet and bake for 10 minutes.
~Cool on rack.

Enjoy

Friday, 5 July 2013

Margarita Donuts


As soon as I saw this recipe I knew I had to try it. But donuts aren't something we eat a lot of and so I was waiting for the right opportunity to make them. I was really intrigued by the idea and finally I got the chance to try them.

I'm going to critique these because I really like the idea of them, but the donut itself really did nothing for me. The margarita curd filling was absolutely amazing and I am trying to think of something else to make that would use it because it is so great. The donut dough portion was not the right thing for this amazing curd.

I've never tried making donuts before. I don't deep fry anything and so the idea of a baked donut intrigued me. Unfortunately, this baked donut tasted a lot like a dinner bun. They looked beautiful and very much like a donut, but when you bit into them they were just like eating bread. I don't know if this is how all baked donuts turn out, or if this was just because of the recipe.

The other problem with this was I made these and then put them in a container and carted them around for eating the next day. A mistake. I don't know why I thought this would be a good idea. You'd never eat a bought donut the next day. They sweat when stored in a container or even a paper bag and they aren't good. Basically, I ended up throwing out almost a dozen and a half donuts because of this mistake.

I would like to try them again, but with a different donut dough. I'll have to do a bit of research because I'm really not at all familiar with donuts and then maybe you'll hear back from me some day. The one good thing about this recipe though was that you did not need to deep fry them, and you didn't need one of the fancy donut pans.

Recipe from Searching for Dessert.

Makes 12 donuts

Ingredients

Donuts
1 Heaping Tsp. Instant Yeast
6 1/2 Tsp. Sugar
1 1/4 C. Flour
1/2 C. Warm Water
1/2 Tsp. Salt
1/4 Tsp. Baking Powder
1 1/2 Tbsp. Butter, melted 

Margarita Curd
6 Tbsp. Butter, melted
6 Tbsp. Sugar
Zest of 2 Limes
1/4 C. Lime Juice
1 1/2 Tbsp. Tequila
1 Egg


Glaze
1/4 C. Berry Sugar
1 Tsp. Orange Zest (1/2 Orange)
1-2 Tbsp. Butter, melted

Directions

Donuts
~Combine all ingredients of the bowl of an electric mixer. Mix to combine and then knead for 5 minutes. If dough is very sticky, increase flour until it forms a nice ball of dough.
~Place dough in an oiled bowl and cover with an oiled piece of plastic wrap and a towel and place in a warm spot and allow to rise to double it's size (1 hour) or place in a cool spot and allow to rise overnight.
~Preheat oven to 350 F.
~Roll dough out onto a floured surface with a floured rolling pin to about a 1/4 inch in thickness.
~Using a 3 inch round cookie cutter (or glass) cut rounds from the dough.
~Place on a floured cookie sheet.
~Cover loosely with oiled plastic wrap and allow to sit and rise for 45 minutes - 1 hour.
~Bake for 12-13 minutes or until the edges just begin to turn golden.
~Allow to cool.

Margarita Curd
~Combine butter and sugar in a microwave safe bowl and whisk until sugars have dissolved.
~Add zest, juice and tequila and whisk.
~Add in egg and whisk well.
~Place mixture in microwave and microwave for 30 second intervals, whisking in between each time. For a total of 3-4 minutes or until mixture remains on the back of a spoon.
~Run mixture through a sieve.
~Place in refrigerator to set.

Glaze
~Combine sugar and zest and mix well to evenly coat.

~With a toothpick, poke a hole into one side and wiggle it around inside to open up the inside.
~With a pastry bag outfitted with a narrow and long attachment, pipe curd into the donut.
~Brush donut with melted butter and roll in the sugar/zest mixture.
~Allow butter to set and then eat right away.

Enjoy


Monday, 1 July 2013

Uber Thick & Chewy Chocolate Chip Cookies


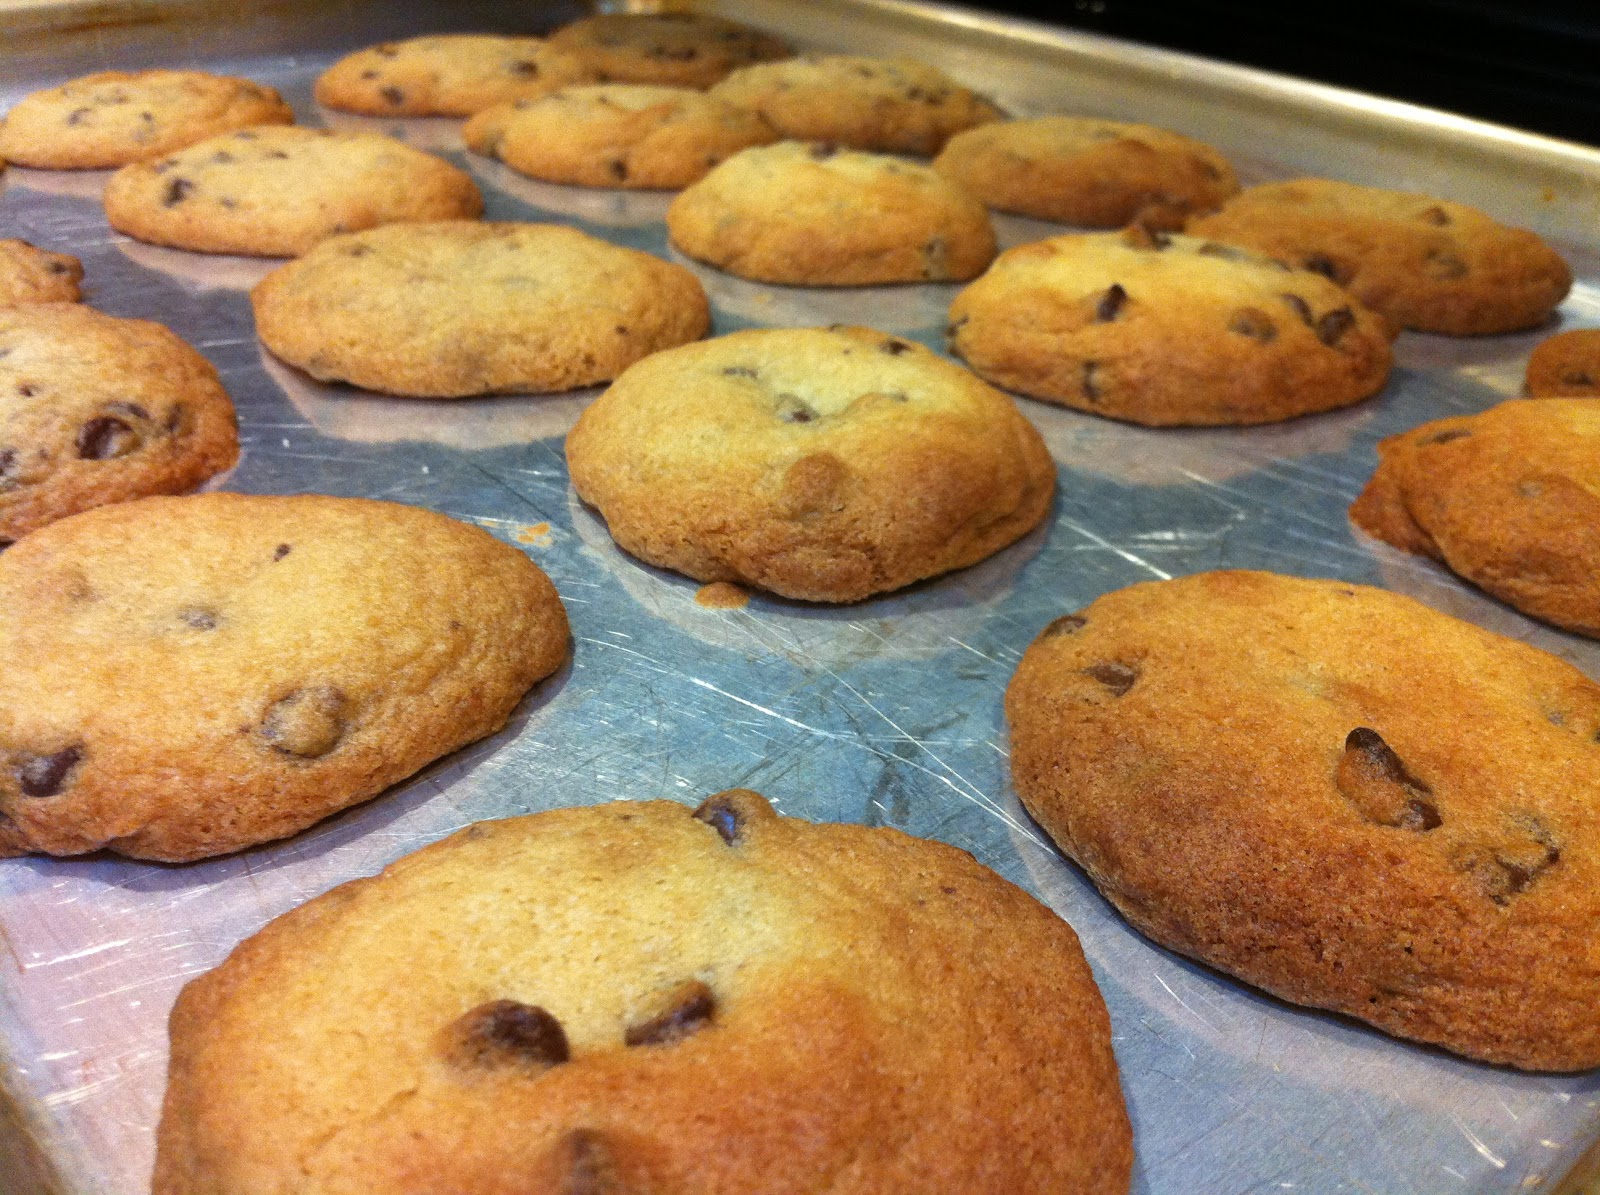
I think I have done it! I have finally tracked down the best chewy chocolate chip cookie out there. They look beautiful, they are thick (there is a trick I've never tried before and it worked perfectly) and they have almost too much chocolate in them. I did say almost.

This recipe utilizes cornstarch, which is something I have tried before and it does make them chewier. Up until today, I thought that this recipe was my favourite chocolate chip cookie. When I actually compare the recipe it is pretty much identical except for a few small tweaks. I guess I know what ratio of ingredients I like in my cookies. One of these being, I like more brown sugar to white sugar as it gives it a fuller flavour in my eyes.

But, this wasn't the only thing different than other cookies out there. It used melted butter and an extra egg yolk which is new to me for cookie recipes. I was very intrigued from the very beginning when I saw this recipe and knew I had to give it a go.

All that aside, what is even more great is that they turned out to be really thick and they were dense and almost cakey. I followed the instructions that said to roll the dough into balls and make them slightly taller than they are wide. So when they bake they stay thick. I rolled the dough into a ball in my hands and then just gave the ball a quick one sided roll between my hands again to form it into more of a cylinder. I then placed it on the cookie sheet and pushed it down a bit from the top so it would have a flat bottom and not roll onto its side during transportation over to the oven. It worked beautifully. I made these a second time though and just rolled them into a normal ball, and the cookies still turned out incredibly thick as well, they just didn't have that little extra oomph. So either way really works.

The only thing I did differently from the original recipe is, like always, I increased the amount of vanilla.

One mistake I did make was on my 3rd cookie sheet I put in the oven (I had made a double batch) I had two extra cookie dough balls. Not wanting to deal with having to clean up one of my already used sheets for just 2 cookies I decided to rearrange and try to cram these extras onto the sheet. Unfortunately, my 3rd cookie sheet is the smaller of them all and it was already crammed to begin with. When I pulled them out of the oven it looked like I had make chocolate chip cookie monkey bread. It all tasted the same, but as a warning, because these are rolled taller, they appear like you can squish them onto a cookie sheet because they don't take up as much of a footprint when unbaked. Just remember that they do spread (even though they still are thick), so watch for that.


Warning, if you like crunchy, well baked cookies stay away. You've been warned.

This amazing recipe is from Sally's Baking Addiction.

Makes 2 1/2-3 dozen cookies

Ingredients

2 1/4 C. Flour
1 Tsp. Baking Soda
1 1/2 Tsp. Cornstarch
1/2 Tsp. Salt
3/4 C. Butter, melted
3/4 C. Brown Sugar, loosely packed
1/2 C. White Sugar
1 Egg + 1 Egg Yolk
2 1/4 Tsp. Vanilla
1 C. Chocolate Chips

Directions

~Combine dry ingredients (flour, soda, cornstarch & salt) in a medium bowl. Toss to combine.
~In a large bowl whisk together butter and sugars until the sugars have dissolved and the mixture is smooth. Add the eggs and vanilla and whisk until combined.
~Pour dry ingredients into wet and mix by hand.
~Add chocolate chips and mix in.
~Refrigerate for a couple of hours (I ran out of time and they sat over night in the fridge).
~Preheat oven to 325 F.
~Roll dough into balls and then shape into taller cylinders so they are taller than they are wide. Place on cookie sheet.
~Bake for 8-10 minutes or until they just begin the turn golden around the edges. Centre will still be soft and unbaked.

Enjoy

Tuesday, 4 June 2013

Gooey S'more Brownies-1st Blogiversary!


I'm back! It felt good to be back in the kitchen after 7 weeks away. Now I can say I was in Europe, and let me tell you, there is two very important things the Europeans don't do well, Brownies & Chocolate Chip Cookies. They have biscuits, and the one brownie I had (no it wasn't in Amsterdam) was supposed to be the 'to die for brownie' but it really wasn't. Kinda disappointing considering I thought I had hit the jackpot when I found it on my Birthday and opted for it over a slice of cake. I made it home and my first day I avoided the kitchen, not because I wanted to, but because I had a lot of stuff to do. Day two though and I was back. I was just going to make some Toll House Cookies, because they had really turned out well the last time I made them in the new oven. But then I started thinking about Brownies, and there really wasn't any further internal debating needed. So S'more Brownies it was because I miraculously had all the specialty ingredients needed and they weren't even old and stale.

But now I'm posting this to you on my one year Blogiversary. Which is pretty cool. If you want the whole sentimental spiel about me and blogging you should check out my 100th post. I really don't have anything else to say that I didn't say there. Especially because I've been out of the loop for awhile now.

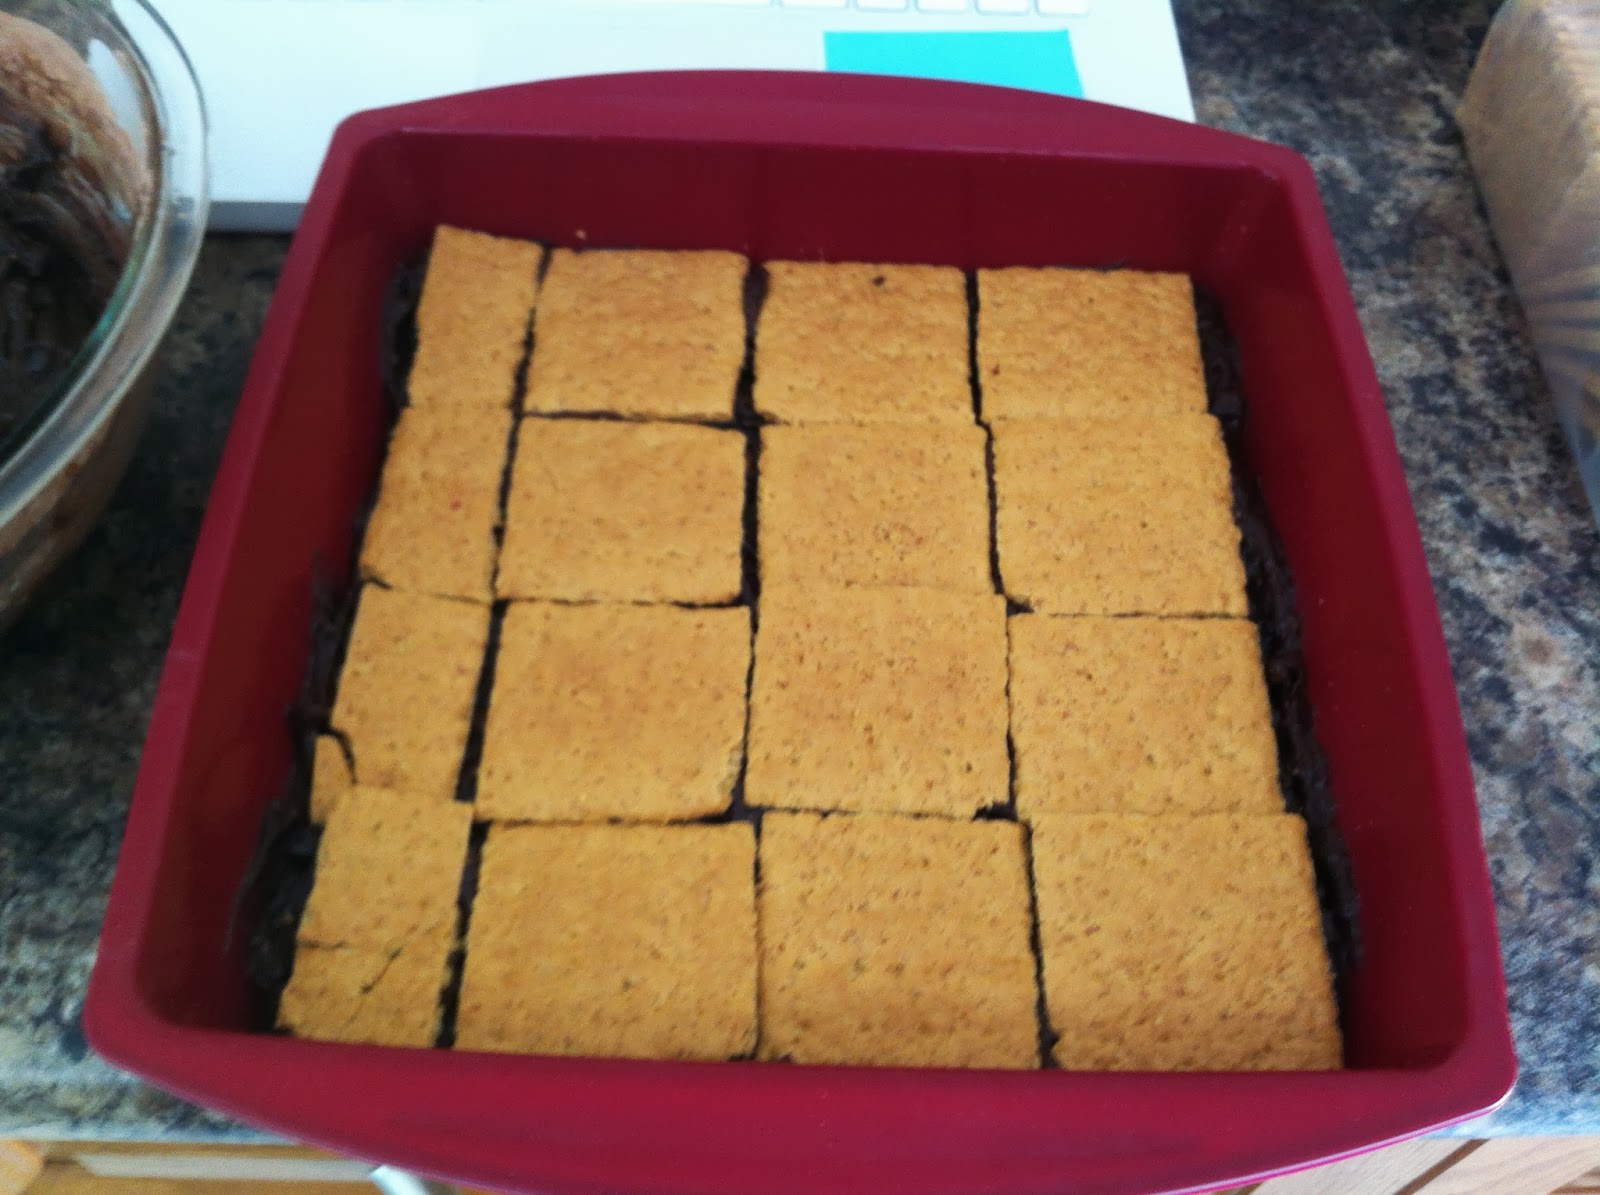
They tasted amazing. I would not recommend removing them from the pan though until they are absolutely cooled. The bottom layer even slightly warm was just a mush of brownie pudding. But oh so tasty brownie pudding. I really liked my silicone baking dish for this one though. Because of the marshmallows in it and all the sugars, I figure it might be a bit tricky to get the edge pieces out of a glass dish.

The marshmallows did amazing things. Only in a few places are there still marshmallows left in marshmallow form as you know it. Everywhere else they simply melted into the brownie batter, making a chewy brownie with a really crisp top. One thing I may consider next time is to layer Brownie, Marshmallow, Graham Cracker, Brownie instead of doing Brownie, Graham Cracker, Marshmallow, Brownie. My original thought was that it'll be a lot easier to spread this thick brownie batter on the top layer over smooth graham crackers, than it would be to try and completely cover marshmallows that just want to jump around. I know it'll change the texture of the brownie layers though because the marshmallows would then melt over the bottom brownie layer, instead of under the top layer (the graham crackers softened up perfectly, but never dissolved. They created a border between the two brownie layers). I'm definitely going to have to try this other way and let you know what method I prefer. I have a feeling that it'll make for a completely different textured brownie.

Wow, that was easy. I've been blogging ever night about my trip on a different blog and I've been typing it up on my phone because I didn't take my laptop with me. This post came together so quickly being able to type with a full keyboard. Plus, I've been home for 3 days now and I still can't get over how big my laptop screen feels.

Recipe adapted from The Royal Cook & The Big Green Bowl.

Makes 10x10 pan


Ingredients

1/2 C. Whole Wheat Flour
1/2 C. All Purpose Flour
2/3 C. Cocoa 
1/2 Tsp. Salt
1 C. Butter, melted
2 C. Sugar
3 Eggs
1 1/2 Tsp. Vanilla
1 C. Chocolate Chips (I used mini ones)
2 C. Mini Marshmallows
14 Graham Crackers (14 Canadian ones, they are different than the American, but you can sub the American in just fine, except the number I'm calling for won't be the same)

Directions

~Preheat oven to 350 F.
~In a medium bowl combine flours, cocoa and salt.
~In a large microwave safe bowl melt butter. Stir in sugars.
~Add in Eggs and Vanilla. Stir.
~Pour dry ingredients into wet and stir by hand until just combined.
~Stir in chocolate chips.
~Spread half of the brownie batter into a greased pan (I used a 10x10 silicone dish).
~Top with a layer of (whole, not crushed) graham crackers, followed by the mini marshmallows.
~Spread the remaining brownie batter overtop the marshmallows and carefully try to spread it out and cover all the marshmallows.
~Bake for 26-28 minutes or until top is crispy and centre still feels soft.
~Cool completely (very important, trust me) before slicing and removing from pan.

Enjoy


Sunday, 3 March 2013

Creamy Peppermint Hot Chocolate (Minus the Cream)


I had to think of something last minute to post here. The reason being was I didn't get to say goodbye in my last post. So goodbye.

Okay, so you probably want a little more than that. Well, I'm going on an adventure and am going to be away from this blog for a bit. I'll be back though. I promise.

Anyway, this drink. It does have alcohol in it, and a type of alcohol I bought because I had to try it but was very sceptical about it. Turns out it really really works (for some things). I'm talking about whipped cream vodka (cake batter is the next one on the list to try). It took me a bit to find something I would want to drink with whipped cream flavouring in it but I can now say it is very good for two things: creamsicle screwdrivers (just your typical vodka and orange with an added creamyness to it) and hot chocolate.

With the hot chocolate I do find you have to balance the alcohols out. I love peppermint hot chocolates but the peppermint schnapps makes the drinks taste more bitter (and I like a sweeter, creamier, milk chocolate hot chocolate), and the whipped cream vodka on its own makes the hot chocolate excessively sweet. So do a 1:1 ratio of the two and it perfectly balances the drink out. The amount of each that I use doesn't make a strong drink, it just adds a hint of flavour. So if you want it stronger feel free to increase the quantities. What I really like about the vodka is that it makes my hot chocolates seem thicker and creamier (it's the word of the day) without having to make it with milk. This was a really good thing when I was limiting the amount of dairy I was consuming. Up until figuring this out I would rather have no hot chocolate than one made with water. But make it with water and add in this vodka and it's all good. Really.

So how do you make this wonderful thing I'm bragging about.

Ingredient

3/4 C. Boiling Water
1 Pkg. Hot Chocolate Mix
1/2 oz Whipped Cream Vodka
1/2 oz Peppermint Schnapps
*Optional* Whipped Cream

Directions

~Boil the water and pour into a mug.
~Stir in hot chocolate mix until dissolved.
~Mix in alcohols and stir.
~Top with whipped cream if desired.

Enjoy

Friday, 1 March 2013

Blueberry Lemon Curd Galette


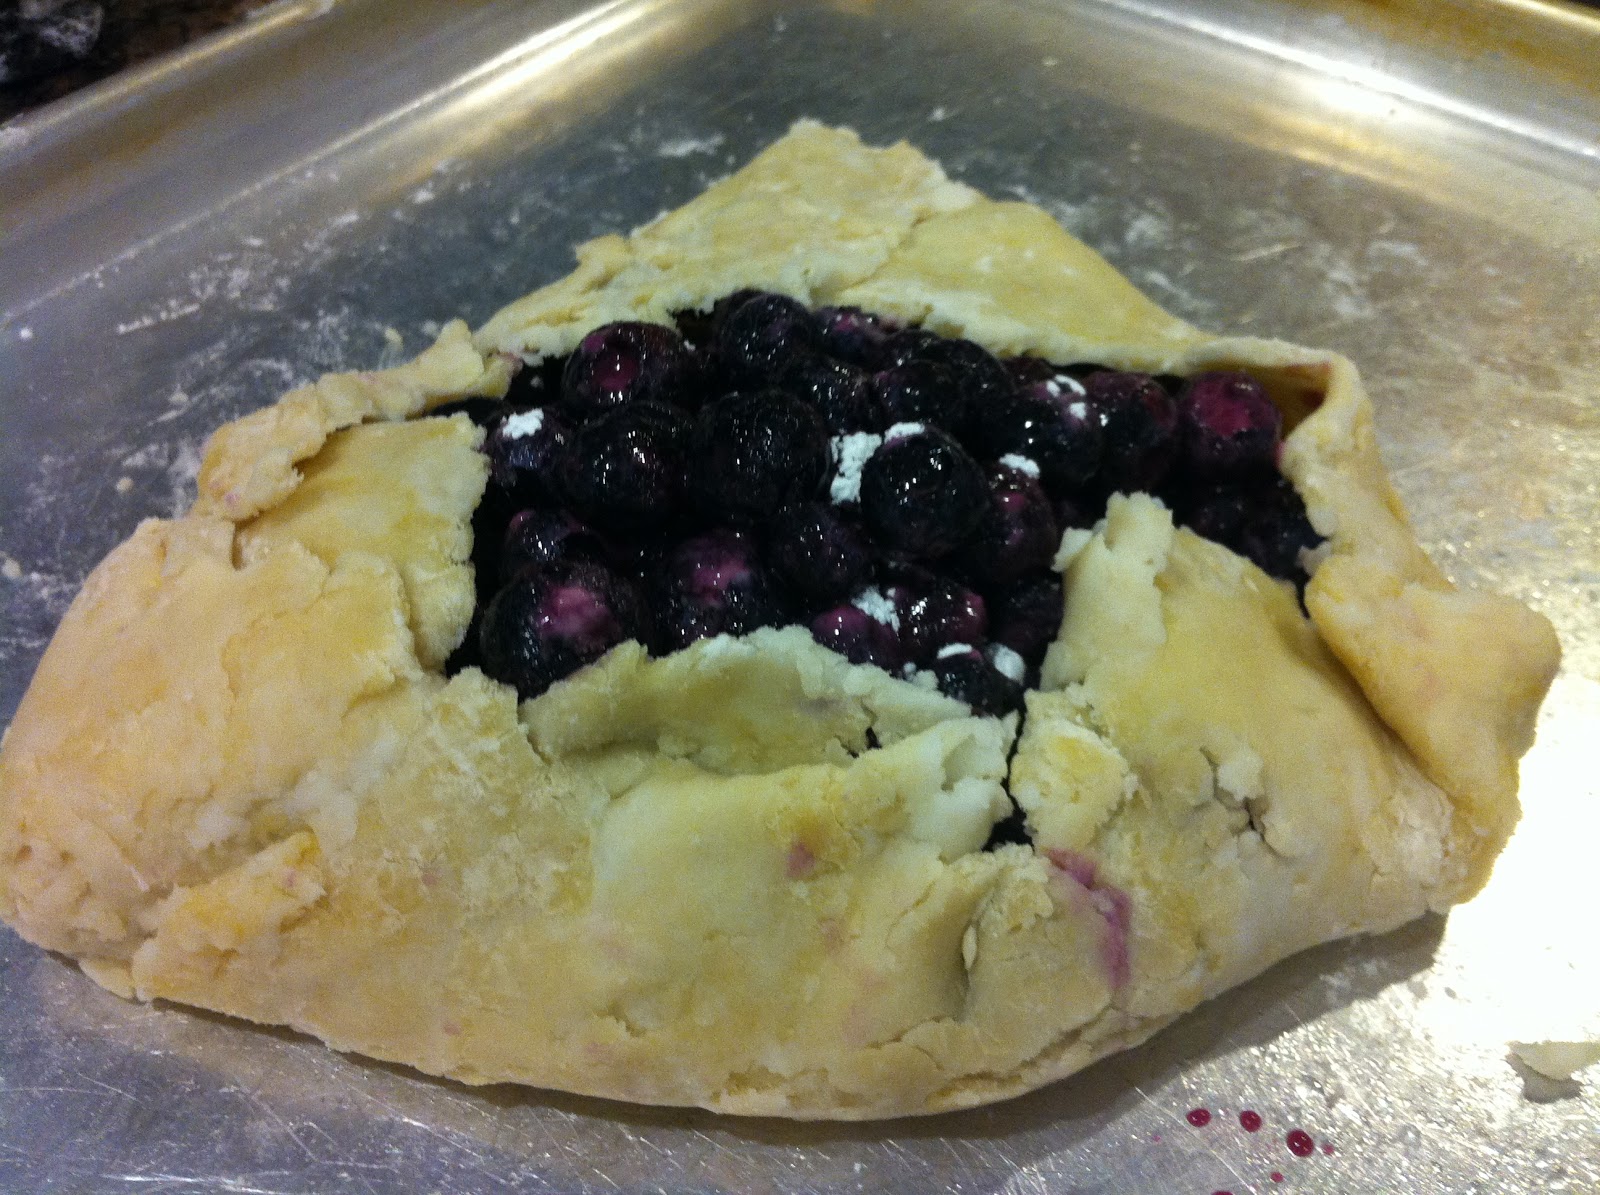
Okay, I know this looks messy and like I ruined my cookie sheet but I can assure you it actually came off the sheet beautifully and once it was on a plate you would never know that all the innards leaked out of it.

The beautiful thing about this is that it looks about as far from perfect as could be, but the rustic look is in right? Right? So really, imperfect is perfect now or at least that's what I'm telling myself. The other great thing about this is that you can really make them as big or as small as you want. Because you aren't limited to the size of a pie pan. I ended up making 4 of these (we cut them into 3 or 4 pieces) and I used about 1/2 - 2/3 of this pastry recipe. It was a great recipe to use up the leftover pastry from the chicken pot pies because I was able to make as many of these as I wanted at the size that I had pastry available for. It wasn't like trying to stretch not enough dough into a pie pan. Plus with my little bit of scraps I was going to throw out at the end I decided to do something with them as well so scroll down to the bottom for that.


The pastry really didn't roll out that well.

But it all tastes the same in the end


Makes 2 Galettes

Ingredients

1/3 Batch of Pastry, divided in 2 
4 C. Blueberries (I used frozen, fresh would work too)
Lemon Curd
5 Tbsp. Sugar
2 Tbsp. Cornstarch
1 Egg
Sugar

Directions

~Preheat oven to 350 F
~Grease a cookie sheet or large baking dish.
~Place 2 rolled out pastry circles onto greased pan (I slid 3 or 4 knives under the edges of the pastry to make it easier to not over-fill it and it helped to just flip the pastry up over the edges when done - see picture above if confused with what I'm trying to say here.)
~Spread lemon curd over the pastry, leaving about an inch around the edge.
~In a bowl combine berries, sugar and cornstarch. Toss to coat evenly.
~Scoop berries on top of lemon curd.
~Flip up edges of pastry over the berries and with your hands press together to seal.
~Bake for 30-35 min. or until pastry is golden.

Enjoy

And this is what you can do with the scraps. Roll it out into a long rectangle, scoop a bit of curd in the centre and fold it up and press the edges together with your hands to seal. Bake with the galette at 350 F but for a little less time (say 25-30 min.), just watch them and when they are golden they are perfect.

Tuesday, 26 February 2013

Toll House Cookies


This was my go-to recipe for chocolate chip cookies from the very beginning. I guess you could say it was where my love of baking really began. I'd spent a lot of time leafing through our cookie cookbook searching for the next great thing to make (if only I had known about food blogs then), but I always seemed to find my way back to page 92, nine times out of ten. Even though I haven't made these in probably a year, I did not forget page 92 when I opened up the book this time. I made this recipe for years almost exclusively before I ever knew what a food blog was. Then I kinda got bored of it (too much of a good thing) and started to search elsewhere for a good recipe. Until discovering food blogs I never found one that I liked as much. Since beginning this blog (and getting my KA mixer) I haven't made these cookies. I made other ones and a few recipes I swore hands down were better. More flavour, more chewy, you get the picture. Well I take it all back. Ever since getting our new oven, the two recipes that as of late I would say were the best cookies really haven't been cooking up well. So I decided to go back to my good old faithful Toll House recipe, a recipe I have yet to make in my mixer. Actually I think I tried making this in my first mixer (the one that broke and was way, way, way too small for me), but I don't count that because the mixer didn't get to work it's magic on the ingredients. But my new mixer...I'll say it again, you never know what creaming butter and sugar truly means until you make cookies in a stand mixer. The hand held mixer just doesn't even come close.

So back to the results of the cookies. They were amazing. I ate some warm and they were the gooiest things I'd ever eaten, they fell apart in my hands. But the dough before baking was amazing. It was silky and light and fluffy (basically whipped is the word to describe it), instead of thick and chunky like my other recipes have been, probably due to their being quite a bit more butter and eggs in this recipe than others (and you bake at 375 vs. 350 so really it is a significant difference from other recipes). So the end result was that these cookies probably tasted close to the same as the recipe I remembered but the texture was so much better. I feel like I've found a whole new cookie recipe. The only think about these cookies was they went pretty flat and almost concave (something I've never really experience with this recipe or other cookie recipes seeing as I usually opt for a chewy and thick cookie recipe), and typically I associate flat cookies with crispy cookies. But as long as you watch your baking time (for my liking, 8 minutes and not a second more was perfect), these cookies are anything but crispy. When the family bit into the first cookie it was asked what recipe it was. When I responded they said they could tell. I guess there's nothing like the original chocolate chip cookie recipe.

One final interesting thing. I was just searching this recipe online (as I got my copy from one of the only recipe books I refer back to time and time again), and found that I really cut back on the chocolate. The recipe in my book is identical to the one on the Nestle website, except mine calls for 1 pkg of Nestle chips and the web version calls for 2 cups. I didn't really know how many cups was in a package so I started by the half cup full and counted up and it looked good at 1 1/2 cups. But I can see why they called for 2. Some of my cookies were amazingly chocolate-filled and others had very little (simply because I had made a double batch and my mixer was pretty close to capacity and wasn't distributing the chocolate quite as well as it should have), so take your pick on the amount of chocolate. 1 1/2 may be enough if you're just making a single batch and you can mix the chocolate in evenly.

Recipe is the Original Nestle Toll House Recipe, from Cookies! A Cookie Lover's Collection.

Makes 4 1/2 dozen medium-large cookies (it's a much larger recipe than other recipes out there).

Can you tell how light and fluffy it is?

Ingredients

1 C. Butter, softened
3/4 C. White Sugar
3/4 C. Brown Sugar
1 Tsp. Vanilla
2 Eggs
2 1/4 C. Flour
1 Tsp. Baking Soda
1 Tsp. Salt
1 1/2 - 2 C. Chocolate Chips
1 C. Chopped Nuts (optional - I've never put these in)

Directions

~Preheat oven to 375
~In a large mixing bowl cream butter, sugars and vanilla. Add in the egg and mix.
~Mix in flour, soda and salt until light and fluffy.
~Stir in chips and nuts if desired.
~Using two spoons, scoop onto cookie sheets (handle as little as possible with your hands, it doesn't matter what the dough looks like on the pan - it doesn't have to be a perfectly shaped ball)
~Bake for 8-9 minutes or until edges are golden and centre still is white and soft.

Enjoy (warm)!


Tuesday, 12 February 2013

Chocolate Malt Chocolate Chip Cookies


Well, I can finally check one thing off of my 'must-do' baking list. The list that narrows down my recipe file from about 1100 recipes to about 20 things. Why are these cookies so special, you might ask, well I can't honestly say. They are just different and I wanted to give it a go.

The only problem with these (and what took me so long to check off such a simple recipe from this list) was that malt powder contains milk ingredients. I can't make a cookie in our house that contains milk and not have some of another dairy free option available. But, every time I would make a normal chocolate chip cookie and then think I'll make these malted ones a few days later and have some overlap, well I turn around and the regular cookies are gone. Kinda like the last batch I made. The one who doesn't like chocolate or sweet things made the bag of them disappear. Hmm. He must have had some help.

Anyway, I've finally gotten around to them and I'm typing this up while the cookies are baking and so I don't know exactly what the finished product tastes like, but let me tell you the dough tasted pretty good. It was definitely different tasting than regular chocolate chip cookies. It had a lot more flavours to it and the malt made it taste nutty, so fingers crossed for the actual cookies. One thing though is that any cookie that seems to use shortening always bakes up very well.

So the final verdict on these is that they are pretty good (not my all time favourite, but definitely still worth eating) and don't taste too strongly of malt. A flavour that I had never tried up until buying the powder for this recipe and I was shocked to discover what it actually tasted like. Let me tell you, malted milk is not a hit in our house. But, these cookies don't taste like straight malt, they just taste good. So if you are looking for a strong malt presence I would suggest adding some more malt. I'm going to stick with it just how it is though, as it creates a very unique flavour.

Cookie recipe from Taste of Home.

Makes 5 dozen cookies

Ingredients

1 C. Golden Shortening
1 1/4 C. Brown Sugar
1/2 C. Malted Milk Powder
1 Tbsp. Vanilla
1 Egg
2 C. Flour
1 Tsp. Baking Soda
1/2 Tsp. Salt
1 C. Semi-Sweet Chocolate Chips
1/2 C. Milk Chocolate Chunks

Directions

~Preheat oven to 375 F
~In large mixing bowl cream together shortening and sugar. Add in the malt powder, chocolate syrup and vanilla, and cream.
~Add egg and mix well.
~Combine flour, soda and salt and mix in with wet ingredients.
~Stir in chocolate.
~Roll into balls and place on cookie sheets
~Bake for 9-11 minutes.

Enjoy


Monday, 11 February 2013

Homemade Chocolate Syrup


This was so incredibly easy to make I can't believe that Nesquik is still even made. Like seriously people, try this yourself. You'll actually know what ingredients are in it and let me tell you, it's a very short list. I had to make this because a recipe I was planning on making (stay tuned for it) called for a couple of tablespoons of chocolate syrup. Well, I wanted to make this recipe now, not in a few hours, not tomorrow, you get my gist right? Plus, I didn't want to go spend $5 on a bottle of chocolate syrup that would then be placed in the cupboard and never used again. I guess I could have pulled out the last bottle that we bought that is still sitting in the cupboard. The only thing is, I can guarantee you that it is way, way, way too old to be consumed. I personally know it hasn't been used in at least three years and it probably sat in there for as many years before that. I know the expiry date has scratched off the lid it's so old. So why do we keep it you might be asking? Well, when I finish typing this up I think I'll march my way over to the pantry and get rid of it. Sounds like a plan.

Anyway, this is a little bitter as far as my likings go. If I were to be making this for an ice cream topping, etc. I probably would be increasing the sugar a little bit. But then again, I always have found chocolate syrup to be a bit bitterer than I like. So I guess this is pretty normal then. The one thing I do like about this recipe is that it can easily be scaled. The recipe I'm going to share makes about 1 1/2 C. of sauce. But because I only needed a couple of tablespoons, I easily was able to make only 1/3 of the recipe, and I didn't have to fiddle around with odd measurements. It just divided perfectly.

Recipe from Kitchen Treaty, who adapted from The Washington Post.

Makes 1 1/2 C.

Ingredients

1 C. Cocoa Powder
1 C. Sugar
1 C. Water
1/4 Tsp. Salt
1 Tbsp. Vanilla

Directions

~In a small saucepan combine cocoa and sugar and whisk to combine.
~Add in water and on medium-high heat bring to a boil, whisking constantly.
~Once on the boil, continue to stir for 3 minutes or until sauce thickens (it will thicken more once cooled).
~Stir in the salt.
~Remove from heat and stir in the vanilla.
~Allow to cool for it to thicken fully.

Enjoy and stay tuned for a recipe that you can use this sauce in.


Sunday, 6 January 2013

Cinnamon Buns


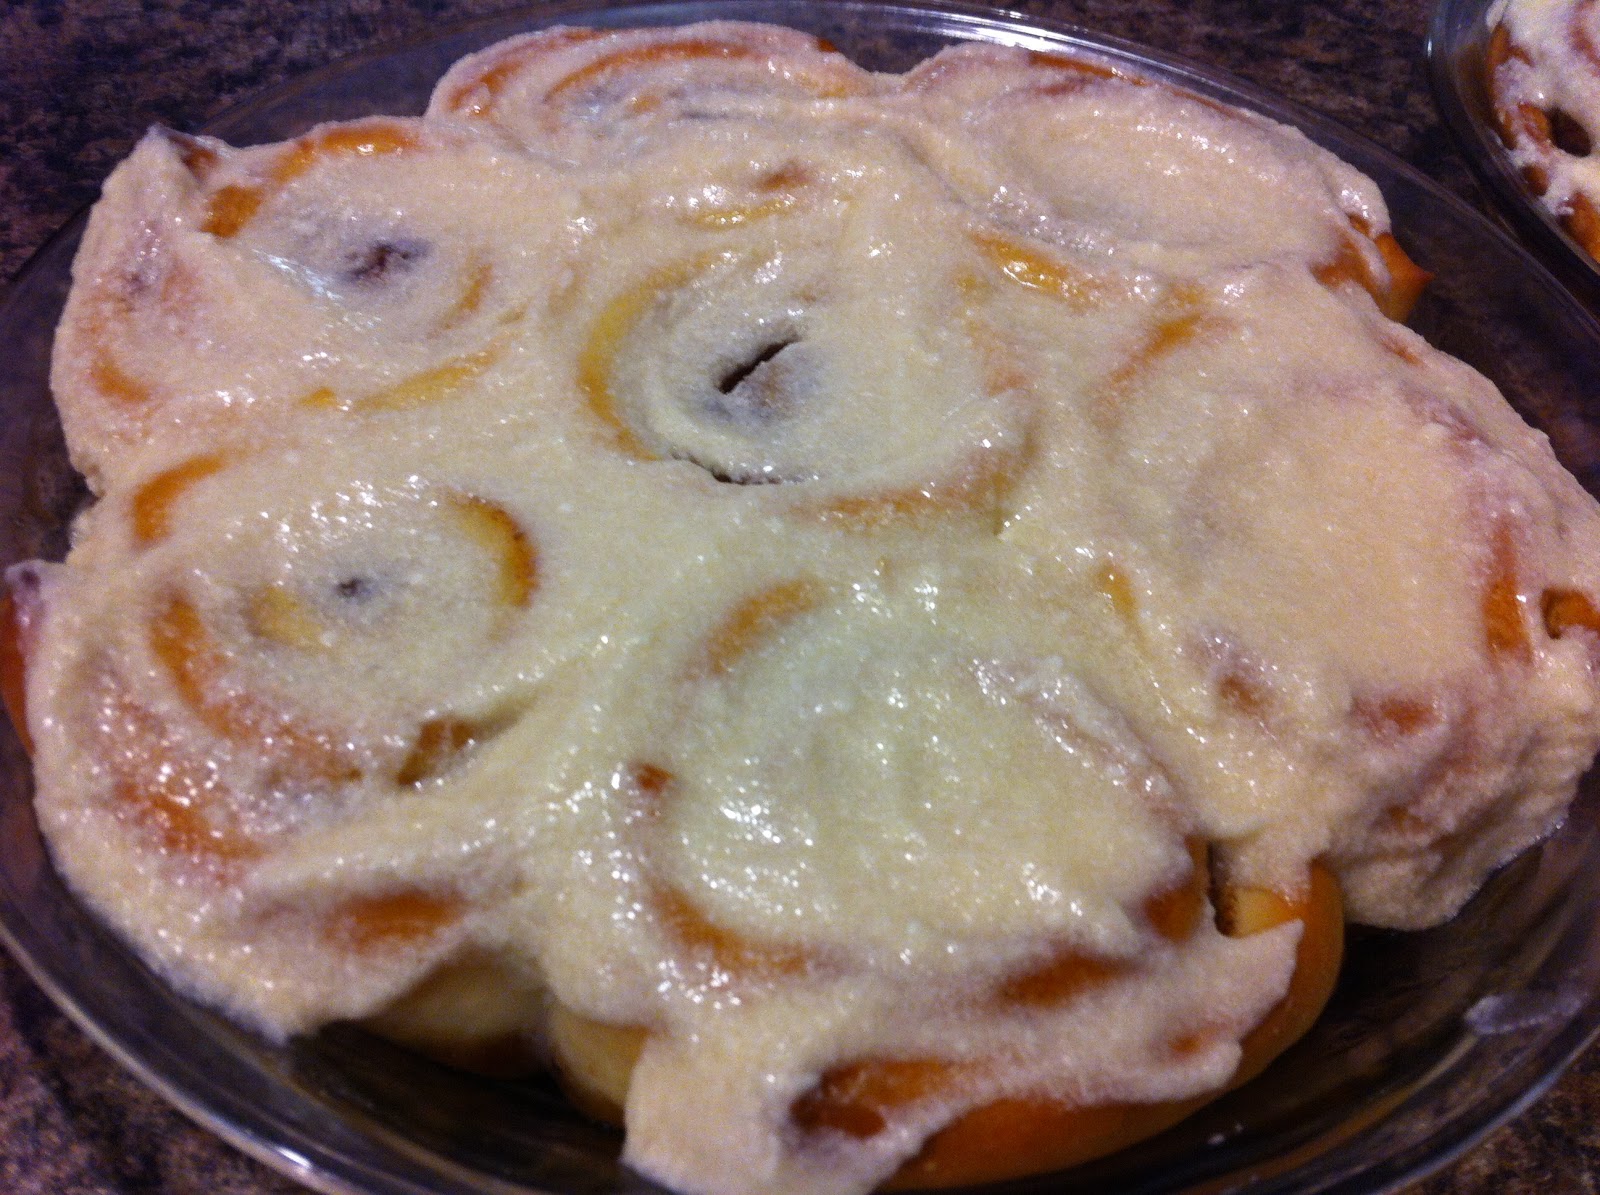
Haha, if you look at the labels in which I've classified this recipe under you'd be laughing too: Dessert & Breakfast! Anyway, moving on...This recipe is one I always use, and by always I mean the one or two times a year I feel the need for cinnamon buns. Sorry, let me clarify, I feel the need for cinnamon buns more than once or twice a year but I can only justify them on those few occasions.

I wasn't as stuck on my last batch of these as I usually am, but ironically everyone else who tried them said they were the best ones yet. The only thing I did different was use my KA instead of hand kneading these. The recipe really was written to be made all by hand from mixing with a whisk to kneading by hand for ten minutes. I decided to speed it up a little this time and so these will be the directions I share because that will be how I make these in the future.

I am going to warn you, these do not taste like Cinnabon which is kinda unfortunate in a way because I like Cinnabon, but I guess it's probably an okay thing that they aren't so sickly sweet right??

The source for this recipe amazingly enough is my middle school home ec. teacher. Yes folks, I actually do use a recipe from that class (actually I use a couple of them still). This recipe though is the reason why yeast doughs never scared me like so many people I know. I always knew that if you could make a cinnamon bun work out and rise you could make a simple loaf of bread work.

Makes 12 Rolls (every single time, no matter what I do I always get 12 and if I double it I still get 24 exactly without fail)

Ingredients

Dough
2 1/2 - 3 C. Flour
2 Tsp. Yeast
1/4 C. Sugar
1/2 Tsp. Salt
1/4 Butter, softened
2/3 C. Hot Water
1 Egg

Rolls
Dough
1/2 C. Brown Sugar
1 Tsp. Cinnamon
2 Tbsp. Butter, softened
1/4 C. Raisins or walnuts (optional)

Oil

Icing
1 C. Icing Sugar
1/4 C. Butter, softened
1 Tsp. Vanilla
water or milk (very little)

Directions

Dough
~Combine 1 C. of flour, undissolved yeast, sugar and salt in a large bowl. Stir.
~Add butter, hot water and egg. Beat with paddle attachment for 1 minute or until thick and elastic.
~Gradually stir in enough of the remaining flour to make a soft dough that leaves the side of the bowl.
~Knead for 5-10 minutes (by hand) or less if using a stand mixer.
~Cover bowl with plastic wrap and a towel and let rest for 20 minutes.
~Meanwhile in a small bowl, combine brown sugar and cinnamon.
~Roll dough into a 12" x 10" rectangle on a floured surface.
~Spread dough with butter (like you're buttering toast) and sprinkle with the sugar mixture and raisins or nuts if desired. 
~Roll dough up tightly starting at the 12" side. Pinch the ends to seal.
~Cut roll into 12 - 1" pieces either with a serrated knife or dental floss (ideally).
~Place rolls into a greased baking dish (all 12 will fit in a 4 x 3 arrangement in a 9"x13" pan or for a better placement use round pans to give each roll a bit more space to expand)
~Brush rolls lightly with oil.
~Cover with plastic wrap and allow to rise for a couple of hours on the counter or overnight in the fridge.

~Preheat oven to 375 F and bake cinnamon rolls for 20-25 minutes (or until lightly browned).
~While baking, mix icing sugar, butter and vanilla in a medium bowl. Add a small amount of milk or water and whisk out any lumps. If too thick, add more liquid. If too thin, add more icing sugar until you reach desired consistency.
~Spread icing on slightly warm cinnamon buns.

Enjoy

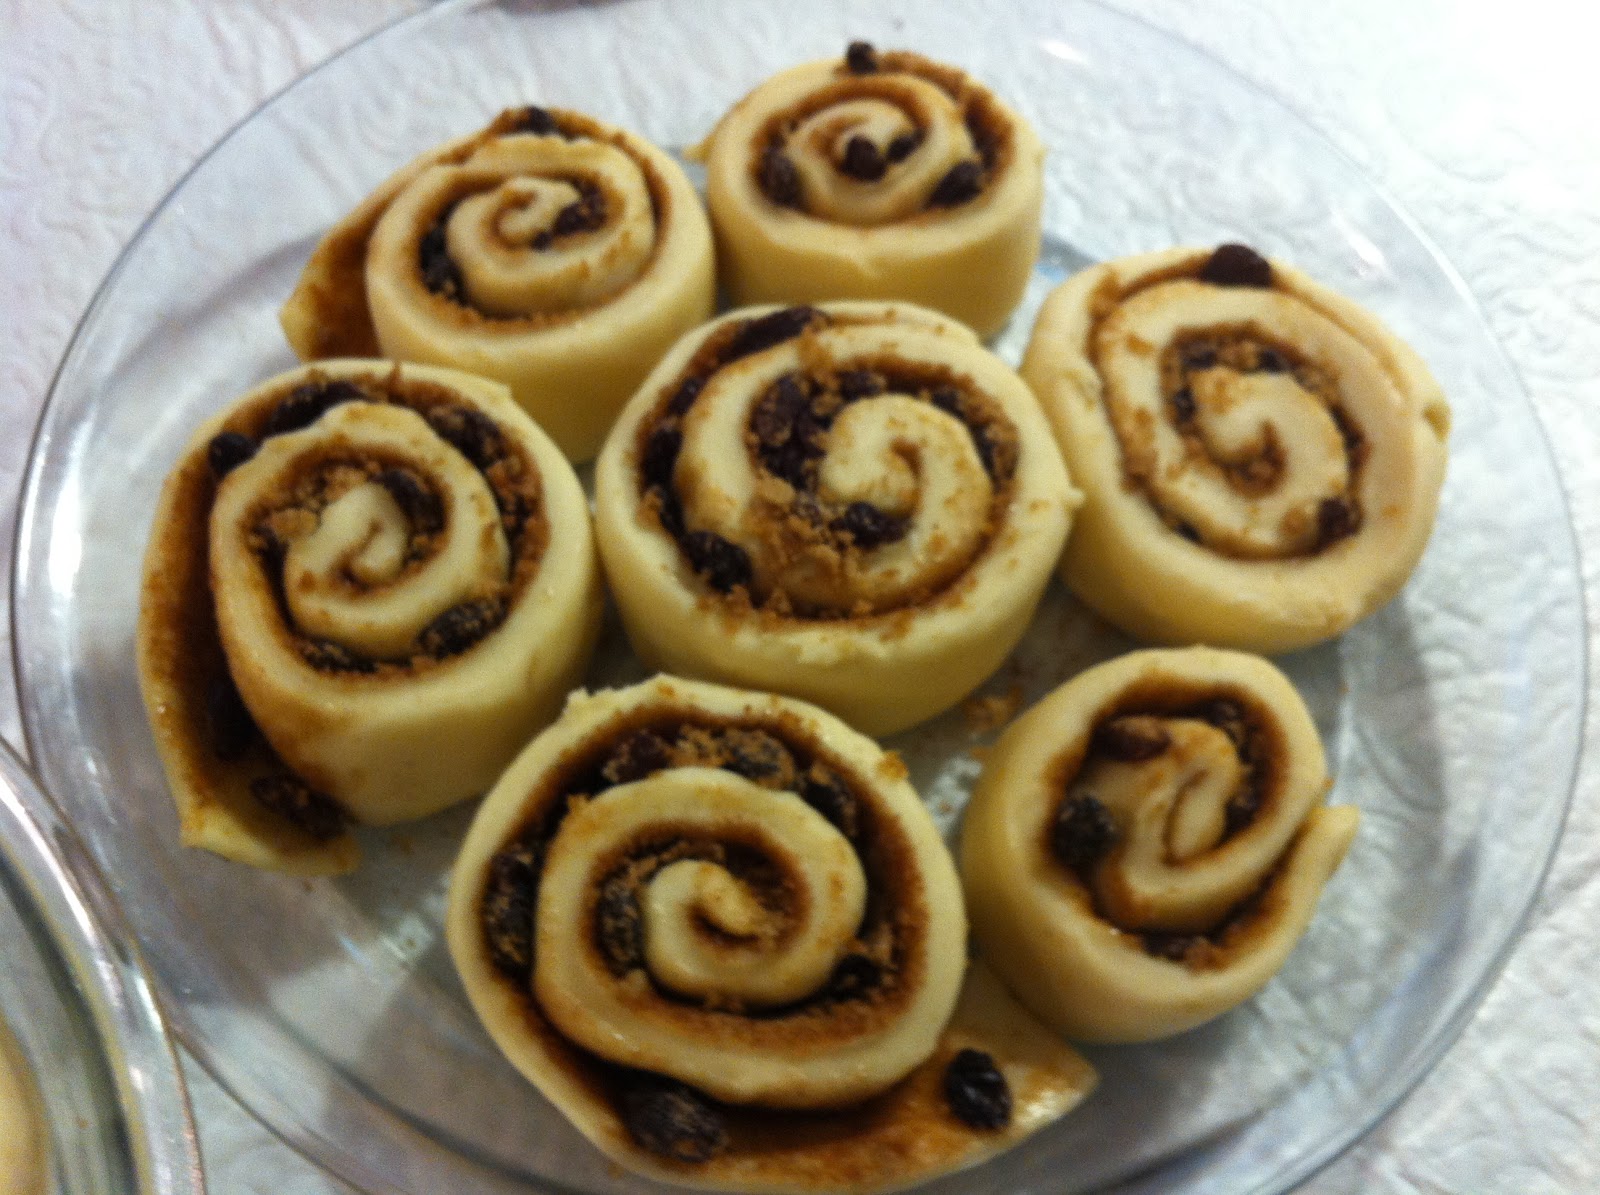
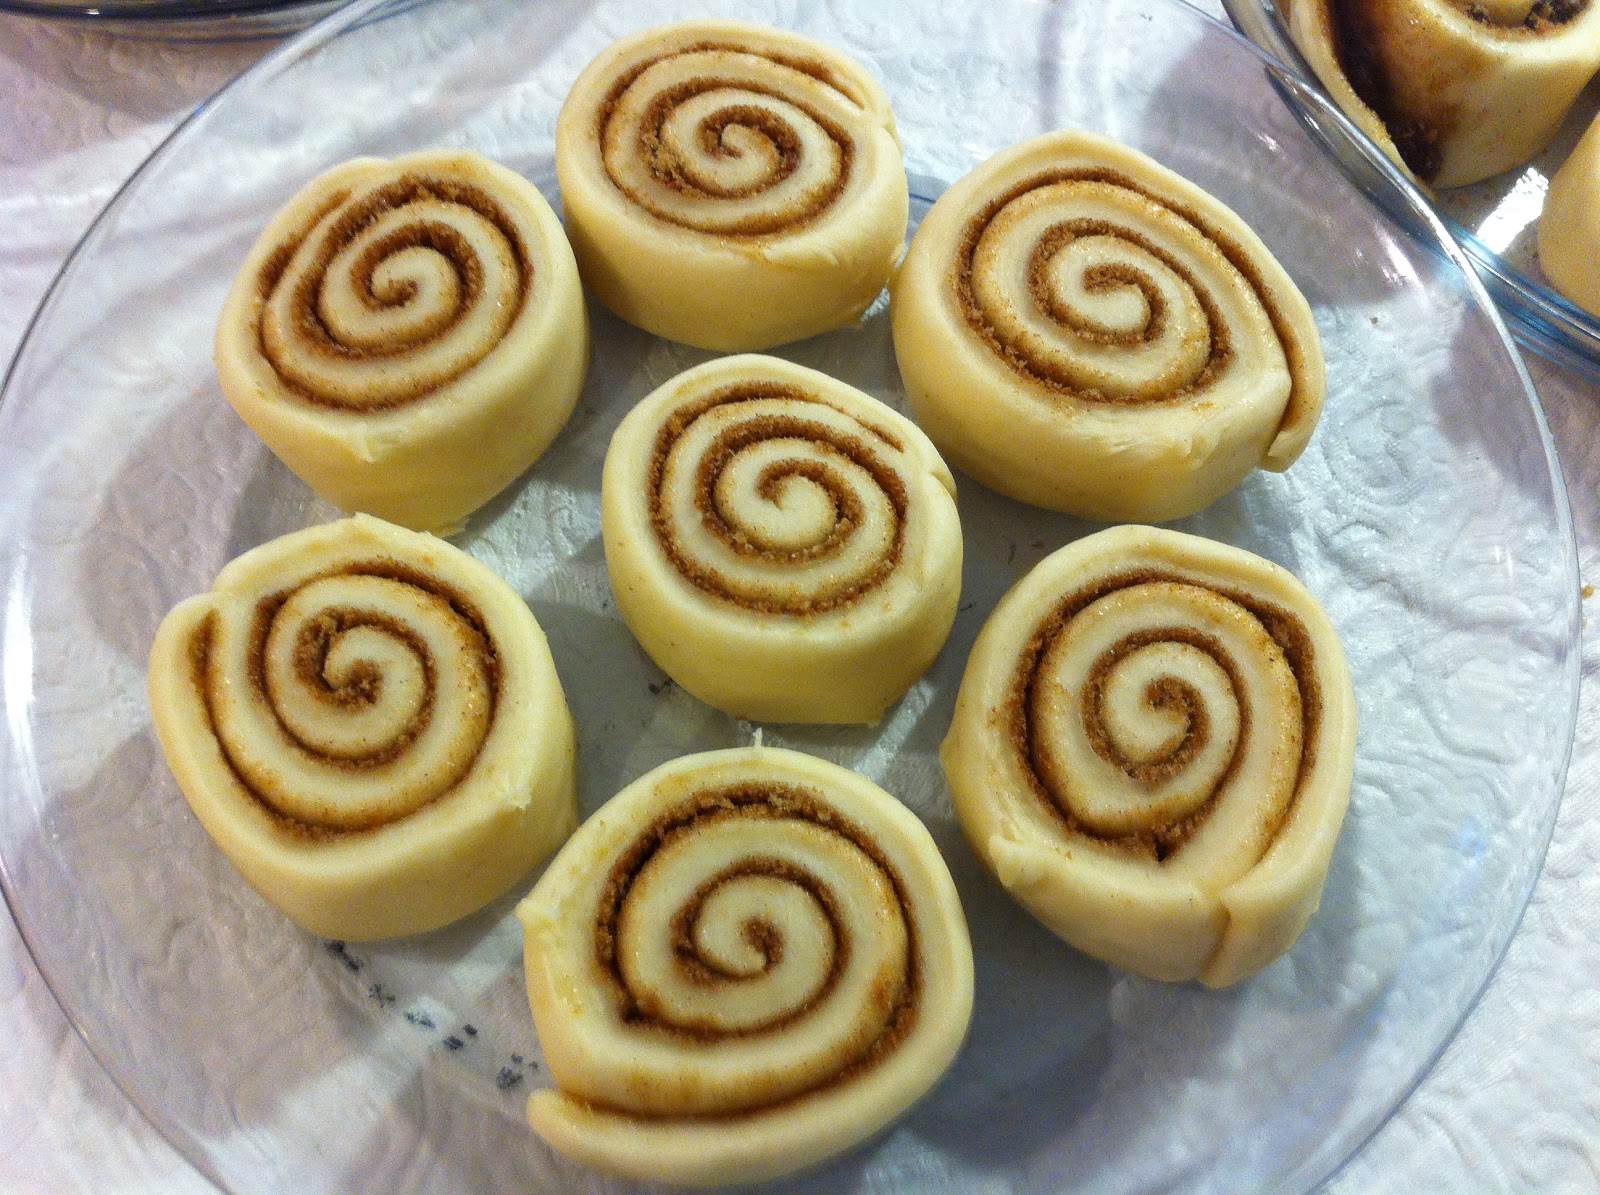
Raisins
No Raisins (so much prettier and much tastier this way!)

Thursday, 3 January 2013

Margarita Cake


I could say a lot about this cake but I'll keep it simple because I could go on about it all day. So let me just tell you that this is the most amazingly moist cake you'll ever eat. And the fact that you could get drunk just off the glaze is good enough for a lot of us who eat this. Plus, it is so incredibly simple to make. Just throw everything in a bowl, mix and you're all set to enjoy.

This recipe was given to us by a neighbour but I actually tracked her source down to allrecipes.com.

Serves 8

Ingredients

Cake
1 Pkg. Lemon Cake Mix (use a Brand Name variety, not a store brand. I made this mistake and it was not good)
1 (3.4 oz) Pkg. Instant Lemon or Vanilla Pudding mix 
4 Eggs
1/2 C. Oil
2/3 C. Water
1/4 C. Lemon Juice
1/4 C. Tequila
2 Tbsp. Triple Sec Liqueur (or if you don't have this substitute Grand Marnier - but it changes the flavour quite a bit so only do this in a pinch)

Glaze
1 C. Icing Sugar
1 Tbsp. Tequila
2 Tbsp. Triple Sec (or Grand Marnier)
2 Tbsp. Lime Juice

Directions

Cake
~Preheat oven to 350 F & grease and flour a bundt pan.
~Combine all ingredients in a large mixing bowl and beat for 2 minutes (30 sec if using stand mixer)
~Pour batter into bundt pan and bake for 45-50 minutes or until toothpick comes out clean.
~Cool in pan for about 15-20 minutes before transferring to a platter to finish cooling

Glaze
~Combine all ingredients in a small bowl and mix until smooth.
~Drizzle over mostly cooled cake.

Enjoy

**A couple of hints:
~When the cake has just come out of the oven and is still in the pan, poke holes in the bottom and pour a small amount of tequila over the cake.
~Make a larger batch of glaze and as soon as you pull the cake out of the pan, drizzle a portion of the glaze over the cake and allow it to soak into the hot cake. Then glaze as usual with the remaining glaze when the cake is warm to cool.


Monday, 31 December 2012

Gift In A Jar - Fruit Crumble


If I hadn't have been sick and feeling like I was dying while putting these things together I may just have used my own crumble topping recipe. But I decided to go with one that was listed for Gifts in a Jar, so this one actually is untested as the person I have given it to has yet to try it out. But really, I don't think you can go wrong with this sort of topping. Add some sugar, some oats, flour and cinnamon and you're good to go. I guess it's not a bad thing that I used this recipe, because when I make a crisp, I typically just throw ingredients in willy nilly without measuring and hope for the best.

Recipe is from Craftbits.

Ingredients

1 C. Flour
1 1/3 C. Brown Sugar
1 C. Oats
2 Tsp. Cinnamon
1 1/2 Tsp. Nutmeg

Directions

~Layer ingredients in a 1 quart jar in the order listed above
~Attach a tag that says:

What You'll Need
2/3 C. Butter, softened
8 apples, sliced

What To Do
Preheat oven to 375 and grease a baking dish
Place apple slices in dish
Pour contents of jar into a bowl and add butter and mix until crumbly.
Sprinkle overtop the fruit
Bake for 30 minutes.

Enjoy


Saturday, 29 December 2012

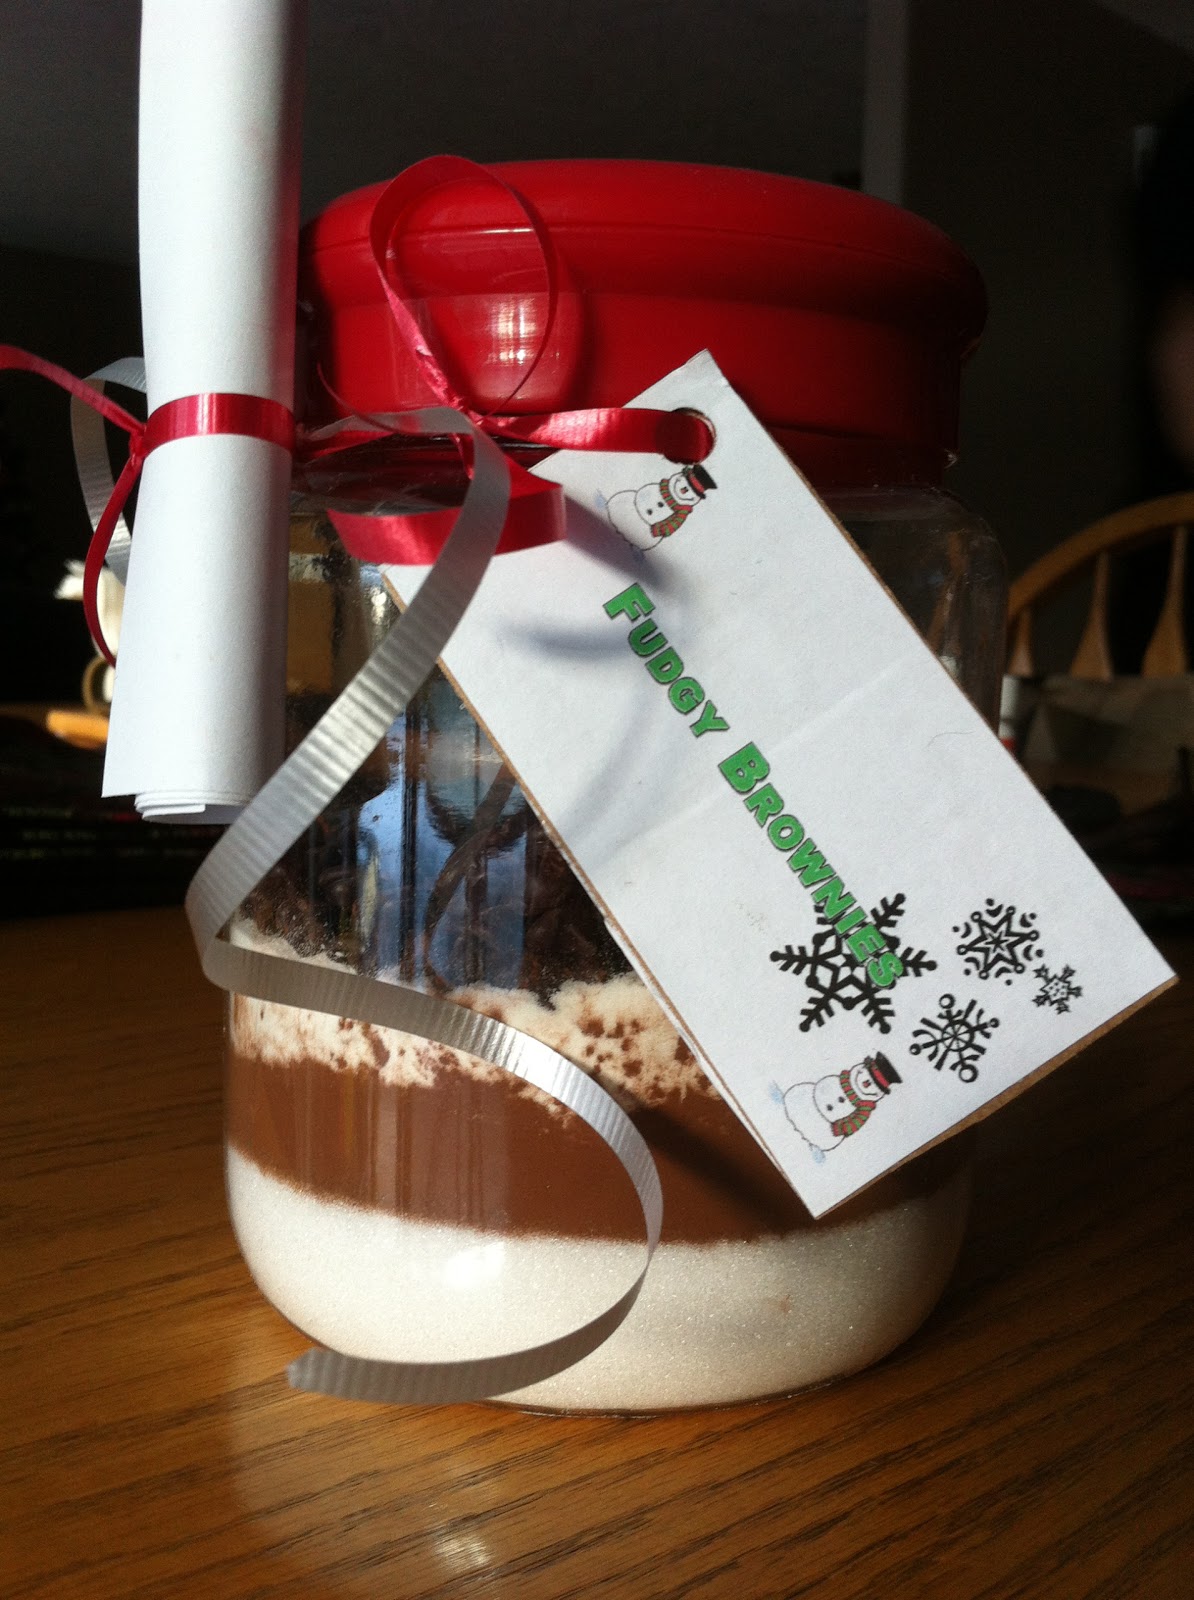
Gift in a Jar - Fudgy Brownie


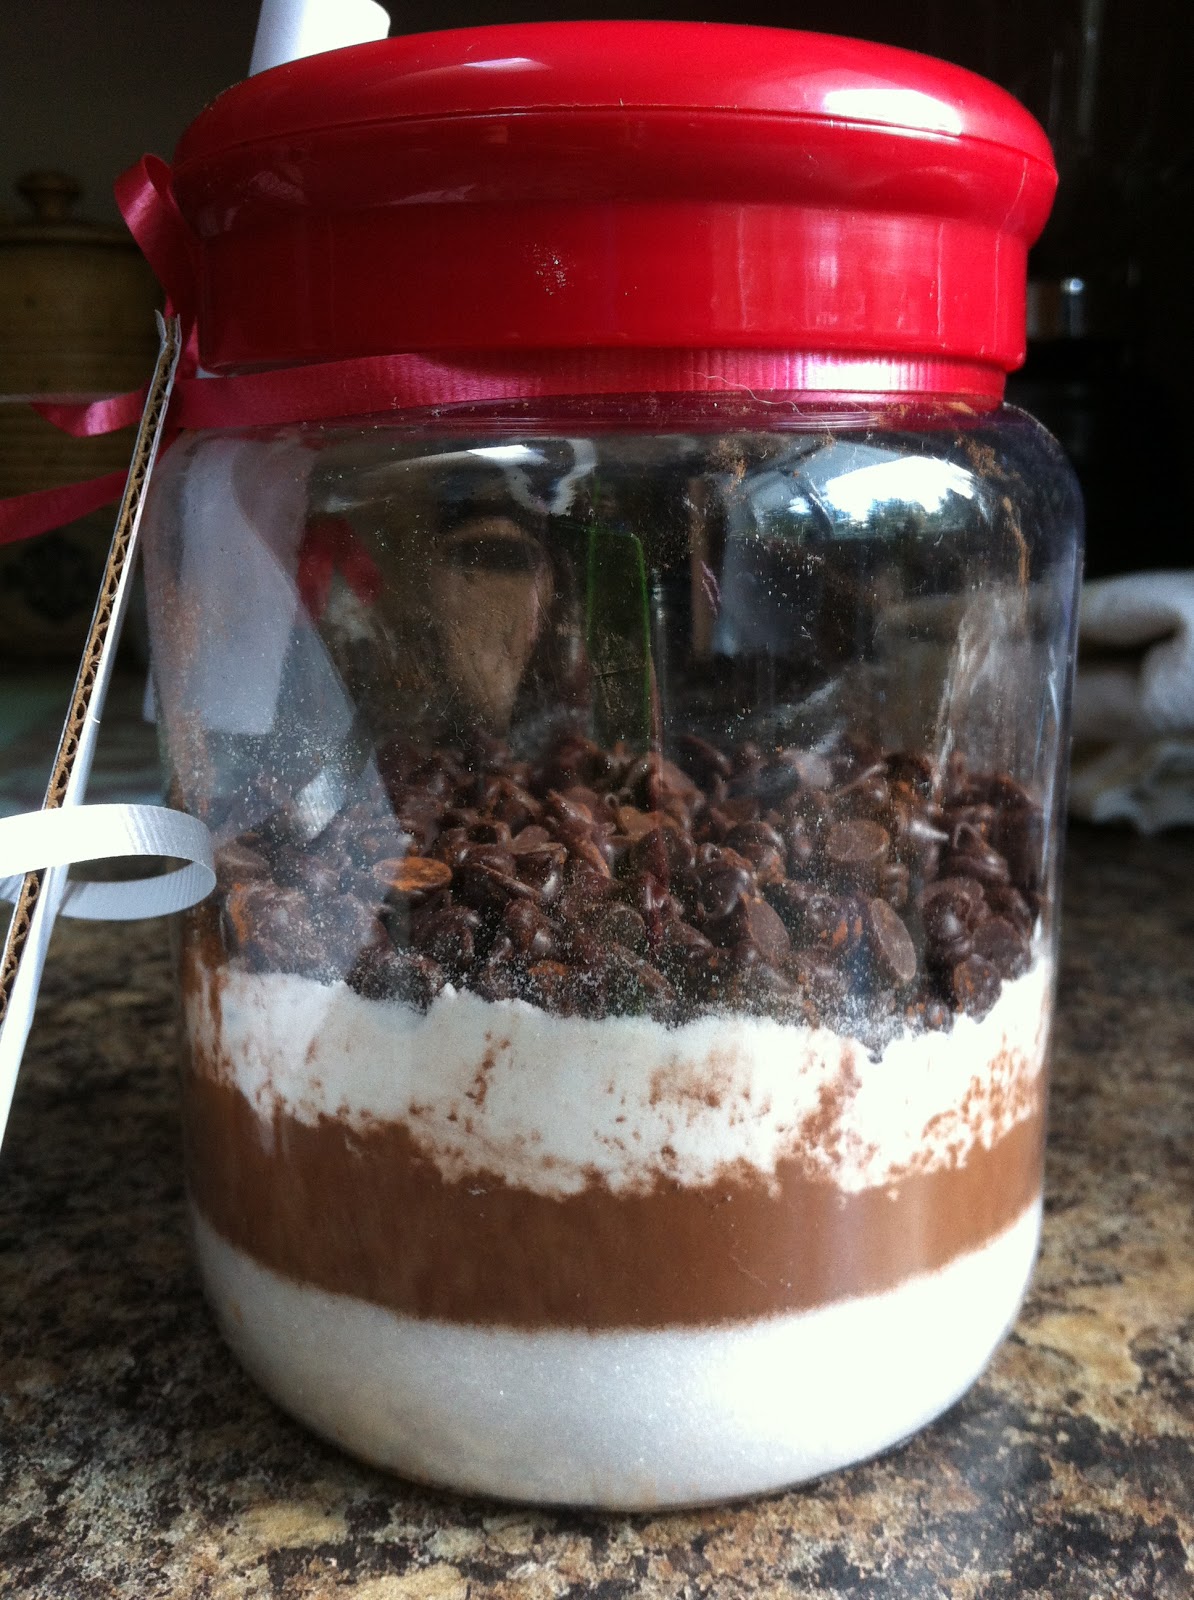
Here begins my slew of post-Christmas posts, for stuff that should have been posted pre-Christmas. But, pre-Christmas was really busy and I was sick for quite awhile, so you're getting them now...for next year.

This brownie tasted pretty good when I tried it out. The only complaint I had was that it made a very, very thin layer in the pan. So, I cut back the amount of chocolate pieces in it and double the mix amount so it will now fill up the 1 quart jar perfectly. The only thing is, because I actually only made a quarter of the amount listed below (I halved the original recipe and made it in a loaf pan to see what type of volume you would get), which means my baking time is going to be different from the listed baking time. So I've just copied over the original recipe's time and you'll have to just add a bit of time as you go if needed.

Recipe from Kicked-Up-Cookie-Recipes

Makes 24 Brownies

Ingredients

2 C. White Sugar
1 C. Cocoa Powder
1 1/3 C. Flour
1/2 Tsp. Salt
1 C. Chocolate Chips

Directions

~Layer all the ingredients in the order listed in a 1 quart jar.
~Attach tag with these instructions:

What You'll Need
1 Jar Fudgy Brownie Mix
1 C. Butter, melted
4 Eggs
2 Tsp. Vanilla

To Make
Preheat oven to 350 F
Mix contents of jar, butter, eggs and vanilla in a large mixing bowl and mix to combine.
Spread batter into a greased 8x8 baking dish.
Bake for 27-32 minutes or until edges begin to pull away from pan.
Cool before cutting into squares.

Enjoy