Showing posts with label HEALTHY. Show all posts

Monday, 28 January 2013

Hearty Raspberry & Orange Pancakes


I struggle with pancakes and because of that I'm kinda scared of them. Give me yeast doughs or pastry any day, but not pancakes. But, I'm trying to slowly get over my fears. Unfortunately it's not working so well. As you can see these are a bit dark on the outside. The funny thing I find with pancakes is I rarely have ever eaten a golden pancake like you see in magazines. I don't know how they do it, but I've never managed it, nor has my Dad who loves his perfect pancake. I think it all has to do with the type of pan you use. So I'm going to blame this one on the pan. The good thing though is while they don't look all that appealing they actually are. They look black and burnt, but they never seem to taste like that, and these ones are full of amazing flavour inside.

These are very heavy pancakes due to the greek yogurt and whole wheat flour in them, kinda like my Yogurt Waffles. One of these (and a few bites of a second one that I shared with Kona) was plenty. Top it off with some butter and some lemon curd and you are good to go.

One other thing, I know that it kind of defeats the purpose of putting dairy yogurt and soy milk in this, but for some reason I believe vanilla soy milk (even the fat-free variety) makes thicker and more flavourful pancakes. Try it and see (even with Aunt Jemima mixes it makes it taste home made).

Adapted from Baking Bites

Serves 2-3

Ingredients

1 C. Whole Wheat Flour
1/2 Tsp. Baking Powder
1/2 Tsp. Baking Soda
1/4 Tsp. Salt
1 Tbsp. Sugar
1 Egg
2/3 C. Plain Greek Yogurt
1/2 C. Vanilla Soy Milk
1 Tbsp. Orange Juice
1/2 Orange, zested
1 Tbsp. Butter, melted
1 C. Raspberries, fresh or frozen & thawed

Directions

~In a medium bowl, combine flour, powder, soda, salt & sugar. Mix and set aside.
~In another medium bowl, whisk together egg, yogurt, milk, OJ, zest & butter.
~Pour dry ingredients into wet and stir until combined.
~Preheat a griddle or skillet and grease lightly.
~Scoop batter into hot pan (if too thick and doesn't spread, gently spread with the back of a spoon), and sprinkle top with raspberries. 
~Cook until brown and then flip and again cook until brown.

Enjoy


Tuesday, 11 September 2012

Twisted Tuna Wrap


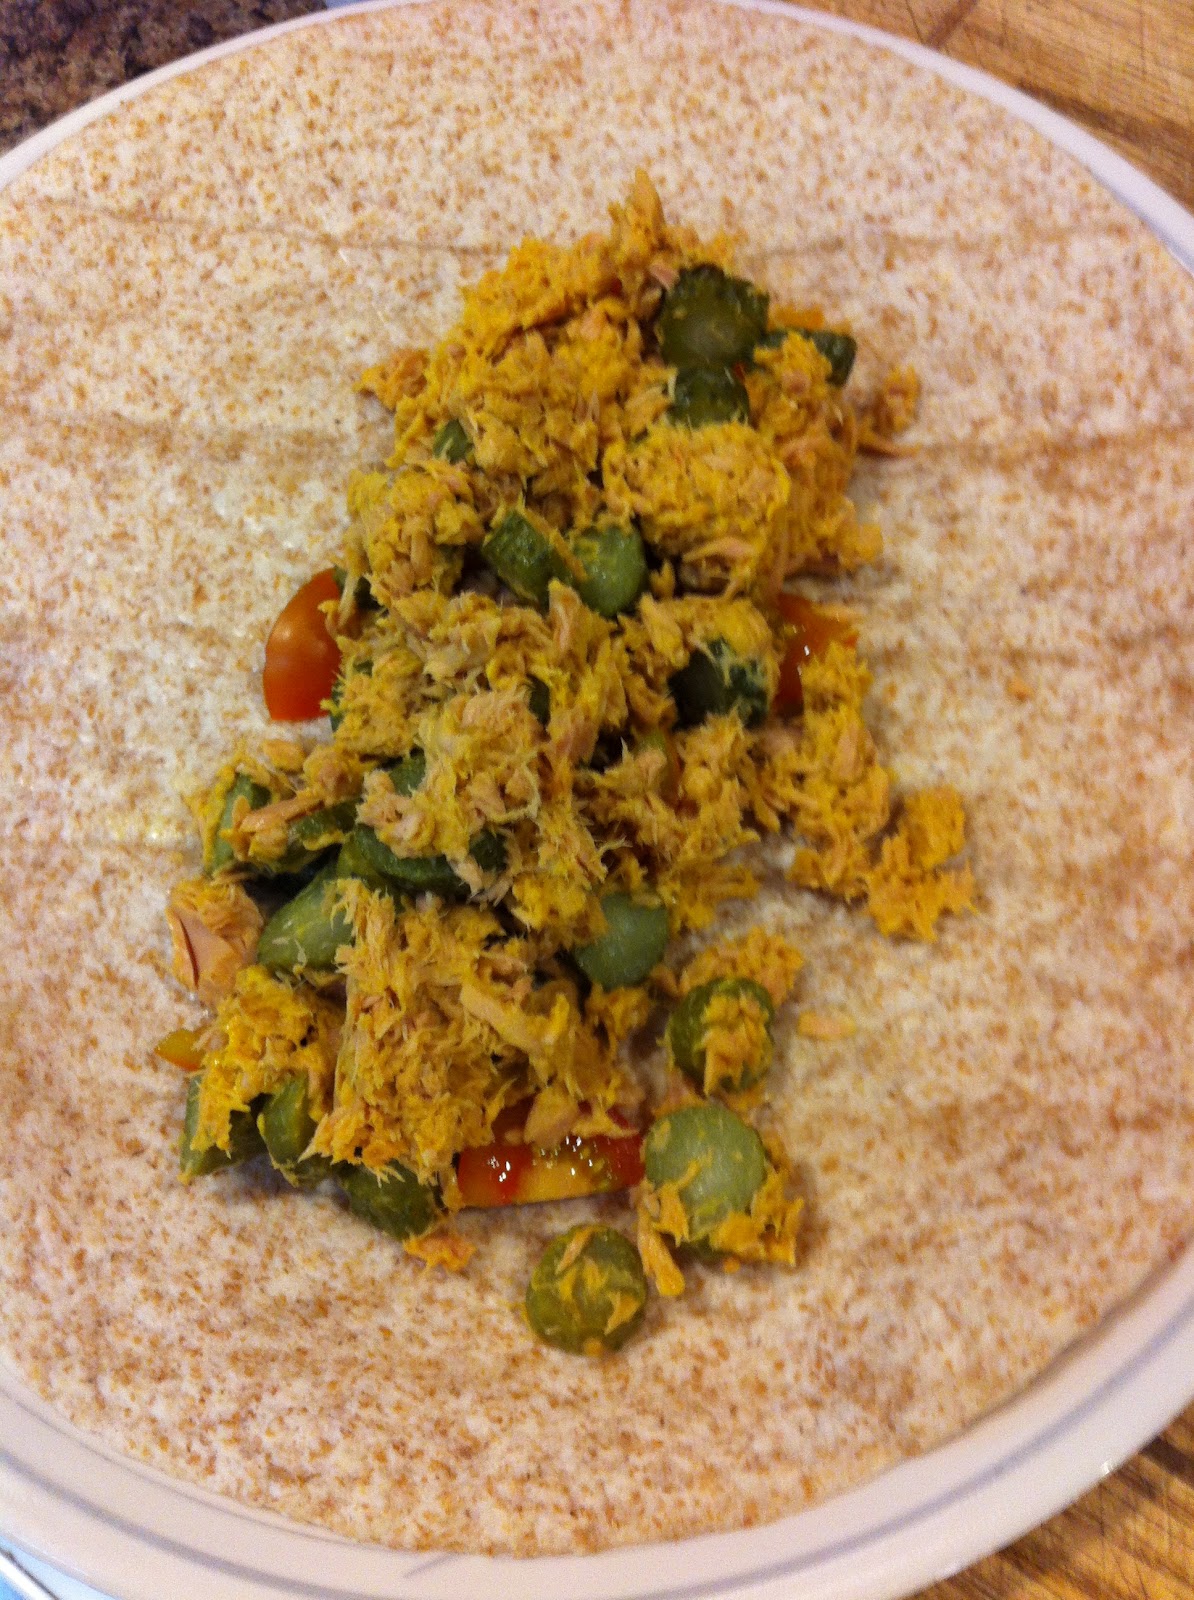
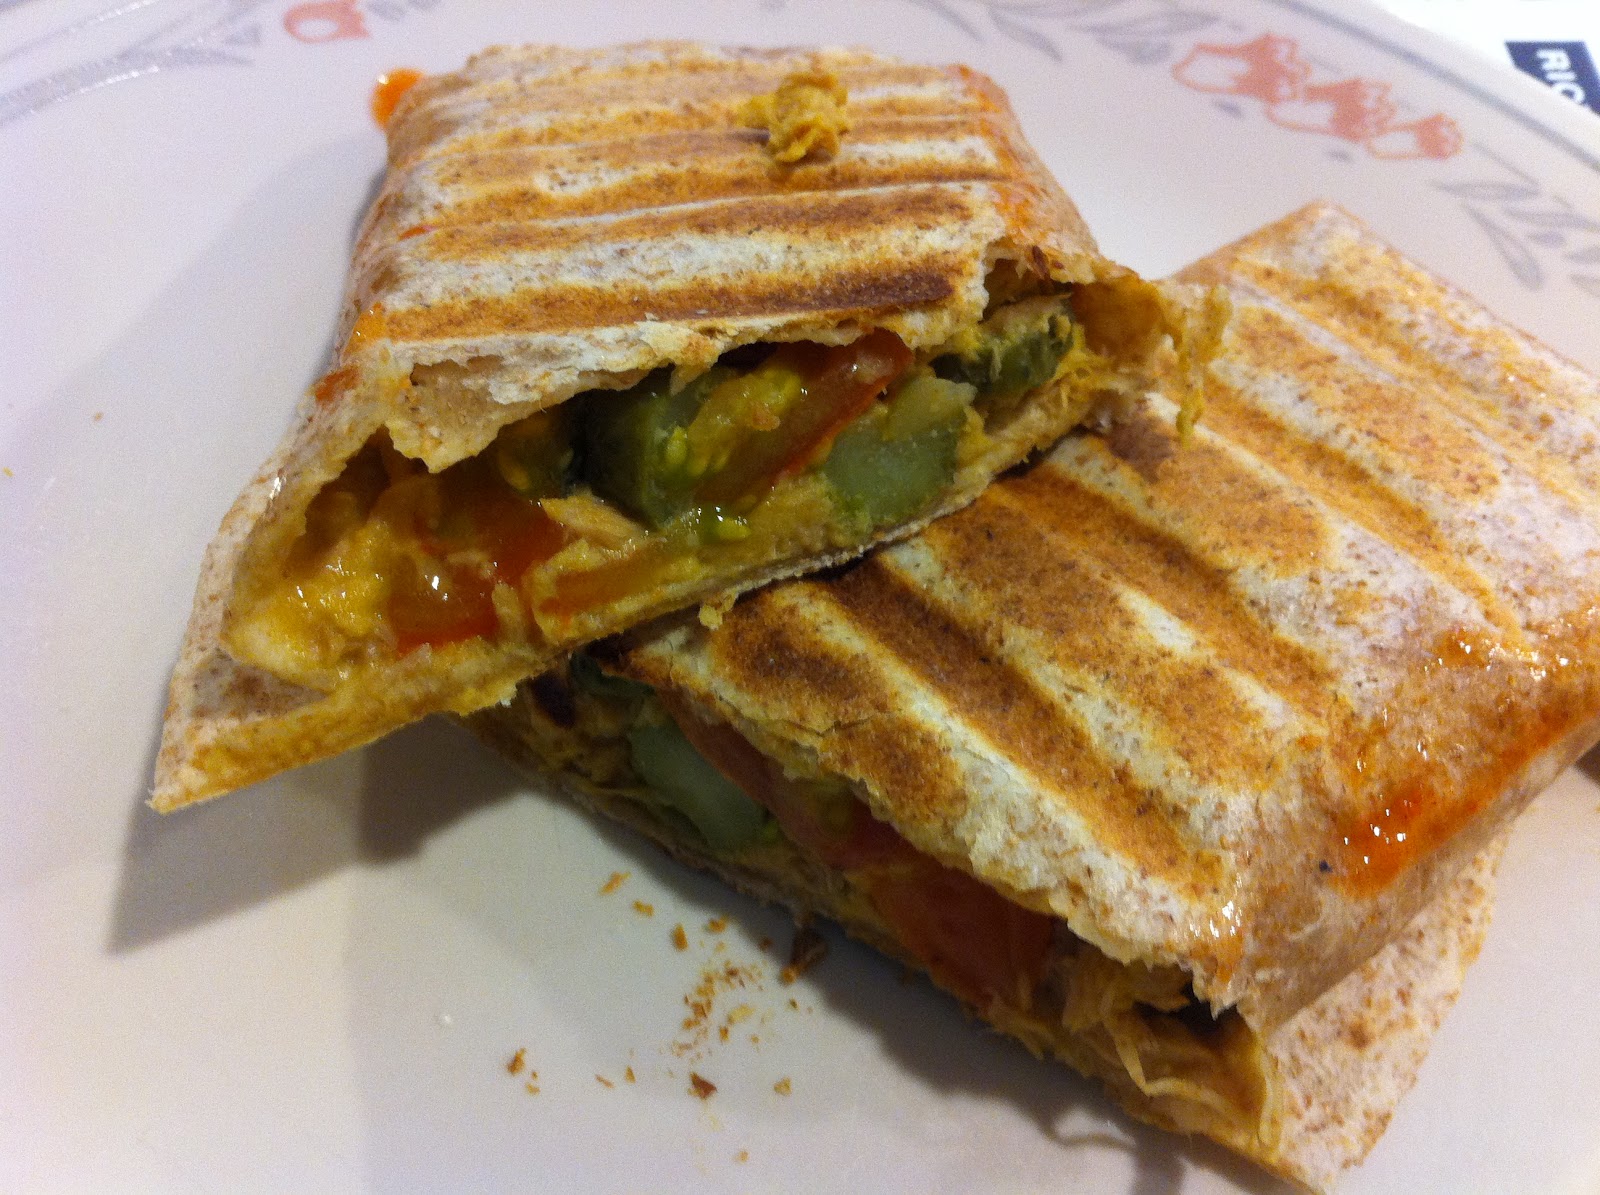
This is not your typical tuna salad. If you've read any of my previous posts (especially my Potato Salad Post), you'll know that I try to avoid mayonnaise whenever possible. Not because I don't like it (I really do enjoy it), but I don't find it absolutely necessary, like some other things I consume, so I try to skip it. Plus, this has a way better flavour as it has a bit of a kick that normal tuna salad doesn't have. Plus, it contains very little calories and a lot of protein (and the only fat comes from the wrap, not the tuna salad).

While you can use the entire can of tuna (and the nutrition facts at the bottom of this post are for the entire can / mixture), I found that about 2/3 of the mixture was sufficient for myself for lunch (but I'm not a big eater at lunch time). If you use 2/3 of the tuna mixture, you'll be at about 290 calories for the entire wrap.

Serves 1

Ingredients

1 Can of Tuna
5 Baby Dill Pickles
1 Tbsp. Yellow Mustard
1 Tsp. Hot Sauce
3 Cherry Tomatoes
1 Whole Wheat Wrap

Directions

~Drain tuna and place in a small bowl.
~Cut pickles into bite sized slices.
~Add pickles, mustard and hot sauce to bowl and use a fork to mix.
~Cut tomatoes into quarters.
~Spread tuna mixture down the centre of a wrap and place the tomatoes on top.
~Roll wrap and place in a panini press and heat until the outside is crispy.

Enjoy


Nutrition Facts
Serves: 1
Calories: 334
Carbs: 37g
Fat: 6g
Protein: 37g

Tuesday, 31 July 2012

Yogurt Waffles


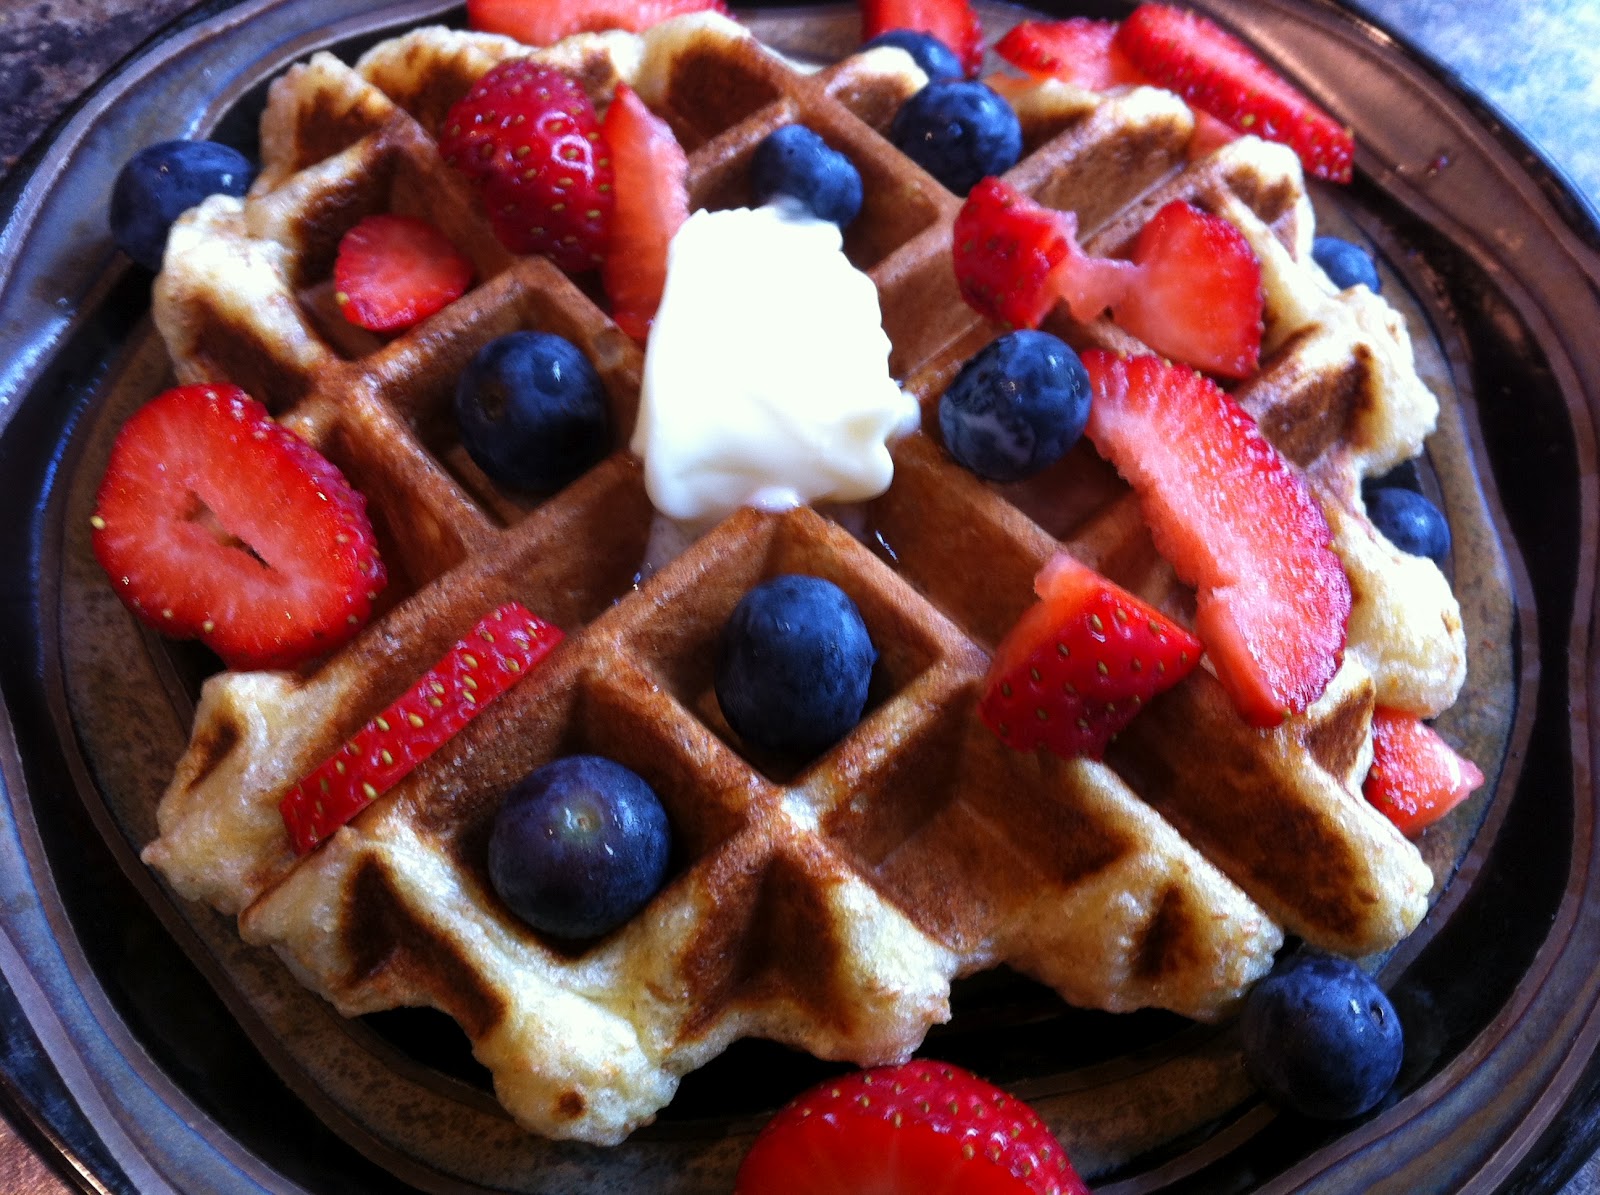
According to the original recipe, these were supposed to be very light and melt in your mouth. I didn't find that, but then again I decided to switch things up a bit and makes these a little bit healthier by using part whole wheat flour and greek yogurt instead of plain yogurt. So they were pretty dense and a little chewy on the outside. But because of this, unlike with normal waffles, I felt full after eating them. And by full, I mean I couldn't even think of eating anything else for a long, long time. There ended up being a lot of protein in these, so that would be the cause of my 'fullness.' Or it could be that the batter was not liquidy like the normal waffles we make. Instead it was like paste it was so thick.

I really enjoyed these, I made them on a morning that it was only myself at home, so I had nobody else's opinion on them, but I don't think everyone in the house would like them. Primarily because they are 'different' from the waffles that we have eaten for so long. So, not 'bad' just 'different.' Typically our waffles are light and incredibly fluffy and you could eat about a half dozen of them because they are just like eating glorified air. These ones are the exact opposite. So, instead of eating one of our old recipe that was enough waffle to fill the entire waffle iron, these ones that I made, I stretched the batter thin and ended up with smaller waffles. Which was a good thing in the end. I strongly encourage you to make 6 waffles out of this recipe. You could (if you're using the same size round waffle iron as I am) really get only 4 normal sized waffles out of this, but don't do that to yourself, seriously. Go for the 6.

This recipe came from Bake-aholic.

Makes: 6 Smaller (or 4 Normal Size) Waffles     [Go for the 6]


Ingredients

1 C. All Purpose Flour
1 C. Whole Wheat Flour
2 Tbsp. Sugar
1 1/2 Tbsp. Baking Powder
1/2 Tbsp. Baking Soda
1 3/4 C. Non-Fat Greek Yogurt
2 Eggs, separated
3 Tbsp. Butter, melted

Directions

~In a large bowl, combine flour, sugar, powder and soda. Set aside.
~In a medium bowl, whisk yogurt, egg yolks and butter together. 
~Pour wet ingredients into the dry ingredients and stir with a few strokes to form a (very) lumpy batter.
~Preheat waffle iron.
~In another medium bowl, beat the egg whites until stiff peaks form.
~Using a rubber spatula, fold the egg whites into the batter. (They don't fold well, because of how thick this batter is, but try your best to get them fully incorporated into the batter.)
~Cook waffles according to the instructions for your waffle iron.
~Top with whatever toppings you desire.

Enjoy

Nutrition Facts

Serves: 6
Calories: 253
Carbs: 32 g
Fat: 7 g
Protein: 13 g

Friday, 29 June 2012

Mexican Panini Wraps


While I believe I have already mentioned that I've had a love hate relationship with breakfast, the same holds true for lunch. I never used to dislike lunch. All that changed one day when I was sitting eating my lunch in middle school and my sandwich tasted off. So, I opened it up and my 'fresh' deli sliced black forest ham was glowing iridescent. It wasn't even the vacuum sealed junk that really isn't meat and has an expiry date of 4 years from now and would survive the apocalypse. No, I'm talking the stuff that you watched the deli person slice in front of you. Not a word of a lie. This quickly put me off of sandwiches and unfortunately, if you are taking a bagged lunch there aren't many other options than sandwiches. For a long time then I ate heavily processed frozen dinners and leftovers when we had some.

In our house, we always ate wraps cold. We didn't heat up the fillings and we definitely did not put them in a panini press. It was basically just another means for eating your ham and cheese sandwich. Thanks but no thanks. When I lived in the dorms at university, they had a great little sandwich place. And by great I mean the food was worth the 15 minute long line up (because it was the best option available *shudder) that you had to wait. Oh yeah, did I mention there was only one other person in this line up. To put it nicely, they were slow moving unambitious workers who couldn't talk and work at the same time (a bit harsh? Sorry it's the truth). But anyway, they made great sandwiches. And the wraps, this was where I really got introduced to the concept of panini presses. So while I don't miss university at all (that's a story for another time), I did find myself missing grilled wraps. Well lo-and-behold a few months ago a cousin decided he was not wanting his George Foreman Grill any longer and donated it to us. While I know this is not the same thing as a panini press, it still works just fine. And ever since I have been counting down the days until the weekend so I can have my grilled wrap, because I don't think they'd take too kindly to me showing up every day to work lugging this big grill and all the fixings for my lunch. I've tried all sorts of combinations and I've basically settled on a great low calorie one. It really is all dependant on what's in the fridge at any given time but I'll give you the base line and you are free to go from there. The secret though...a pinch or two of cumin (my latest obsession). It adds some amazing flavour, and it's flavour you can't get from hot sauce because I find there is a very fine line between getting good flavour from the hot sauce and having too much on and getting an awful taste (not just hot, I find it almost bitter at times. I don't know.) In the directions of this recipe I've put in my two-bits about how to avoid this. And, while I know these aren't really Mexican, I'm really at a loss for what to call these, so that's what they're stuck with. Because the amazing creation my brother came up with one day holds the title of Southwestern Wrap. Maybe I'll share it one day with you. If I ever get up the nerve to consume that many calories in one sitting (outside of the dessert menu). It's a little unsettling to say the least. But for now, I'm going to stick with this healthier option.

If you do want to change things up a bit, this is also good with a light coating of refried beans, a sprinkle of cheese and some rice. Or any combination of the above and below.

Ingredients

Makes 1 Wrap

1 Tortilla Wrap
1/3 Red Bell Pepper
1/4 C. Onion, sliced
1/2 Chicken Breast
1 Mushroom
Pinch (or two) of Cumin
Dash of Hot Sauce (I used Frank's Red Hot Sauce)

Directions

~Cook your chicken breast anyway you like (or if you're like me, this cleans out the leftover chicken from the night before. Plus, it's better if you're putting all cold ingredients in the wrap, they'll heat more evenly when the wrap is grilled then.).
~Clean your pepper and mushroom.
~Slice the pepper, onion, mushroom and chicken breast into slices.
~Get your panini press or grill heating.
~On a dinner plate, place your wrap. Down the centre, lay out your mushrooms, onion, pepper and chicken.
~Sprinkle the cumin over the fillings.
~Top with as much hot sauce as you'd like (make sure it's evenly spread out and not just in big globs).
~Roll up your wrap, making sure all ends are tucked in and sealed so no juices can leak out.
~Place your folded up wrap on the press / grill. And grill until the wrap is toasted on the outside (but not black).
~Remove wrap from the press and cut in half. Let it sit for a minute to cool slightly. (Be careful the fillings do get extremely hot).
~Now what I do to get an even taste of hot sauce is I pour a little bit of sauce on my plate and with the back of a spoon I scoop some up. I then rub the back of the spoon lightly across the edges of the wrap. Coating it just nicely in hot sauce. Then you let it sit for a minute and 'dry.' All the moisture from the sauce soaks into the wrap and you are left with the flavour of the sauce, without the kick. You can see in the picture below the red line down the side of the wrap. That's the Hot Sauce.

Enjoy


Monday, 25 June 2012

Peanut Butter Cup Muffins


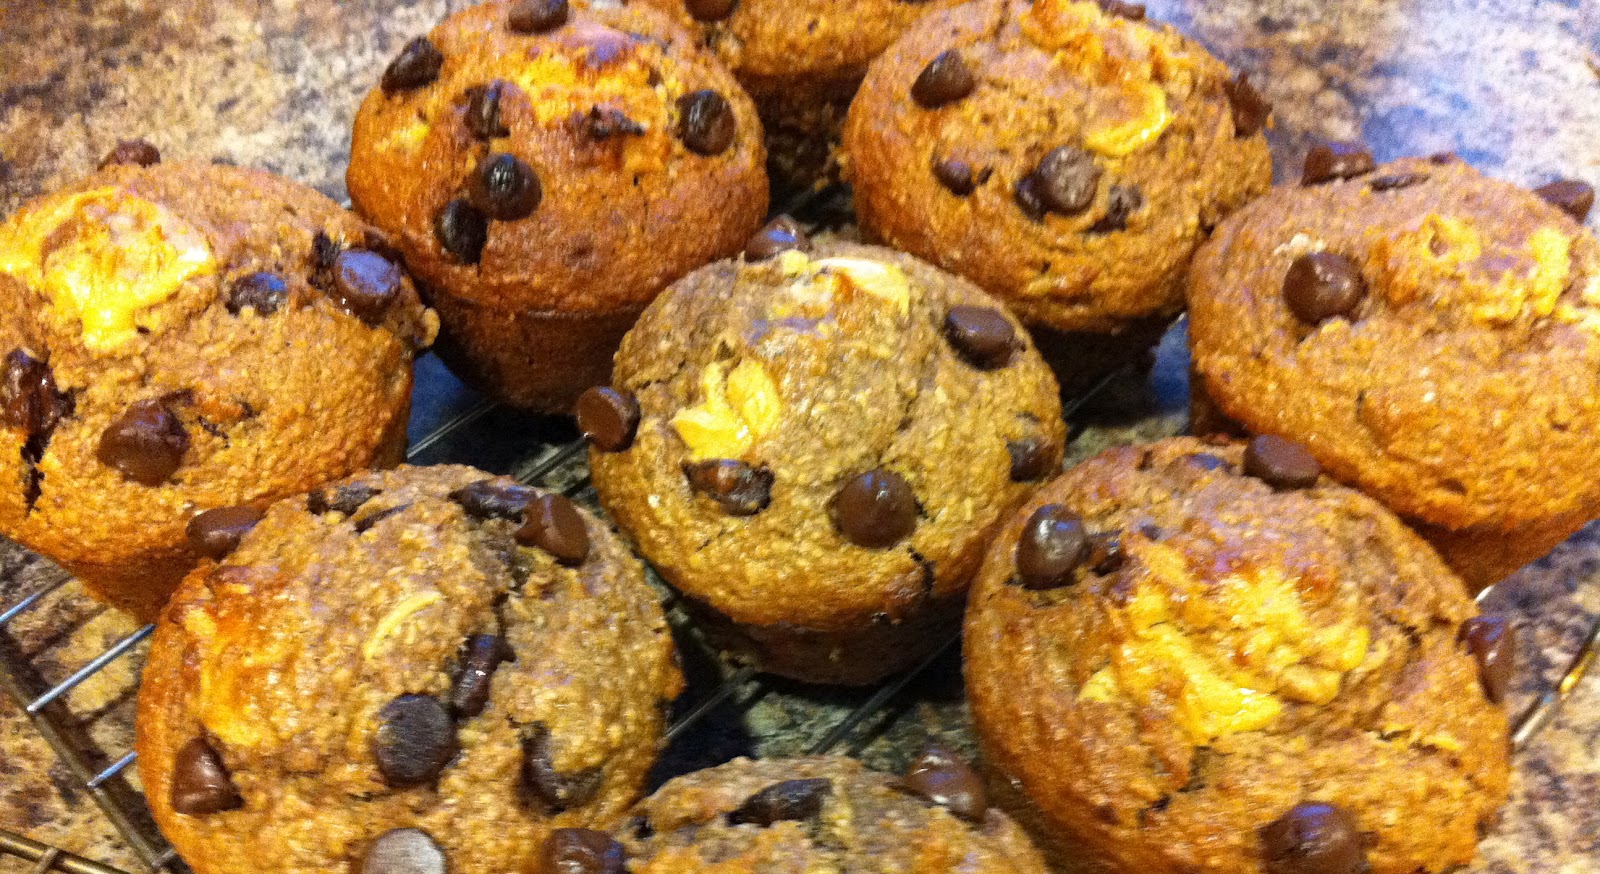
Okay, people said these were good. My dog loved me when I was making them because she got to lick the peanut buttery spoons clean. (She's such a good little helper.) I don't actually know what they taste like as I'd much rather eat my Nutella Muffins than these. Plus, I'm not so fond of these muffins for the sole reason that they gave me a horrible time when trying to photograph them. Yup, I don't know what it is about muffins (and breakfast foods and breads) that make them so hard to get a good picture of. Maybe it's that they are all brown and brown isn't the nicest colour. Or even that they are brown and I'm trying to take their picture next to a brown countertop, brown wood board, brown kitchen cupboards, brown walls. I think I've found why I can't get a decent picture. Then again, didn't I say that I don't really care if I have top notch photography (or even mediocre), so I shouldn't be fretting over this. This blog in the end is just for me to document what went right and wrong in the kitchen. Hey, if anyone else wants to read this then that's a bonus.

Yes, this is the same muffin recipe as the one from which I made my Banana Bran Nutella Muffins. In the process of trying to make these muffins dairy free, I think I also created something wonderful. You see, the first time I made these with peanut butter, I threw a couple chocolate chips on top as an after thought because hey, everyone that likes peanut butter seems to love peanut butter cups. Well the verdict quickly came in, they were good but didn't have enough chocolate. So here you have my updated Peanut Butter Cup Muffin Recipe. And yes, they still are pretty healthy (minus the odd chocolate chip or two now in them.)

One thing I did notice is that while you think peanut butter and nutella have a similar consistency, they actually bake up quite differently. With the nutella, I was able to swirl the extra spread on top of each muffin and it just stayed there nicely like I had placed it. The peanut butter on the other hand really melted and oozed over the top of the entire muffin (and looked really horrible and unappetizing). My recommendation: continue to place the nutella on top of the batter, but if you do peanut butter, place the blob of peanut butter on top of the batter and then with a toothpick try to flip the blob upside down so that the entire blob is coated in a bit of muffin batter. Does that make sense? If it doesn't, just push the blob into the depths of the muffin batter. When the peanut butter is encased by the batter it doesn't ooze away and so you bite into a peanut butter surprise.

The original recipe is still from Baking Bites.

Ingredients

Makes 14 Very Large Muffins (or 18 Regular Sized)
1 1/2 C. Whole Wheat Flour
1 C. Oat Bran (or Quick-Cooking Oatmeal)
2 Tbsp. Cocoa
1 Tsp. Baking Powder
1/2 Tsp. Baking Soda
1/2 Tsp. Salt
2 Tbsp. Vegetable Oil
3/4 C. Brown Sugar
2 Large Eggs
1 1/4 Tsp. Vanilla
1 C. Mashed Bananas (about 2 1/2 Bananas)
1/3 C. (heaping) Peanut Butter (+ additional for top ~ 1/3 C. extra)
1 C. Buttermilk
1 1/2 C. Chocolate Chips

Directions

~Preheat oven to 375 F.
~Line muffin tins with liners or grease.
~In a large bowl, combine flour, bran, cocoa, baking powder, soda and salt. Stir to combine.
~In a medium bowl, whisk together oil, sugar, eggs, banana, nutella and buttermilk until smooth.
~Poor wet mixture into dry, add chocolate chips and stir until just combined.
~Fill each muffin tin.
~Drop 1-2 tsp of the additional peanut butter onto top of each muffin, then either push the peanut butter into the middle of the batter or with a toothpick, flip the peanut butter blob around to get the top surface covered by muffin batter.
~Bake until toothpick comes out clean. Approximately 13-15 minutes for regular sized muffins or 15-17 for large muffins.
~Cool muffins in tin slightly then remove to cool completely on a cooling rack.

Enjoy


Saturday, 16 June 2012

Broccoli Salad


Now as I've mentioned before, when I'm cooking things I make again and again I do not like to use a recipe. As such, I don't have a recipe to share with you guys for this amazing salad. I do have an ingredients list thought, and so my recommendation is make this salad (it's so amazing you have to try it), but add in the extras as you see fit. Remember, this is a broccoli salad, so what I do is mix the dressing up first and pour it over the broccoli florets. Then toss in a few add-in's as per your own tastes. You can even make the base salad of broccoli and dressing and chop up the add-in's and let everyone make their own unique creation. While you can bottle up the dressing and mix it in just as you're going to eat the salad, I would recommend at least combining the broccoli and dressing ahead of time, because it definitely tastes better when the broccoli has been given a chance to soak. Confused yet? Forget everything I just rambled about and just go throw all these ingredients together as you see fit. That's my final piece of advice. So without further ado...Broccoli Salad

Oh...wait...one more thing. Please don't omit the salami (or bacon), this salad just does not taste the same (or even half as good) without it. It needs the salt. Don't bother making it if you aren't going to add it. You've been warned.


Ingredients

Dressing:
1 C. Mayonnaise
1/3 C. White Sugar
1 Tbsp. White Vinegar

Salad:
Broccoli Florets
Almonds, slivered
Seedless Grapes, halved
Salami (originally called for bacon, but the packaged salami you get in a 3 pack from Costco adds a much better flavour)

Additional Salad Add-In's:
Sweet Red Pepper, sliced into bite size pieces
Strawberries, sliced
I also tossed a few blackberries in as well as an afterthought because I had them lying around.

Directions

~Mix all the dressing ingredients together and stir well until they are well combined and the sugar is no longer gritty.

~Prepare your broccoli (the Costco bag of florets is great for this) and any add-ins you wish to have. (My recommendation would be broccoli, almonds, grapes & salami-that is just the minimum for this salad. I actually think that was what the original recipe called for if I remember correctly. It's been a while since I've seen the original.)

~Toss the salad with the dressing.

Enjoy