Showing posts with label SIDES. Show all posts

Sunday, 29 November 2015

Easy Food Processor Biscuits

Just a couple of notes for this one. When it says don't over handle, it really means it. Sure they look just as good, and taste fine, but if you compare an overly handled biscuit with one that hasn't been, from the same batch it's an incredible difference. So, when you pat these out and use your cookie cutter for the first time, make sure you get as many out of that first try as possible, because when you clump the dough up again and pat it out for a second time, they are distinctly different.

If you're using salted butter or margarine, in a recipe instead of unsalted butter, typically I eliminate the added salt, but for this one don't. You may be able to reduce it a little from the 1 Tsp, but don't forgo it all together.

When baking, the original recipe called for the rounds to be placed on a cookie sheet for baking. I always place them in my two very thick bottomed, oven safe fry pans because you can nestle them really close together and the heat comes off of the sides of the pan as well. Try push the rounds right next to each other, and then for some, leave some space in between. It makes for a completely different biscuit whichever way you choose.

Of course this recipe would work just fine if you did not use a food processor and instead went about things the old fashioned way aka cutting in the butter, keeping your hands cold, etc. However, the food processor is very easy, and helps you avoid over handling and heating up the dough which needs to be kept as cold as possible.

I typically double the batch and they don't last anymore than 24 hours.

Recipe from Southern Food.

Ingredients:

2 C. Flour
1/4 Tsp. Baking Soda
1 Tbsp. Baking Powder
1 Tsp. Salt
6 Tbsp. Unsalted Butter, cold
1 C. Buttermilk

Directions:

~Preheat oven to 450 F
~Place dry ingredients into food processor and pulse a couple of times to combine
~Place butter into food processor and pulse until mixture becomes course meal
~Add buttermilk and mix only until combined, mixture is very wet so if it appears too dry, add a bit more buttermilk
~Place dough onto a floured surface and gently fold it approximately 5 times, then pat until it is 1" thick, do not roll
~Use a round cookie cutter to cut out rounds
~Can knead the scraps together and pat again to get more rounds, but won't be as good as the original
~Place biscuits onto a cookie sheet
~Bake for 10-12 minutes or until light golden
~Enjoy!


Tuesday, 15 April 2014

Chow Mein

This recipe is amazing. Not much more to say than that. Other than this disappears at alarmingly fast rates and it honestly tastes better as leftovers the next day once all of the flavours have blended. It's even good cold, or hot, or anything in between.

Even though I've made this multiple times, I can't say I have a picture of it. Maybe the next time.

While I've used for the most part the same ingredients as the original recipe, the steps to make it I've really changed around to fit how I typically make stir fry's. So this recipe is adapted from Canadian Living.

Ingredients

1 - 400g pkg Chow Mein Noodles
1/4 C. Oyster Sauce
2 Tbsp. Soy Sauce
1 Tbsp. Sesame Oil
1 Tbsp. Oil
1 Onion, thin strips
3 Cloves Garlic, minced
2 Tsp. Ginger, minced
1/2 C. Chicken Stock
Optional
*Vegetables (snow peas, peppers, broccoli)
*Meat (chicken, pork, beef)
*Bean Sprouts

Directions

~Cook noodles according to package instructions, drain & set aside.
~In a bowl, combine oyster sauce, soy sauce & sesame oil. Set Aside.
~Heat oil in a large skillet and saute onion until transparent. Add garlic & ginger and cook for 1-2 minutes.
~Add noodles, chicken broth and sauces to pan and stir until heated through.

Optional
~Before adding noodles to onions, add in and stir fry your choice of vegetables, then add noodles.
~If adding in any meat, stir fry in a separate skillet and once cooked, add into onion mixture with the noodles and sauces.
~Sprinkle finished product with bean sprouts

Enjoy!

Monday, 22 July 2013

Philly Cheese Steak Stuffed Peppers


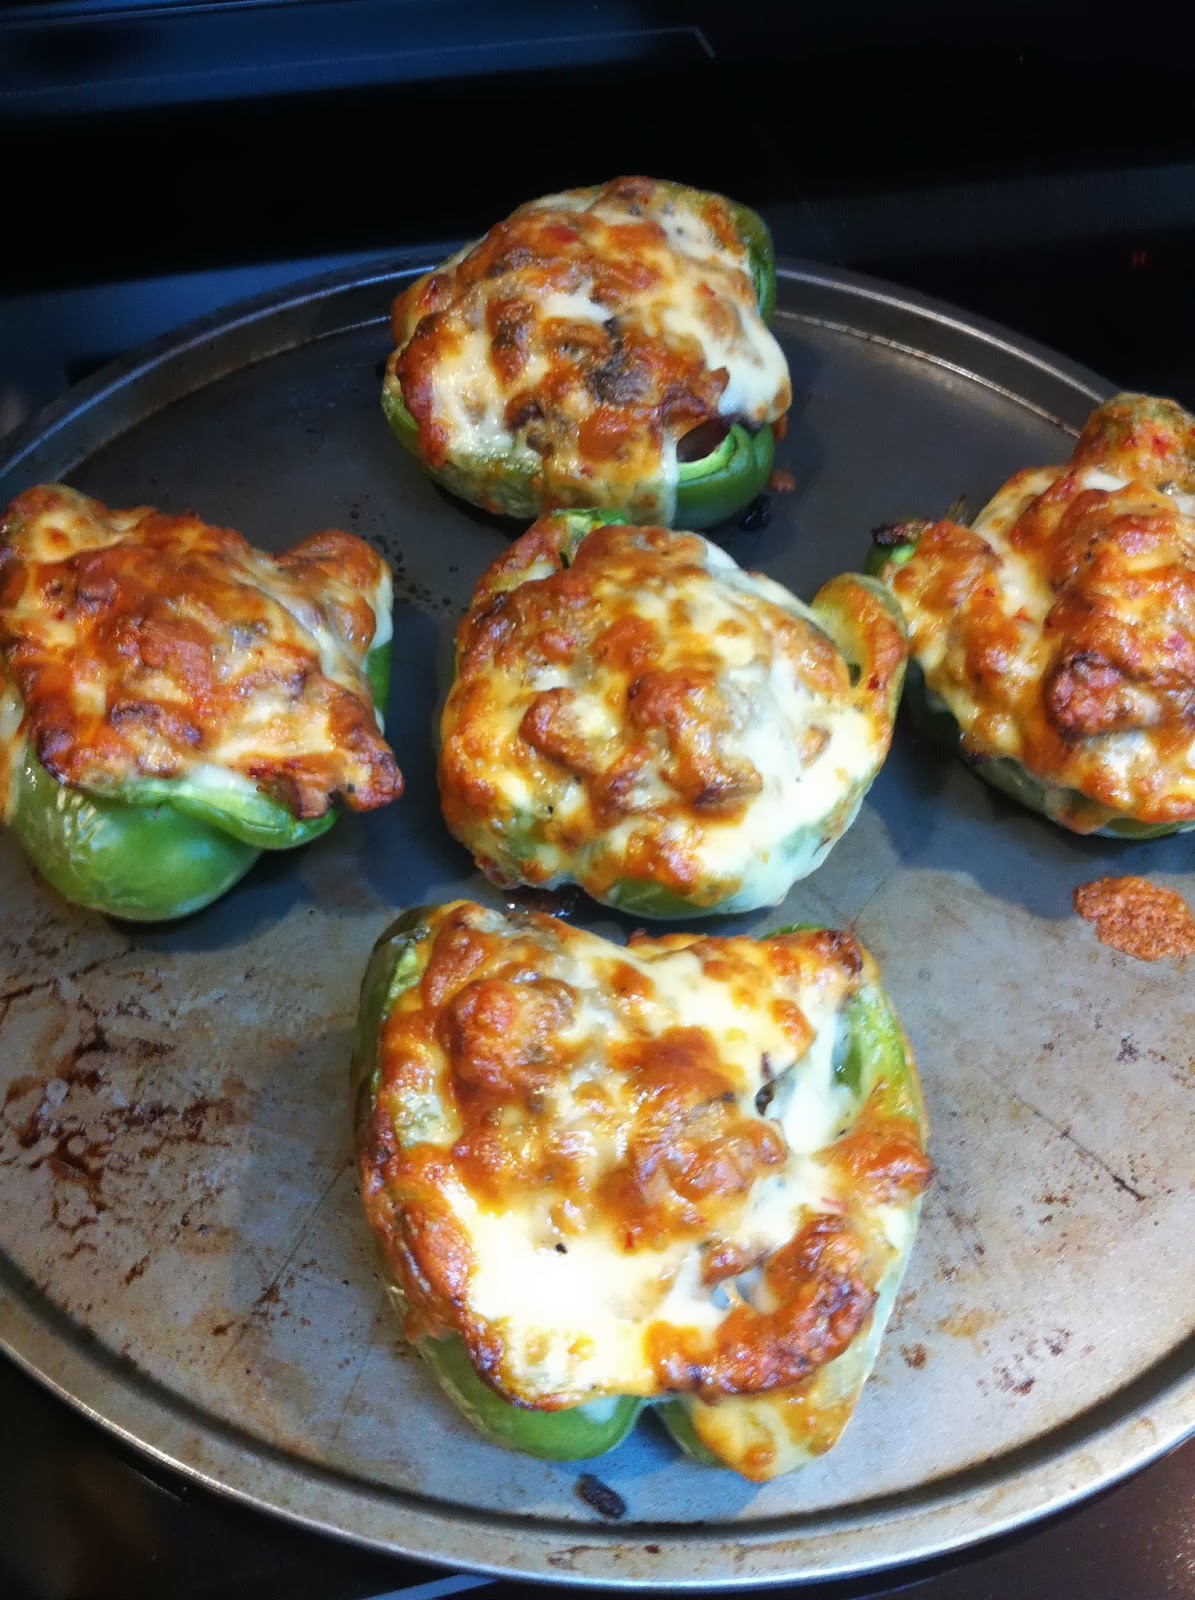
These were a success. Like a really, really big success. Usually only some of the more unique things I make, pass the 'would I make this again test?'. This one passed with flying colours and everyone seemed kind of shocked that this slightly bizarre concept could taste so amazing.

Recipe from Quick & Easy Recipes.

Ingredients

8 oz. thinly sliced roast beef (or leftover steak)
8 Slices Provolone Cheese (I used a spicy Monterey Jack and it was amazing, don't use havarti it just melts away to nothing)
2 Green Bell Peppers
1 Onion, diced
1 C. Mushrooms, sliced
2 Tbsp. Butter
2-3 Cloves Garlic, minced
Salt 
Pepper

Directions

~Preheat oven to 400 F
~Slice peppers in half lengthwise and remove the seeds and stem.
~Place a slice of cheese in side each half of the pepper
~Combine onion, mushrooms, butter, salt & pepper in a heated skillet and saute until softened.
~Add in beef slices and stir long enough to heat.
~Add garlic and cook, stirring constantly.
~Scoop mixture into each pepper.
~Top with another slice of cheese.
~Bake for 15-20 minutes, or until the cheese on top is bubbly and golden.

Enjoy

Wednesday, 13 February 2013

Cheesy Italian Quinoa Bake

I've been looking forward to making this for a few weeks now and was happy to finally get around to it. I did kinda change it up a bit, and decided that the recipe I had, had some of the basics for an Italian Style Dish, so I went with it and this was what I ended up with. It has an incredible smell to it, but I didn't find that the flavour quite measured up to that smell. Everyone else who ate it said it was better than the Quinoa Mac & Cheese I made a week or so ago, but I had to disagree. All a matter of opinion though I guess. I was also told to stop with the quinoa for awhile, so oh well. 

Recipe adapted from Dinner, Dishes & Desserts who got it from The Healthy Apple.

Serves 8-10 people

Ingredients

1 1/2 C. Quinoa, uncooked
1 1/2 C. Water
1 1/2 C. Broth
3 Eggs
2 Tsp. Basil
1/4 Tsp. Sage
1 Tsp. Oregano
Salt
Pepper
6 Cloves Garlic, minced
1 1/2 C. Onion, diced
1 C. Tomatoes, diced
1 C. Mushrooms, diced
1 1/2 C. Mozzarella Cheese (I only had Aged Cheddar on hand), grated
2/3 C. Parmesan, divided
Marinara Sauce

Directions

~Rinse quinoa and cook in the water and broth in a saucepan until all the moisture has been absorbed. Allow to cool until it is just warm.
~Preheat oven to 375 F
~Meanwhile, whisk eggs in a large bowl.
~Season eggs with basil, sage, oregano, salt & pepper to taste, & garlic.
~When quinoa has cooled enough, mix into the egg mixture.
~Add onion, tomatoes, mushrooms, cheese and 1/3 C. Parmesan. Mix to combine.
~Transfer mixture into a greased 9"x13" baking dish. Sprinkle top with remaining 1/3 C. Parmesan
~Bake for 20-25 minutes or until top is golden and crispy.
~Serve by itself or topped with marinara sauce.

Enjoy


Monday, 4 February 2013

Quinoa Mac & Cheese


This was good and will definitely be added to my make-again list. Even the one that hates anything to do with healthy, wholesome eating (aka eating quinoa) went back for seconds and ate it as a midnight snack as well. I feel this incredible sense of accomplishment for this.

The thing for me about quinoa is I've always liked the idea of it, but never really found anything I could make at home that tasted half decent. Until now that is. I think the answer may be as simple as cooking it in stock instead of water, or maybe just adding lots and lots of cheese to it. Cheese always makes anything better (or is that supposed to be chocolate?).

Recipe from Baking Serendipity who adapted from Monica Nelson Fitness.

Serves 6-8

Ingredients

1/2 Zucchini, chopped into small pieces (about 1/2-3/4 C.)
1 Medium Onion, diced
2 Garlic Cloves, minced
2 Tbsp. Oil
1 1/2 C. Quinoa, rinsed & drained
3 C. Chicken Stock
2 Eggs
1 C. Milk (we used unflavoured almond milk)
2 C. Aged Cheddar Cheese, shredded and divided
3/4 C. Parmesan Cheese, shredded and divided
1/2 C. Panko

Directions

~Chop vegetables and saute in oil in a large skillet until soft.
~Add in the rinsed and drained quinoa and saute for approximately 3 minutes.
~Pour in stock, stir and reduce heat and simmer until all the liquid has absorbed and quinoa is cooked.
~Meanwhile preheat oven to 350 F.
~In a large bowl, combine eggs, milk, 1 1/2 C. Cheddar & 1/2 C. Parmesan. Stir to combine.
~When quinoa is cooked, scoop into egg mixture and mix to evenly coat.
~Put mixture into a greased 9x13 baking dish (or to make individual versions, use muffin tins), sprinkle top with remaining cheeses and panko.
~Bake for 15-20 minutes or until top is crispy and golden and inside is hot.

Enjoy


Monday, 7 January 2013

Buffalo Cauliflower 'Wings'


Okay, these are good. And by good I mean I think I took the top layers of skin off of my tongue. Yes folks, these are very hot. But good, oh so good. I had requests to make them two nights in a row.

So as I said, these are hot, hot, hot but they taste exactly like hot wings, but not so much like buffalo wings but that could easily be remedied by using the buffalo flavoured Frank's Hot Sauce instead of the original.

Serves 6 people

Source Tasty Kitchen

Ingredients

1 Head Cauliflower, in florets
1 C. Milk
3/4 C. Flour
3 Garlic Cloves, minced
1 C. Hot Sauce
2 Tbsp. Butter

Optional ** Blue Cheese or Ranch Dressing for dipping

Directions

~Cut cauliflower into florets.
~Preheat oven to 425 F
~In a medium bowl whisk together milk, flour and garlic
~Dip each piece of cauliflower into mixture and let excess drip off.
~Place on a greased cookie sheet
~Spray tops of cauliflower with oil
~Bake for 20 minutes until fork tender
~While baking, in another medium microwave safe bowl melt butter then add hot sauce.
~Heat mixture just before tossing the baked cauliflower in it.
~Serve immediately as it cools very quickly.

Enjoy

Tuesday, 30 October 2012

Green Bean Casserole


I've never really had any desire to make this dish until we went to Costco and bought a huge bag of these Crispy Fried Onions. They were little shavings of onions that had been fried and then packaged up to be used on salads, burgers or casseroles. So, that's what brought me to making this dish. I found it okay, not great, but okay. But that could have been because the beans we got were kind of rubbery and not so stellar. Others that tried it really liked it. But, I like vegetables just as vegetables, they don't need to be all dressed up for me to like them, so that may have been another reason.

The recipe for this came from Campbell's.

Serves 6

Ingredients

4 C. Cooked Green Beans
1 Can Condensed Cream of Mushroom Soup
1/2 C. Milk
1 Tsp. Soy Sauce
Pepper
1 C. French Fried Onions, divided

Directions

~Wash beans and snip the ends off.
~Boil beans until tender in a pot of water, then drain
~In a medium bowl, combine the soup, milk, soy sauce and pepper to taste. Stir.
~Mix in 2/3 C. of the onions and the beans.
~Spoon mixture into a greased 1 1/2 quart casserole dish.
~Bake in the oven at 350 F until mixture is bubbling (20-25 minutes).
~Sprinkle with remaining onions and return to oven for 2-5 minutes (watching that it doesn't begin to burn).

Enjoy


Monday, 22 October 2012

Sweet Potato Casserole


This was something I just 'had' to make. I meant to make it for Thanksgiving Dinner, but we ended up making 10 gallons of mashed potatoes, so this dish wasn't exactly needed. So I made it tonight, because I didn't know how it was going to turn out and so I made it because we had some leftovers in the fridge from last night incase it turned out to taste awful. The other option was to simply scrape the marshmallows off if it wasn't good. I never expected the marshmallow topping to be good, but again, I just 'had' to try the full blown sweet potato casserole. Anyway, just plain mashed yams taste amazing (no butter or milk or sugar needed), this dish tastes pretty darn good and the marshmallow topping just adds that little something extra (without making it too sickly sweet like I had expected it to), no need to scrape it off or turn to the leftovers.

I've never had the need to buy pumpkin pie spice, mainly because I don't like pumpkin pie, but this recipe called for 1 tsp. of it. Instead I used the cinnamon, all spice, nutmeg and ginger combination I listed below. Take your pick for which version you prefer.

Unfortunately, I copied this recipe down from a food blog some time ago before I had ever considered the possibility of food blogging myself. As such, I never copied down the source of this recipe and I was unable to find it by searching through google. So to the unknown blogger out there, I apologize and I thank you for this great tasting recipe.


Serves 12

Ingredients

4 lbs Sweet Potatoes (or yams as we call them here), 4 large or 6 if they're regular sized
1/4 C. Butter
1/4 C. Milk (I used vanilla almond milk)
2 Eggs
1/4 C. Brown Sugar
3/4 Tsp. Cinnamon
1/8 Tsp. All Spice
1/8 Tsp. Nutmeg
1/8 Tsp. Ginger
1/2 Tsp. Salt
2 C. Mini Marshmallows

Directions

~Scrub the yams clean, prick with a fork and bake until soft either in the microwave or in the oven (just as you would bake a regular potato).
~Once the yams are soft, allow them to cool (important step...don't make the same mistake as me, my fingertips were in rough shape because I skipped this step) and then remove the skins.
~Place the peeled yams in a mixing bowl and mash or process with the paddle attachment of your stand mixer.
~When smooth, add in all the remaining ingredients except the marshmallows. Mix until well combined and smooth.
~Scoop mixture into a greased 8x8 baking dish (or two loaf pans) and bake for 30 minutes at 350 degrees, or until heated through.
~Top with marshmallows and return to the oven for 5 minutes, or until marshmallows have melted.

Enjoy!

Wednesday, 17 October 2012

Dairy Free, Creamy Scalloped Potatoes


I feel like I just accomplished the impossible. We just ate scalloped potatoes that had a rich and thick creamy sauce, without any cream in it. Plus, it looked exactly like what normal scalloped potatoes look like, minus some stringy cheese, but big deal. This was so cool.

I'm going to say Happy Easter now, just like I did when we sat down to eat. Yeah, I know I'm about 6 months too late (or early) but when you're sitting down to ham and scalloped potatoes what else can you say.

The texture of this dish was bang on and the flavour was there as well (which truly boggles my mind considering some of the ingredients that are listed to be used: tahini, rice vinegar??). You actually don't taste any of these 'different' ingredients when it's all said and done. They just blended in to give the right texture to the sauce. One thing I might do differently next time is add 1/2 tsp of salt to the sauce as it cooks (instead of just sprinkling some over the top before cooking), or a couple of cloves of garlic. Because it's missing the cheese it just needs a bit of something else to go with the 'cream' flavour. This is definitely a keeper.

I used the exact recipe that I found at Tessa the Domestic Diva and I added in my suggestions as optional ingredients.

Serves ~6

Ingredients

1 3/4 C. Chicken Broth
1/4 C. Mayonnaise
1 Tbsp. Nutritional Yeast
1 Tbsp. Tahini
1 Tsp. Rice Vinegar

*Optional* 1/2 Tsp. Salt

1/4 C. All Purpose Flour
5 Large Potatoes, peeled (I used Russets)
1 Onion, chopped finely
*Optional* 2 Cloves Garlic, minced
Paprika
Pepper

Directions

~Preheat oven to 350 F.
~Slice potatoes thinly using a mandolin, slicing attachment on a food processor or a knife.
~Chop the onion finely and mince the garlic.
~Arrange the potatoes, onion and garlic in a greased 9x13 baking dish.
~In a medium saucepan, combine all the ingredients from the chicken broth through to the salt and stir until smooth.
~When mixture begins to heat, whisk in the flour a little bit at a time, making sure to whisk out all of the lumps before adding more.
~Continue to whisk until mixture thickens and starts to bubble.
~Pour mixture over top the potatoes, and sprinkle with paprika and ground pepper.
~Bake for 1 - 1 1/2 hours or until fork tender and bubbly (cooking time will be dependent on how thin you sliced the potatoes, so watch carefully).

Enjoy


Wednesday, 10 October 2012

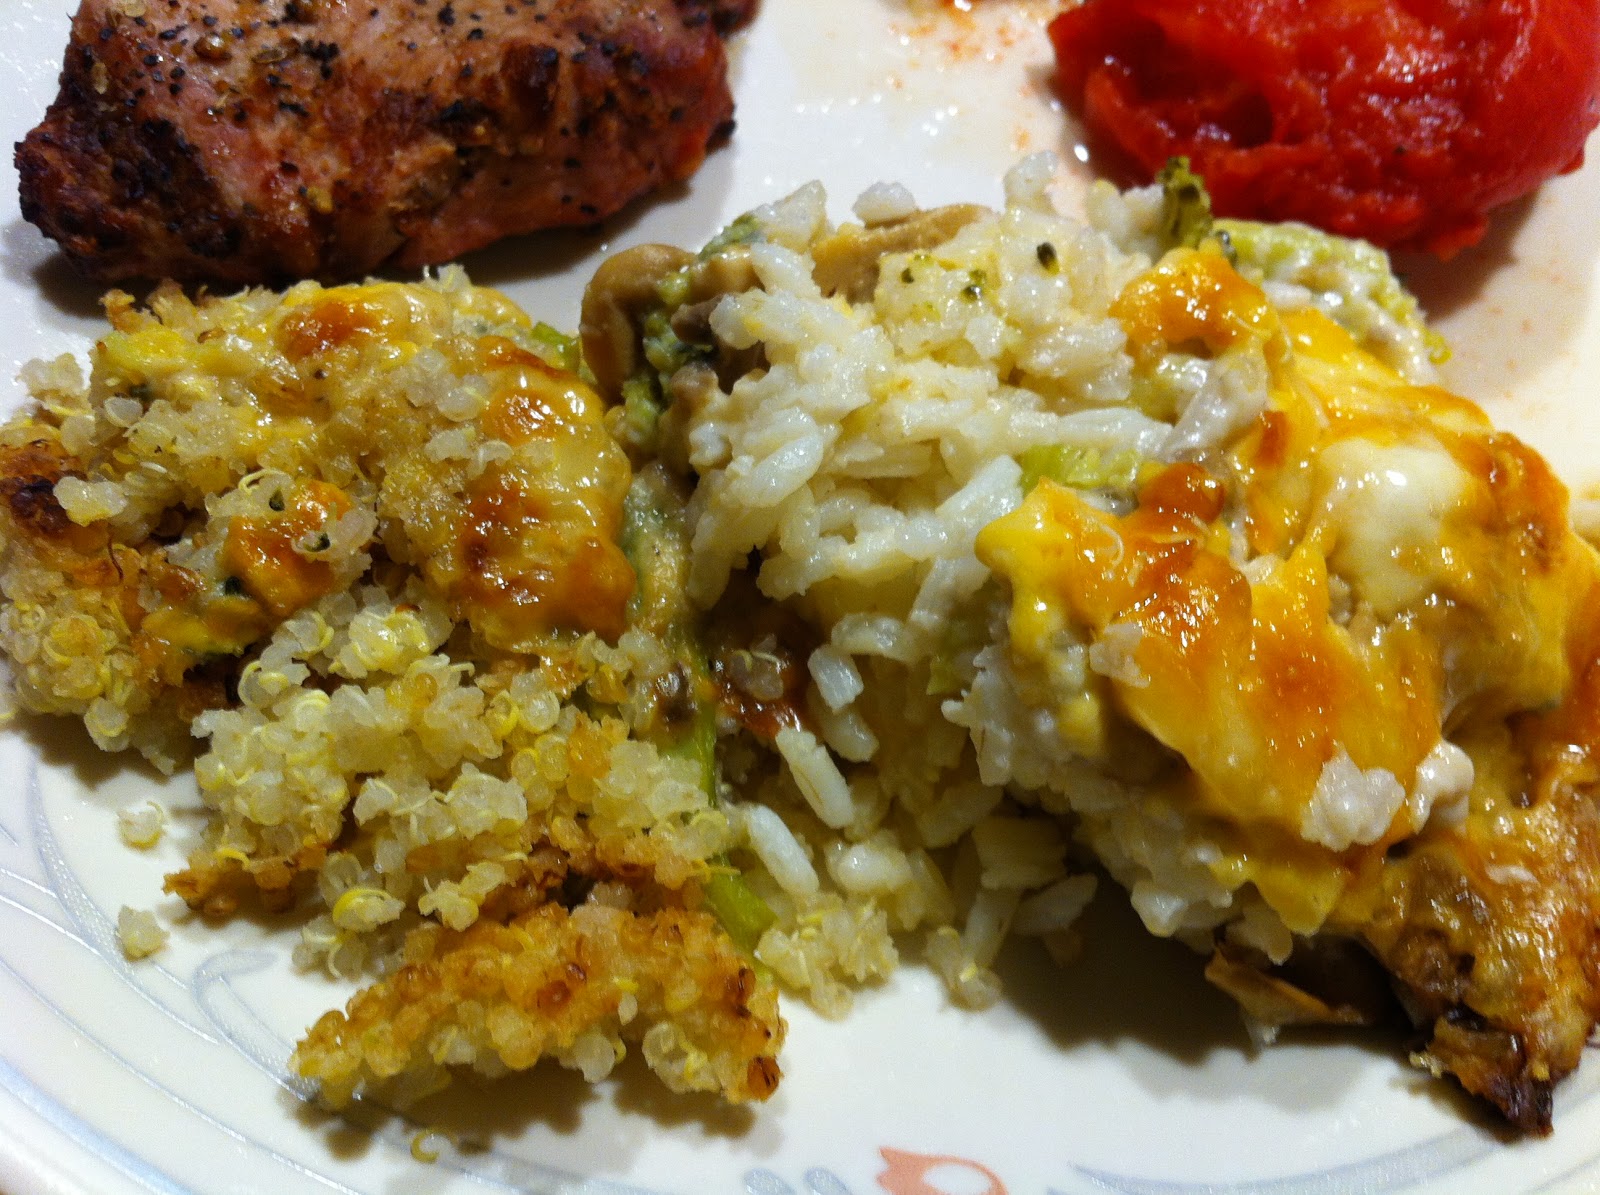
Cheese Rice Casserole (or Quinoa)

Quinoa on the left : Rice on the right


My family has never been (and will never be) a casserole family. Mainly because of the fact that 99.99% of casseroles started out as Campbell's Recipes, meaning that all 99.99% of the casseroles call for a condensed soup in some form or the other. Condensed soup = a lot of cream = bad news for lactose intolerant. Despite the fact that this casserole not only contains soup, but a lot of cheese as well, you would think it would be the worst type of offender. Yup, no! This is what we make in our house when we've eaten plain rice for 3 days and still have mountains of it left. It's great. Just not for the lactose intolerant among us.

When I was away at university, my mom took it upon herself to bring me a couple of my favourite dishes. This being one of them. The only problem? To transport it easier she froze it. Let me tell you, rice doesn't freeze. So do yourselves a favour and enjoy this straight from the oven (or if you must, reheat it in the microwave after it's been in the fridge). Oh, and she added carrots...the nerve. While I love carrots, they don't belong in this dish, so please, please, please don't mess with the broccoli. Trust me. As a little kid I did not like broccoli, but I still loved this dish, so do me a favour and just try it.

As you can see, I'm not fond of anyone changing this dish. It is not meant to be changed. BUT...the last time we had it, we substituted in quinoa for the rice and I have to admit, it was pretty decent.

We call this recipe my Mom's Recipe, but really I think she stole it from my aunt. Were it came from before that is unknown but like I said earlier, I'd assume it originally came off a can of Cream of Mushroom Soup.

Ingredients

1/2 lb. Aged Cheddar Cheese, grated
2 Heads Broccoli (~2 lbs)
1 1/2 C. White Rice (or quinoa)
3 C. Water (to cook the rice / quinoa, or use the amount specified on the packaging)
2 Cans Cream of Mushroom Soup (the condensed version)
*Optional* 1 Can Sliced Button Mushrooms, drained

Directions

~Cook rice according to package directions
~Steam broccoli until crunchy (do not cook until soft because they'll be overcooked by the time they come out of the oven).
~Mix soup, cheese (reserve enough to sprinkle over the top) and mushrooms in a large glass bowl.
~Preheat oven to 350 degrees.
~In a greased casserole dish, layer the rice, broccoli then the cheese-soup mixture. Repeat.
~Sprinkle the top with the remaining cheese.
~Bake at 350 degrees for 1 hour.
~During the last couple of minutes, switch the oven over to broil so the cheese goes crunchy on top.

Enjoy!


Monday, 24 September 2012

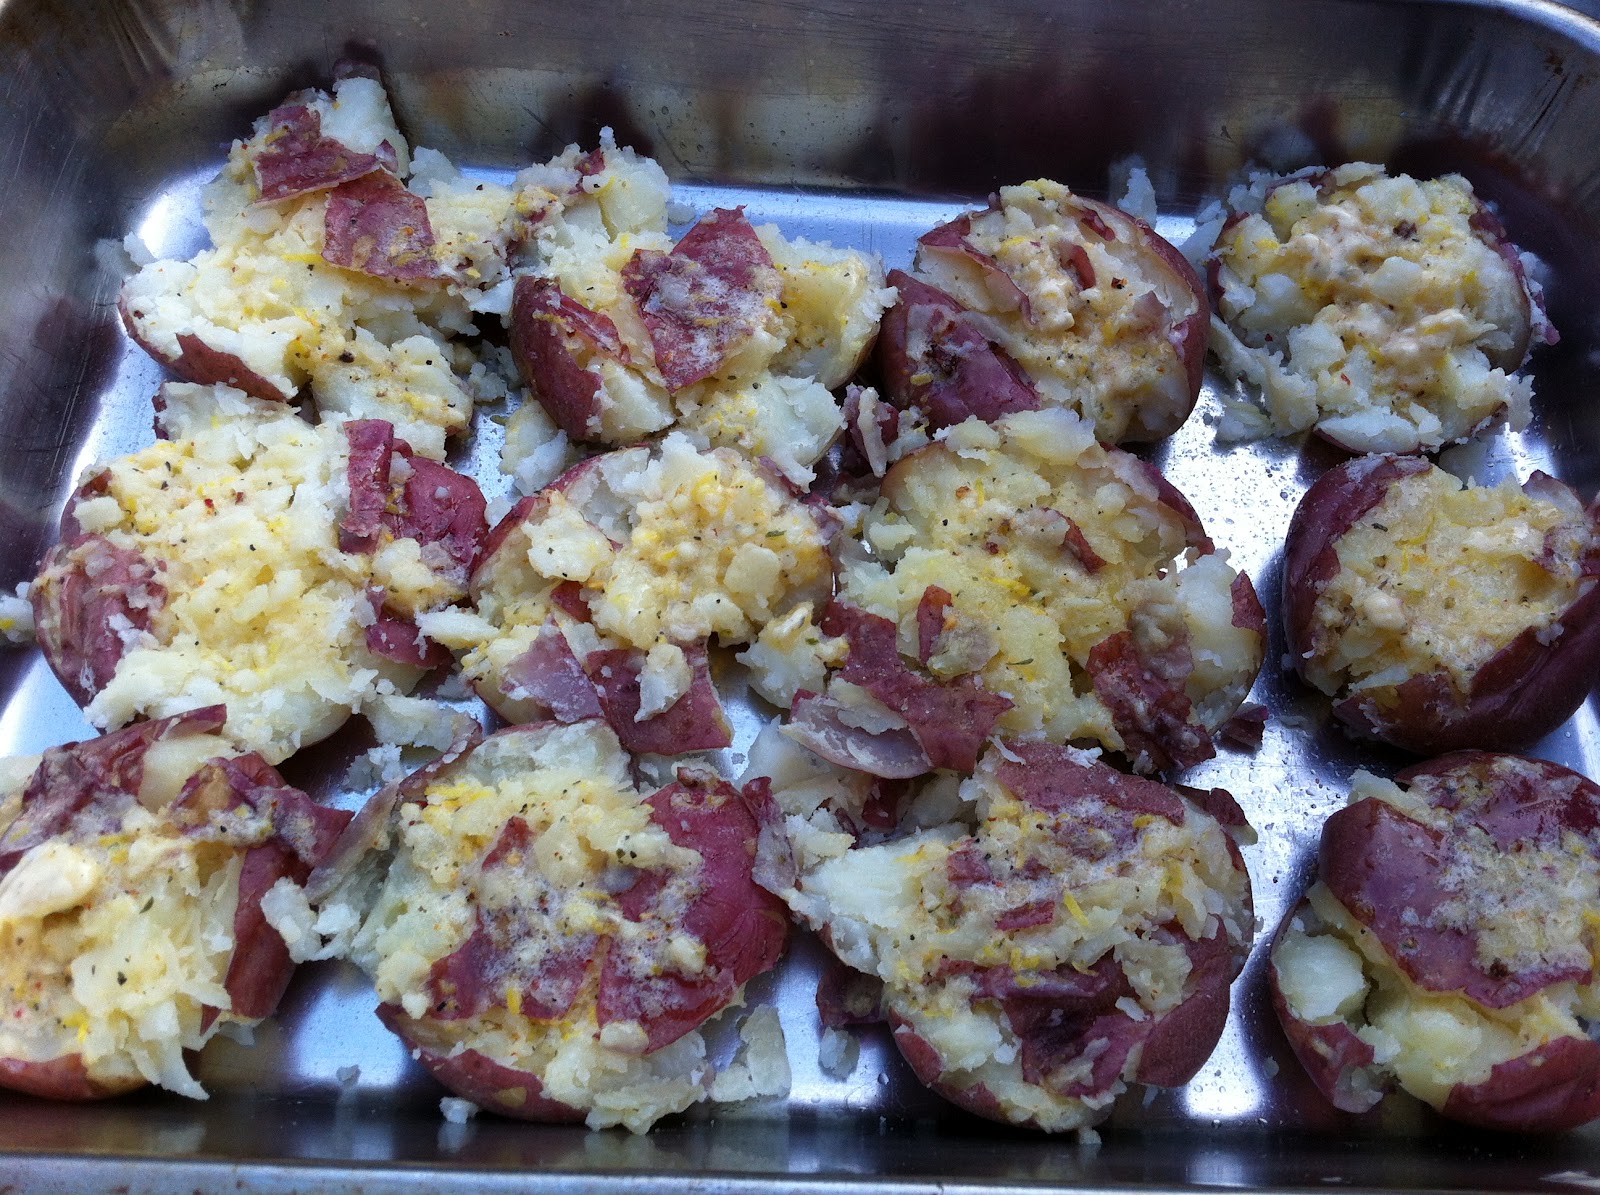
Smashed Potatoes with Herbed Butter


I've made these once before. The first time instead of using the greek spices I used fresh dill. Unfortunately, the time for fresh dill has come and gone and I was left staring at the dried spice drawer trying to come up with a substitute. I briefly considered some Montreal Steak Spice (which would be very good I'm sure), but not exactly what I was hoping for, for tonights dinner. So, I went garlicky and lemony and let me tell you, it has been hours now since I ate and my mouth is still burning from the garlic. What I'm trying to say is, if you aren't a huge garlic fan (let me slap some sense into you...kidding) you might want to reduce the number of garlic cloves in this. Then again maybe not, as I was using amazingly fresh and crisp (not rubbery in the slightest, hallelujah), local farm garlic. So I think it may have had a bit more of a kick than the grocery store variety would have.

The idea for smashing the potatoes has come from multiple blogs. The herbed butter is my own creation.

Makes 8 servings


Ingredients

16 medium Red Potatoes
1/2 C. Butter
Zest of 1 Lemon
1 Tsp. Lemon Juice
1/2 Tsp. Hot Sauce
5 Cloves Garlic, minced
1 Tsp. Greek Spice Blend
Salt
Pepper

Directions

~Bring a large pot of water to the boil and place potatoes in the pot.
~Meanwhile in a small bowl, whip the butter until it is smooth.
~Zest the lemon and add it in to the butter along with the lemon juice, hot sauce, minced garlic and greek spices.
~Mix well to combine.
~Place into fridge while the potatoes boil, allowing for the flavours to develop.
~Boil potatoes until they are fork tender. Then drain.
~Preheat oven to 375 F.
~Grease a cookie sheet and line up the potatoes on it.
~With a potato masher, gently press evenly on the top of each potato to crush it just enough so the whites of the potato are visible.
~Place a dollop of the butter mixture on top of each smashed potato and then spread so it covers the entire top surface.
~Season with salt & pepper
~Bake potatoes in the oven (or on the BBQ as I had to do) until the top surface begins to brown and crisp (10-12 minutes).
~Serve with a dollop more of the herbed butter.

Enjoy (and don't think of all the cholesterol)!


Wednesday, 19 September 2012

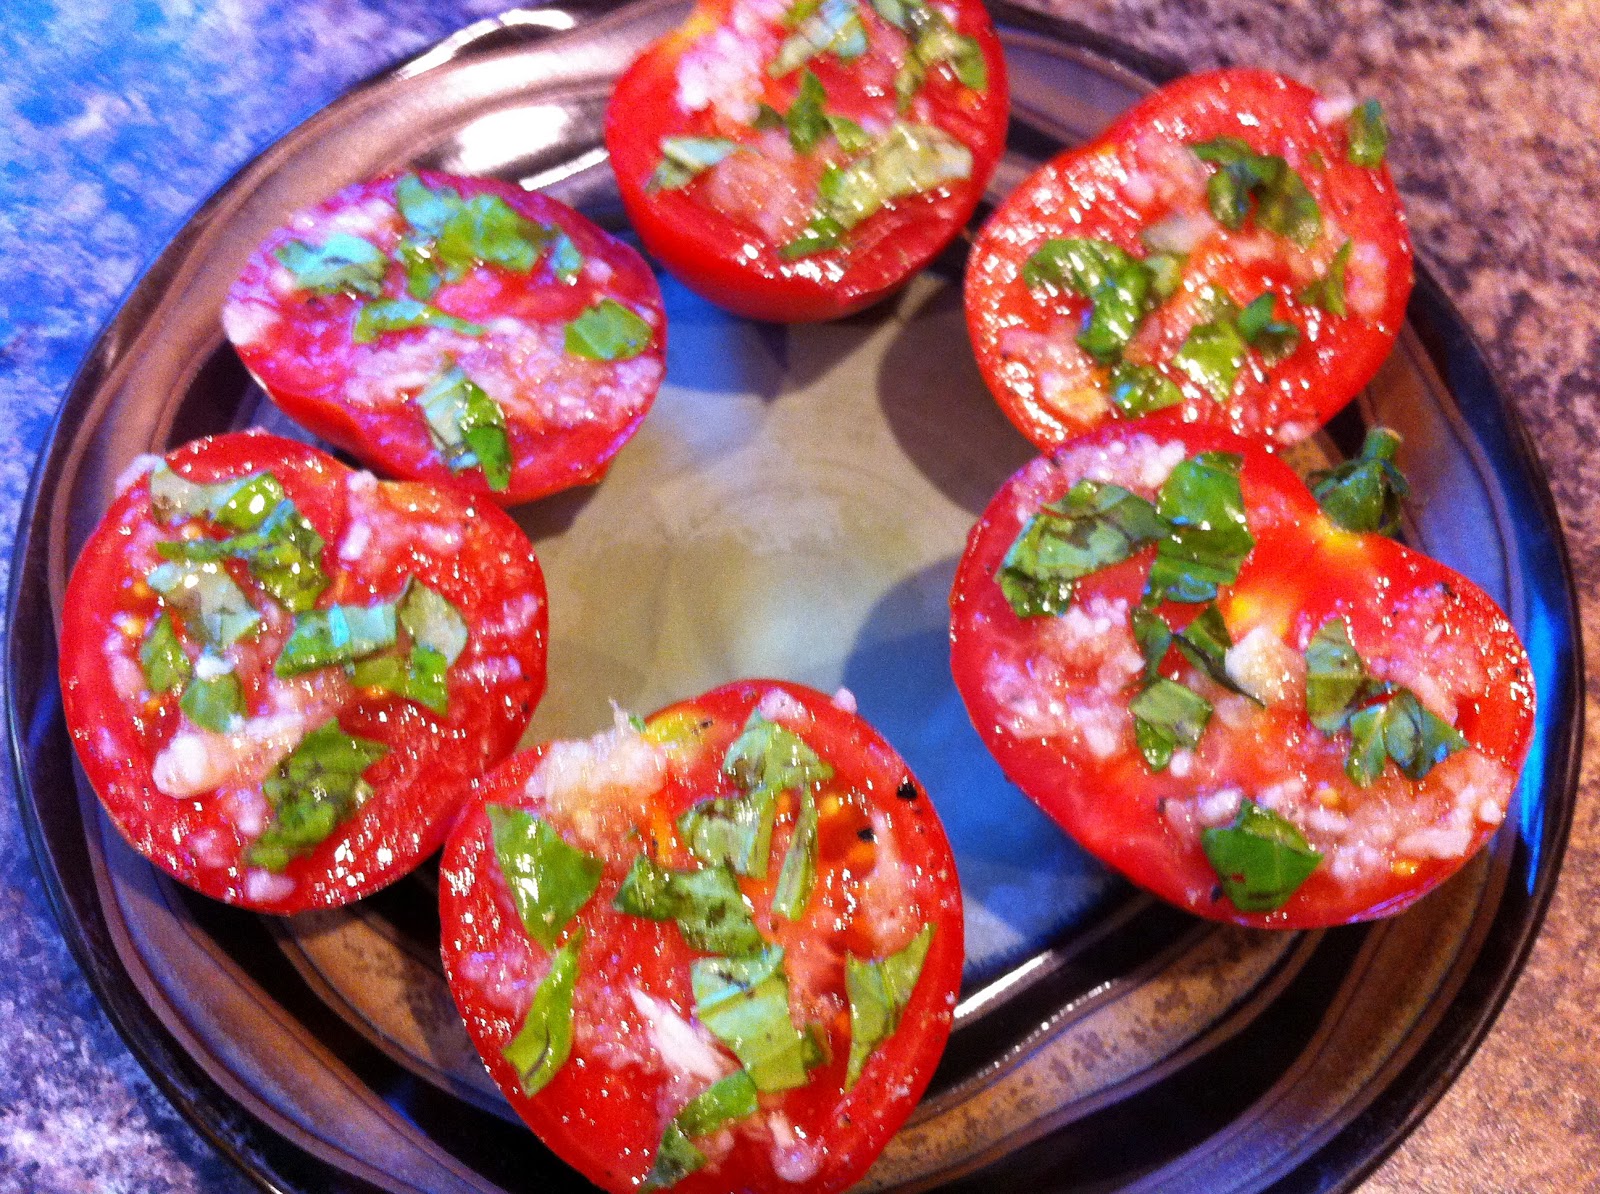
Grilled Tomatoes


Our tomatoes are finally ripening much to the little tomato addict's (and peanut butter, cheese, peas, bananas, garlic...addict's) delight. Yes, that would be my dog. You know, I think she only likes her little bite of steak she gets occasionally because we smother it in garlic. The steak, well it just messes with her being a vegetarian. I believe she's truly a vegetarian at heart.

Back to the tomatoes. It's amazing some days that I get any fruit off the plants because Kona runs up, grabs a tomato off the plant and runs to go eat it on the grass. It's not just tomatoes though. She sits under the raspberry bushes and aggressively nips each individual berry off the bush. Then there was the pea fiasco a few years ago. Let me tell you first, that we don't plant peas any longer. The first summer we planted them, Kona ran and picked the peas off the vine. Then the next summer, she got so excited that there were going to be peas in the garden that she ripped the vines right out of the ground and started flinging and chasing them around the back yard. Unfortunately, she pulled all the vines out before they produced any actual peas (the vines themselves must to a dog smell the same as the peas).

Moral of the story is: My dog is a vegetarian.

Back to the tomatoes. I was able to wrestle a few nice looking tomatoes out from under her nose and I decided to grill them. Typically I do these on a pan under the broiler, but because our oven is still broken and we were BBQing, I did them out on the grill instead.

Serves 3

Ingredients

3 Tomatoes
2 Cloves Garlic, minced
2 Leaves Fresh Basil
1/2 Tbsp. Olive Oil
Salt
Pepper

*Optional*
Feta Cheese

Directions

~Wash tomatoes and slice in half.
~Brush flat surface with oil.
~Spread the garlic and finely chopped basil over the oil.
~Season with salt & pepper
~Lightly brush over the top again with oil.
~Sprinkle with feta cheese if desired.
~Place on a baking sheet and under the broiler or directly onto the grill and grill until tomatoes soften and warm through.

Enjoy

Saturday, 23 June 2012

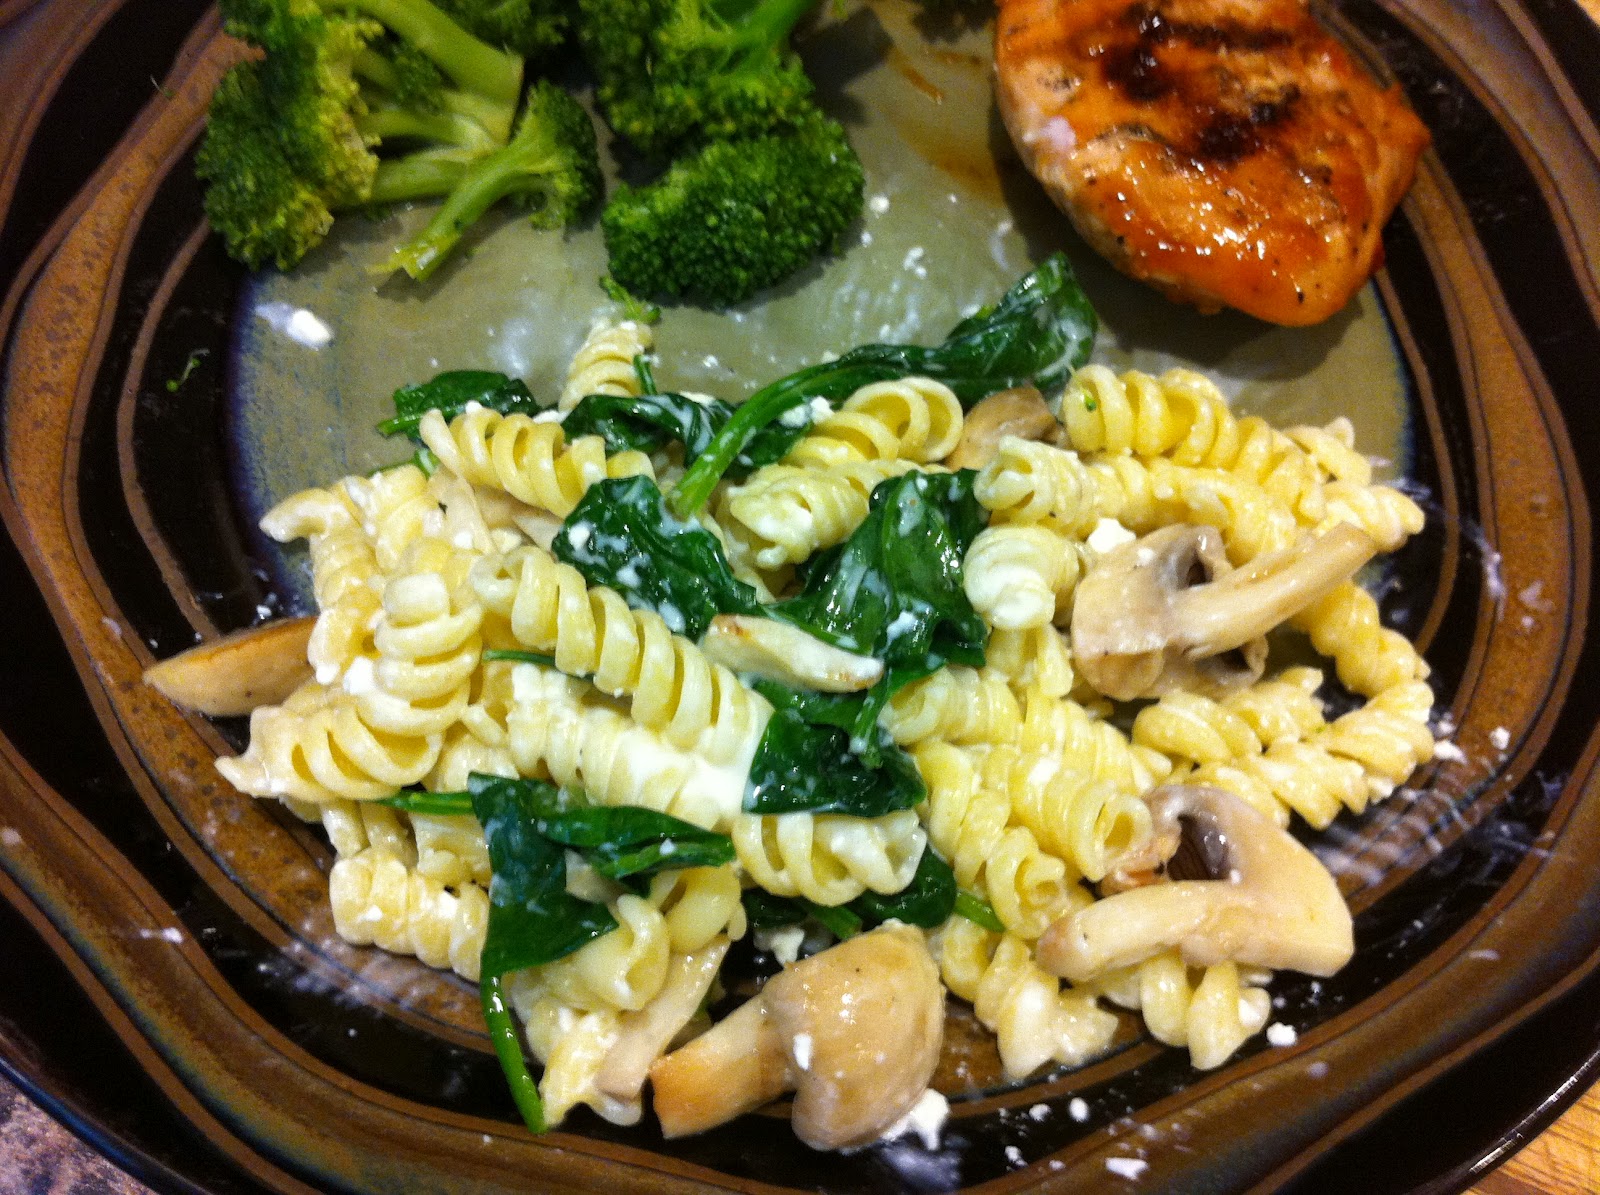
Greek Pasta


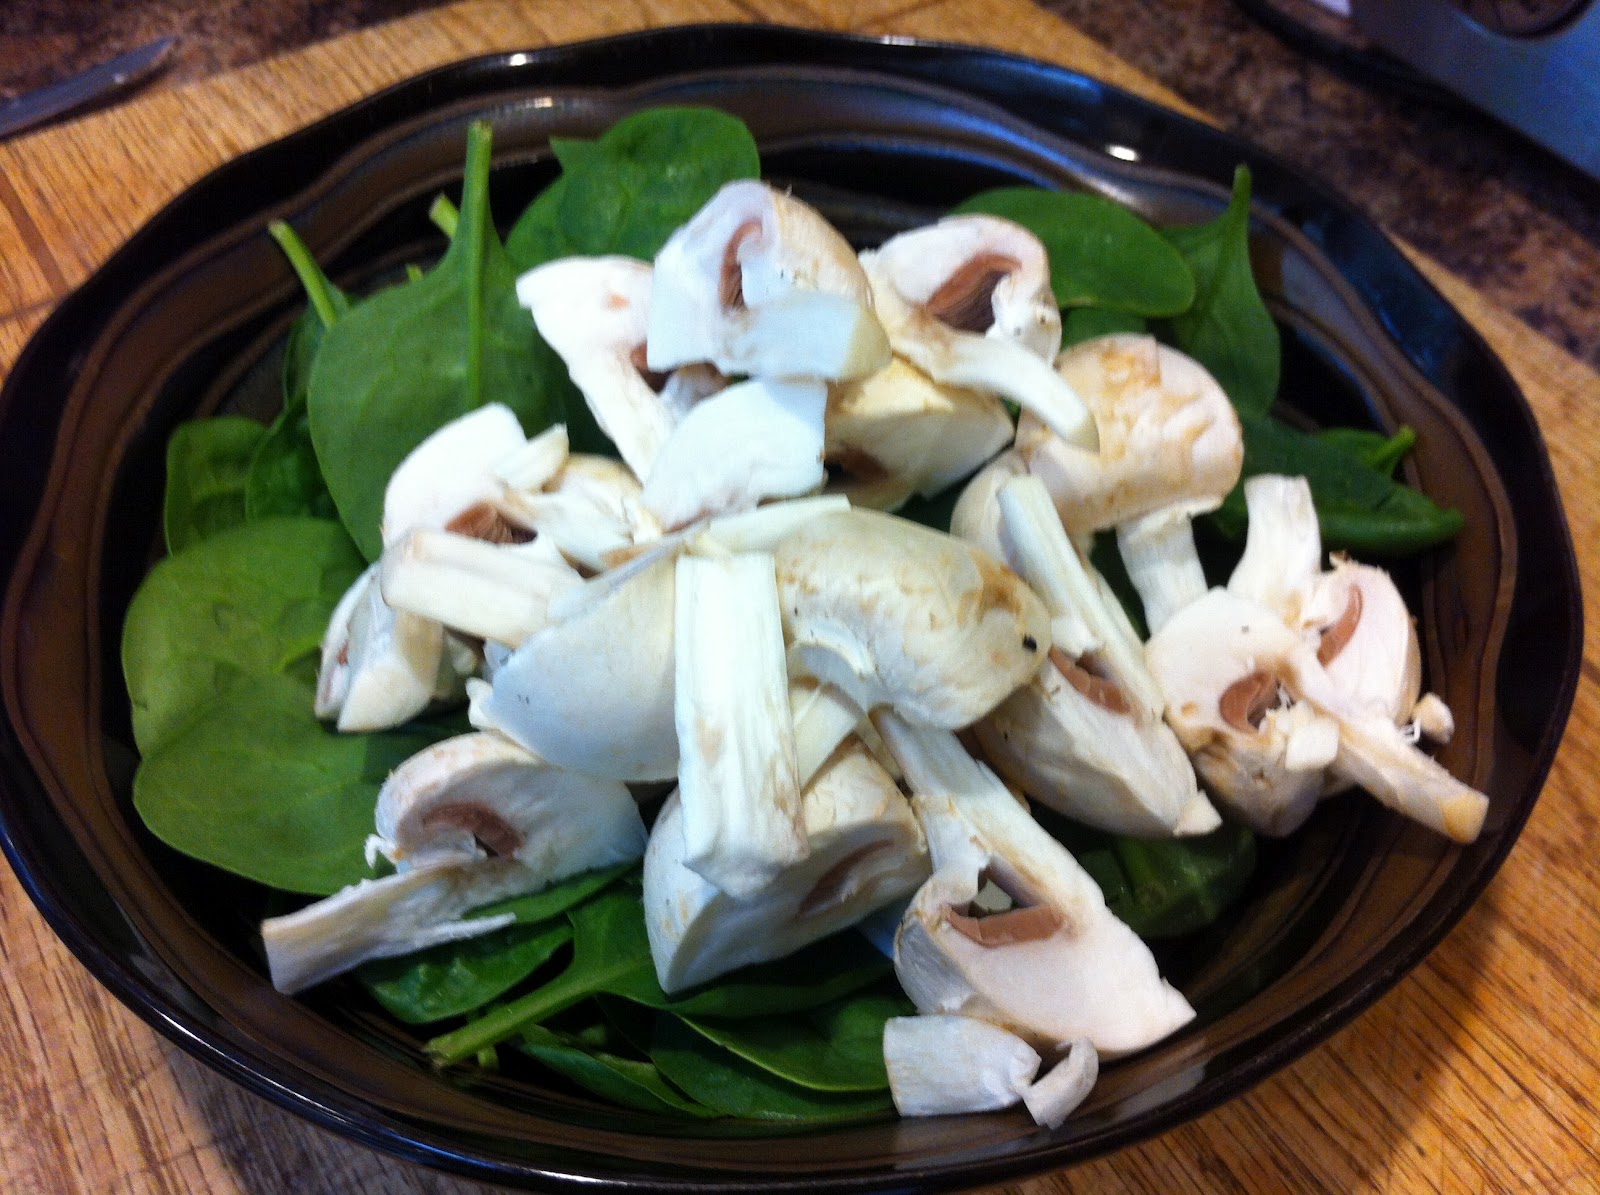
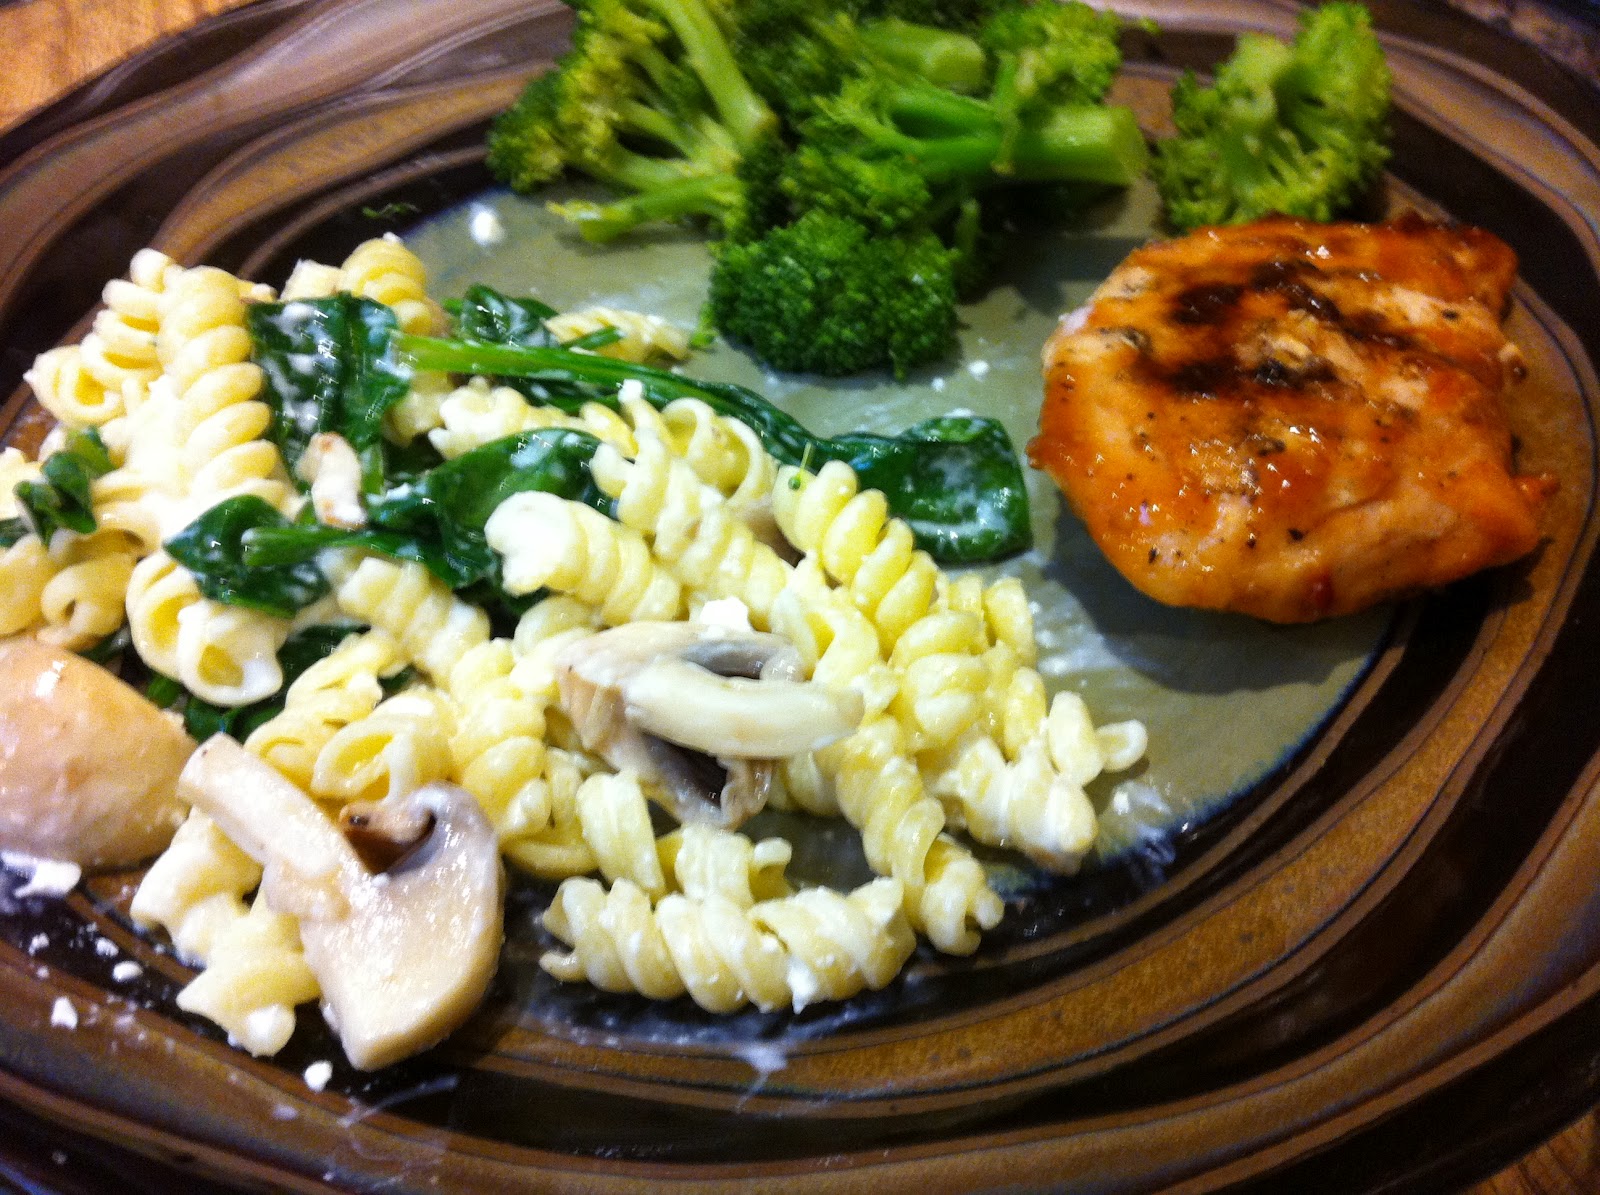
Greek Pasta. Is that an oxymoron? Maybe it's just having a culture identity crisis. I don't know, all I know is that it's tasty. I started a little while ago throwing a bit of tzatziki on my cold pasta that I was taking for lunch because we didn't have the dressing I normally use for pasta salad, and I'm not a fan of olive oil and / or balsamic vinegar. So, much to my delight I found something amazing. So, there are two ways you can eat this dish. Hot or cold. It's as simple as that. If you're eating it cold I'd suggest tossing your pasta with some raw mushrooms, some bell pepper, feta and tzatziki. Hmm! A great lunch. Well I began thinking and we needed something for dinner and we had some left over plain pasta. So I whipped this up in dare I say 5 minutes. Not a word of a lie. All those recipes people quote as saying are quick and simple work night meals, well this really is. The only thing you have to cut up is the mushrooms and from the time you walk into the kitchen until you can be eating this is literally 5 minutes. My leftover chicken I was reheating in the microwave was barely even heated by the time I was ready. So because I made this to accompany a leftovers meal, I did not make this up in a large quantity. Instead I did it more on an individual basis for just myself. Feel free to double, triple etc. depending on how much pasta you are having. Oh one more thing, when I say leftover pasta, I mean that I reheated it so it was hot. You can use fresh pasta though if you're one of those leftoverphobes. I guess I might not fit too well into the food blogging world because I am definitely not a leftoverphobe.

I'm sure this would be really good topped with a chicken breast that had been done in a souvlaki or something lemon juicy. I only had BBQed Chicken and so I decided to keep them separated on my plate instead of combining them.


Ingredients

Makes 1 Serving

3/4 C. Cooked Pasta
2 Tsp. Butter
1 C. Spinach
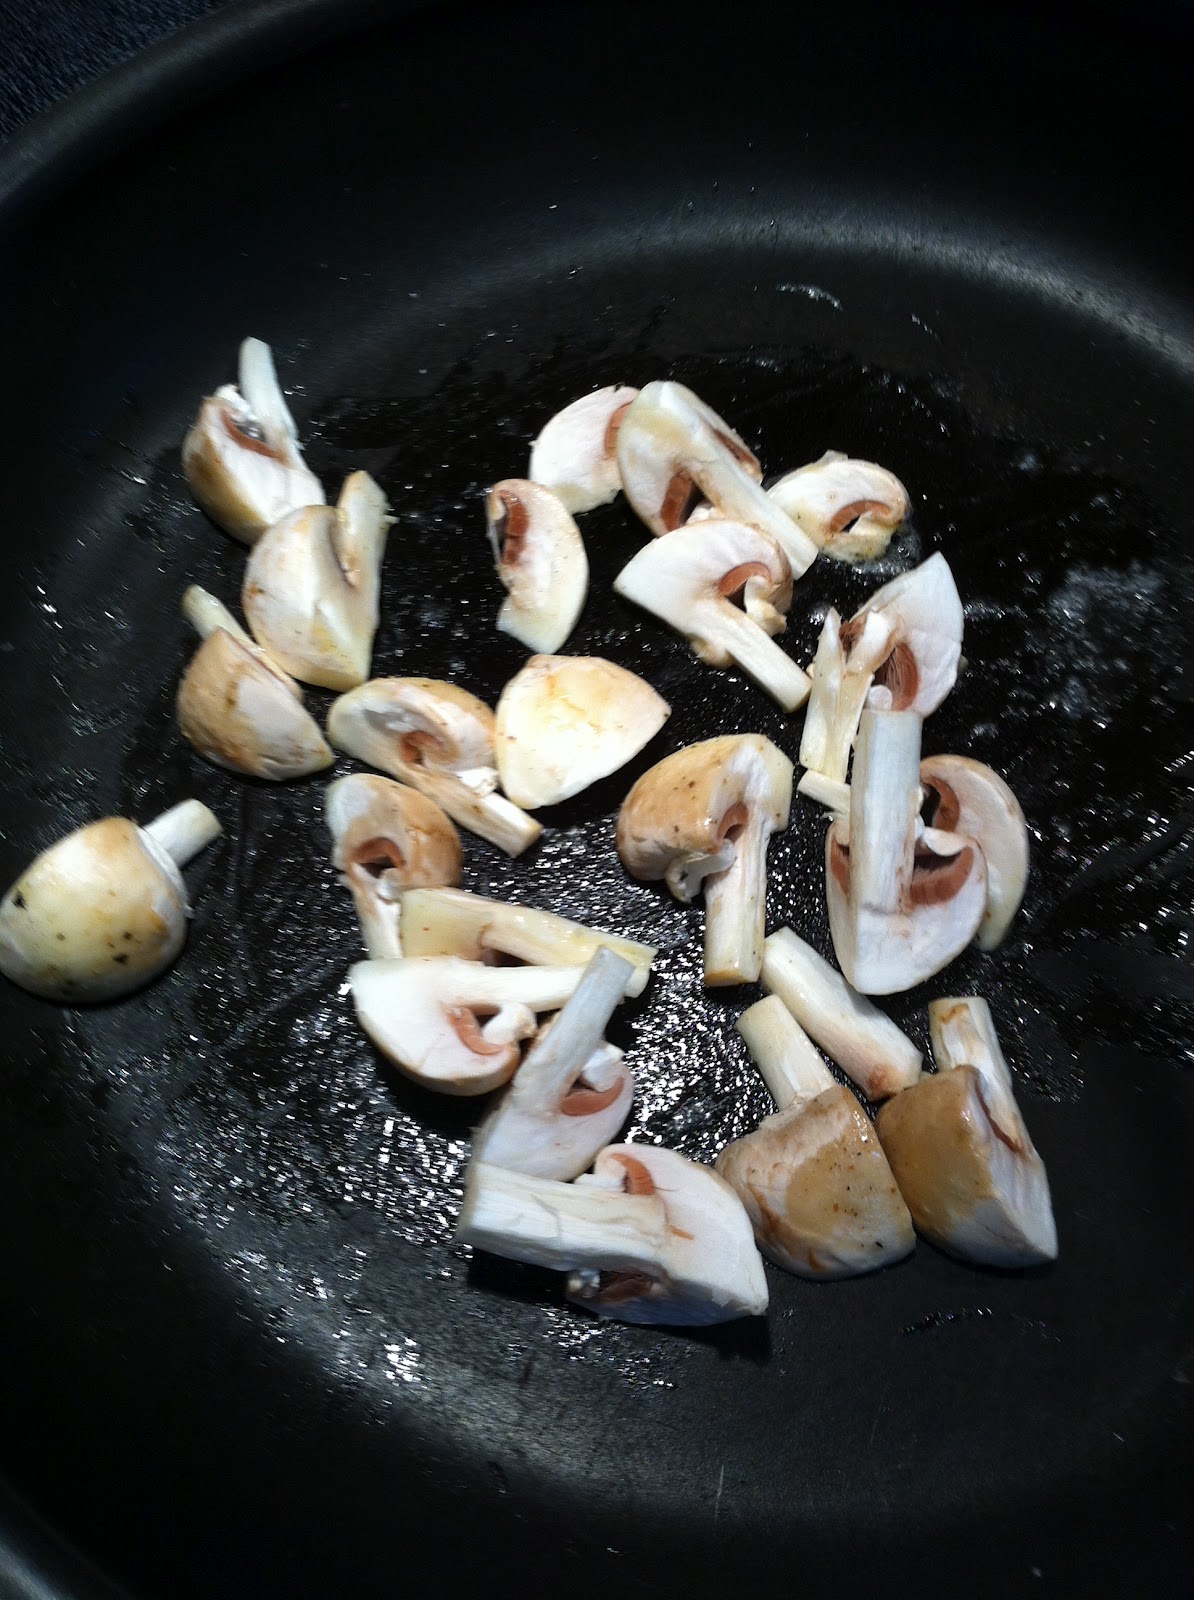
3/4 C. Mushrooms, sliced
2-3 Tsp. Tzatziki
Lemon Juice
1/2 Inch Cube of Feta, crumbled

Directions

~Cook your pasta according to the package instructions (or reheat last nights pasta as I did)
~Clean and slice your mushrooms
~When pasta is ready, heat a frying pan. When hot add in your butter.
~Once butter is bubbling, toss in the mushrooms and stir until they just start to cook (about 30 seconds)
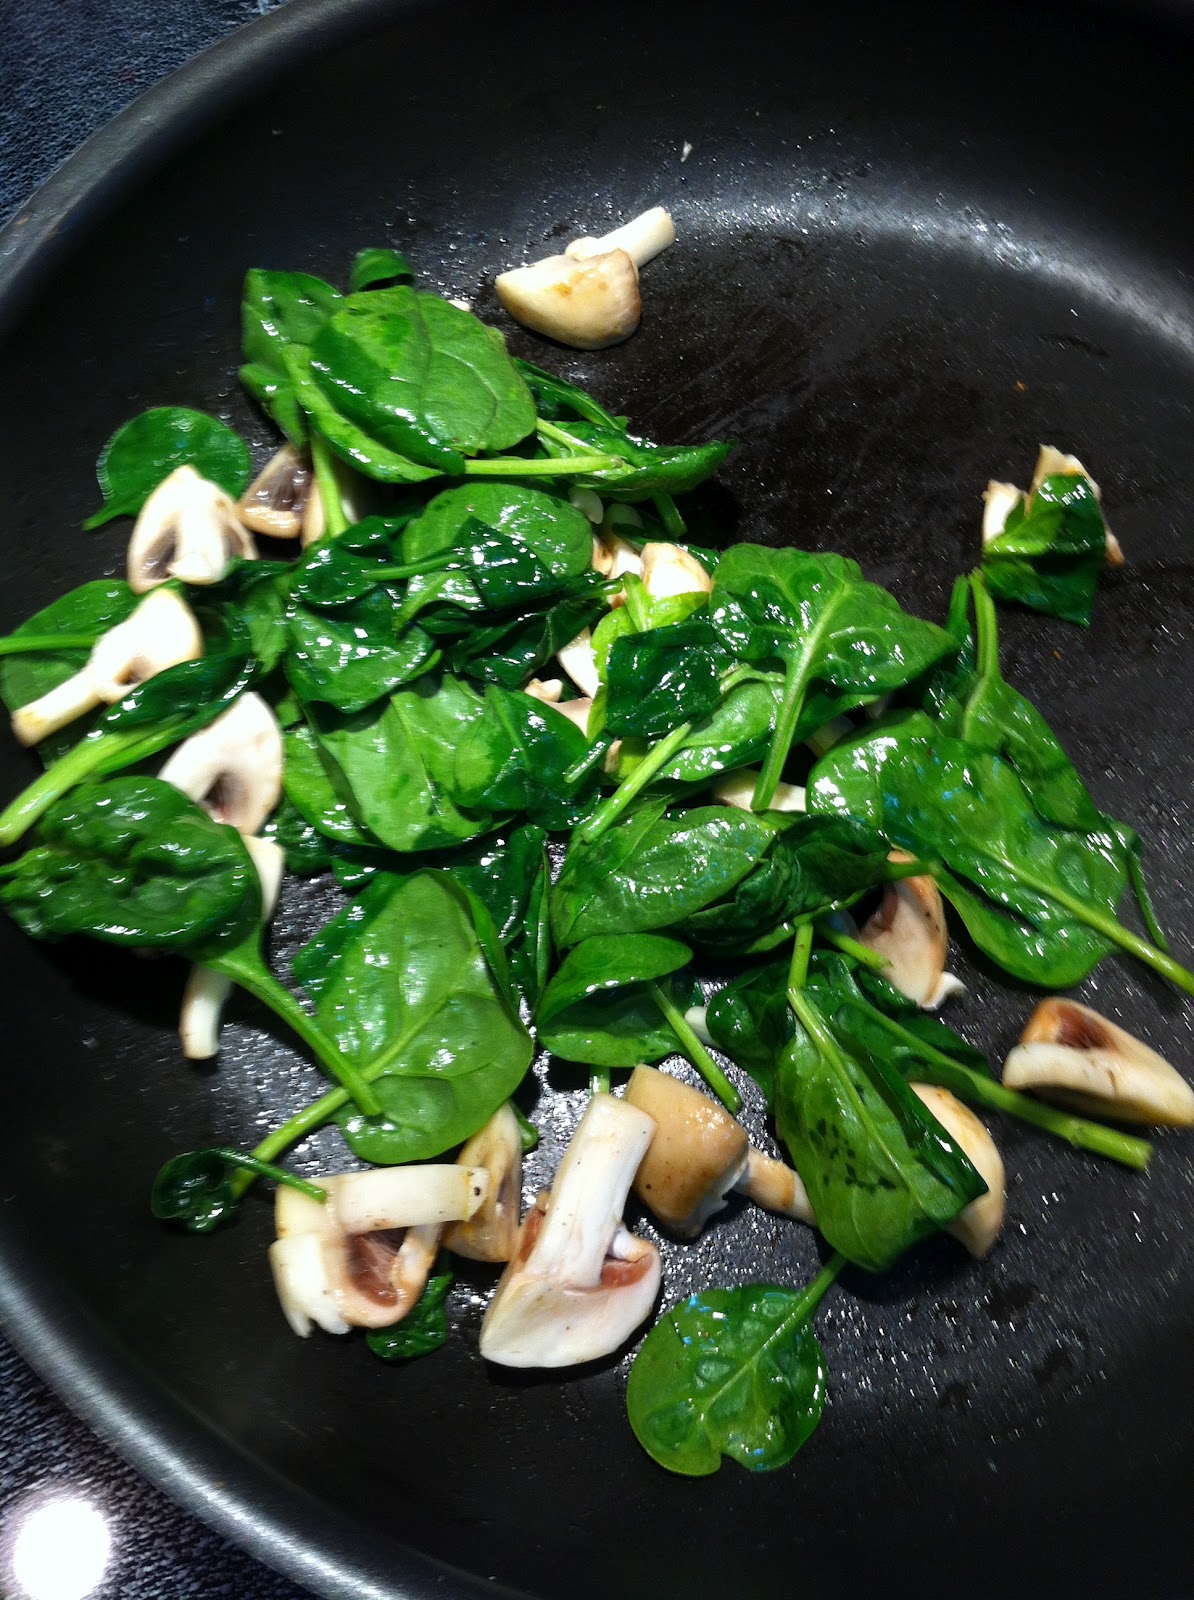
~Add in the spinach. Stir, just until the spinach begins to soften and wilt.
~Remove pan from heat.
~Top hot pasta with tzatziki. Stir to evenly distribute. It should melt nicely around the pasta.
~Place spinach mixture on top of pasta (work fast, the spinach cools really quickly.) Stir in.
~Top with crumbled feta and a squirt or two of fresh lemon juice.

Enjoy


Friday, 8 June 2012

Dairy & Tomato Free Pasta Sauce


Being lactose intolerant means you don't get to experience the wonderfulness of alfredo sauce. No big deal right? After all you can just switch to a classic marinara sauce. Unless you can't eat tomatoes. Now, that makes things a bit tougher. The third option is pretty decent but flawed as well because I'm not a fan of the flavour of olive oil. So I went a looking and came across a few ideas that basically worked as stepping stones to get me to this recipe. The first recipe I found had me boil the vegetables before putting them into the food processor. While it did taste good, it wasn't exactly the flavour I was searching for. So I decided to put together this creation. It was so flavourful that I felt like I'd put too much sauce on my pasta and it was overriding the flavour of the tortellini I was eating. So the next meal that I ate, I used only a trace of sauce and that was more than enough. A little definitely goes a long way with this recipe, and once I figured that out I enjoyed the sauce much more. I will be making this variation again, and I would like to try it with a less flavourful pasta such as spaghetti noodles (or anything that doesn't have a filling already).

In addition, I ended up adding coconut milk as an after though. Simply because after all the work I put into the sauce, it didn't product a huge amount after it went through the food processor. Plus it was exceptionably thick and I just happened to have some coconut milk hanging around that needed to be used before its looming expiry date. It was the first time we'd bought coconut milk, we've always just used soy milk (vanilla flavoured to be exact), and while the soy milk does amazing things for baking or pancakes (tastes like rich buttermilk pancakes), it isn't the best idea to add to a savoury dish. I was worried that adding the milk would water down the flavour too much but that didn't happen. Amazingly enough, I started adding 1/8 cup of milk at a time until I got to the desired consistency. I would have never guessed that it would take over a cup to thin it down (the puree just kept sucking up the liquid), and the flavour of the veggies still came through. Next time I may use slightly more milk, say 1 1/2 cups, to get it just a little bit thinner, but that really isn't too much of an issue, just me being picky. It was perfectly fine as it was and that is the story behind how I ended up with a creamed roasted red pepper sauce.

By the way, sorry about the lack of quantities for the herbs. I really don't measure my spices and instead just eyeball them.

Ingredients

1/3 Red Onion
1 Yellow Onion
5 Sweet Red Peppers
1 Head of Garlic
2 Carrots
Olive Oil
Salt
Pepper
Basil
Oregano
Sage
Dried Chili Pepper Flakes
1 1/4 C. Coconut Milk
Dash or two of Hot Sauce (optional)

Directions

~Preheat oven to 425 F

~Cut vegetables into large chunks and separate and peel the cloves of garlic.

~On a cookie sheet (or large baking dish), toss vegetables with enough olive oil to evenly coat all surfaces.

~Season with salt, pepper and herbs (I used fresh herbs-the first batch of the year from our garden yahoo!)

~Place tray into oven and bake until vegetables have softened and browned. About 30 minutes.

~Remove tray from oven and scoop vegetables into food processor and pulse until smooth.

~Add coconut milk and the hot sauce if desired and pulse again to mix.

~Serve over fresh pasta or store in refrigerator for a later date. (If serving right away, you'll have to reheat the sauce, as the milk will have cooled it down.)

Enjoy