Tuesday, 30 October 2012

Green Bean Casserole


I've never really had any desire to make this dish until we went to Costco and bought a huge bag of these Crispy Fried Onions. They were little shavings of onions that had been fried and then packaged up to be used on salads, burgers or casseroles. So, that's what brought me to making this dish. I found it okay, not great, but okay. But that could have been because the beans we got were kind of rubbery and not so stellar. Others that tried it really liked it. But, I like vegetables just as vegetables, they don't need to be all dressed up for me to like them, so that may have been another reason.

The recipe for this came from Campbell's.

Serves 6

Ingredients

4 C. Cooked Green Beans
1 Can Condensed Cream of Mushroom Soup
1/2 C. Milk
1 Tsp. Soy Sauce
Pepper
1 C. French Fried Onions, divided

Directions

~Wash beans and snip the ends off.
~Boil beans until tender in a pot of water, then drain
~In a medium bowl, combine the soup, milk, soy sauce and pepper to taste. Stir.
~Mix in 2/3 C. of the onions and the beans.
~Spoon mixture into a greased 1 1/2 quart casserole dish.
~Bake in the oven at 350 F until mixture is bubbling (20-25 minutes).
~Sprinkle with remaining onions and return to oven for 2-5 minutes (watching that it doesn't begin to burn).

Enjoy


Monday, 29 October 2012

Salsa


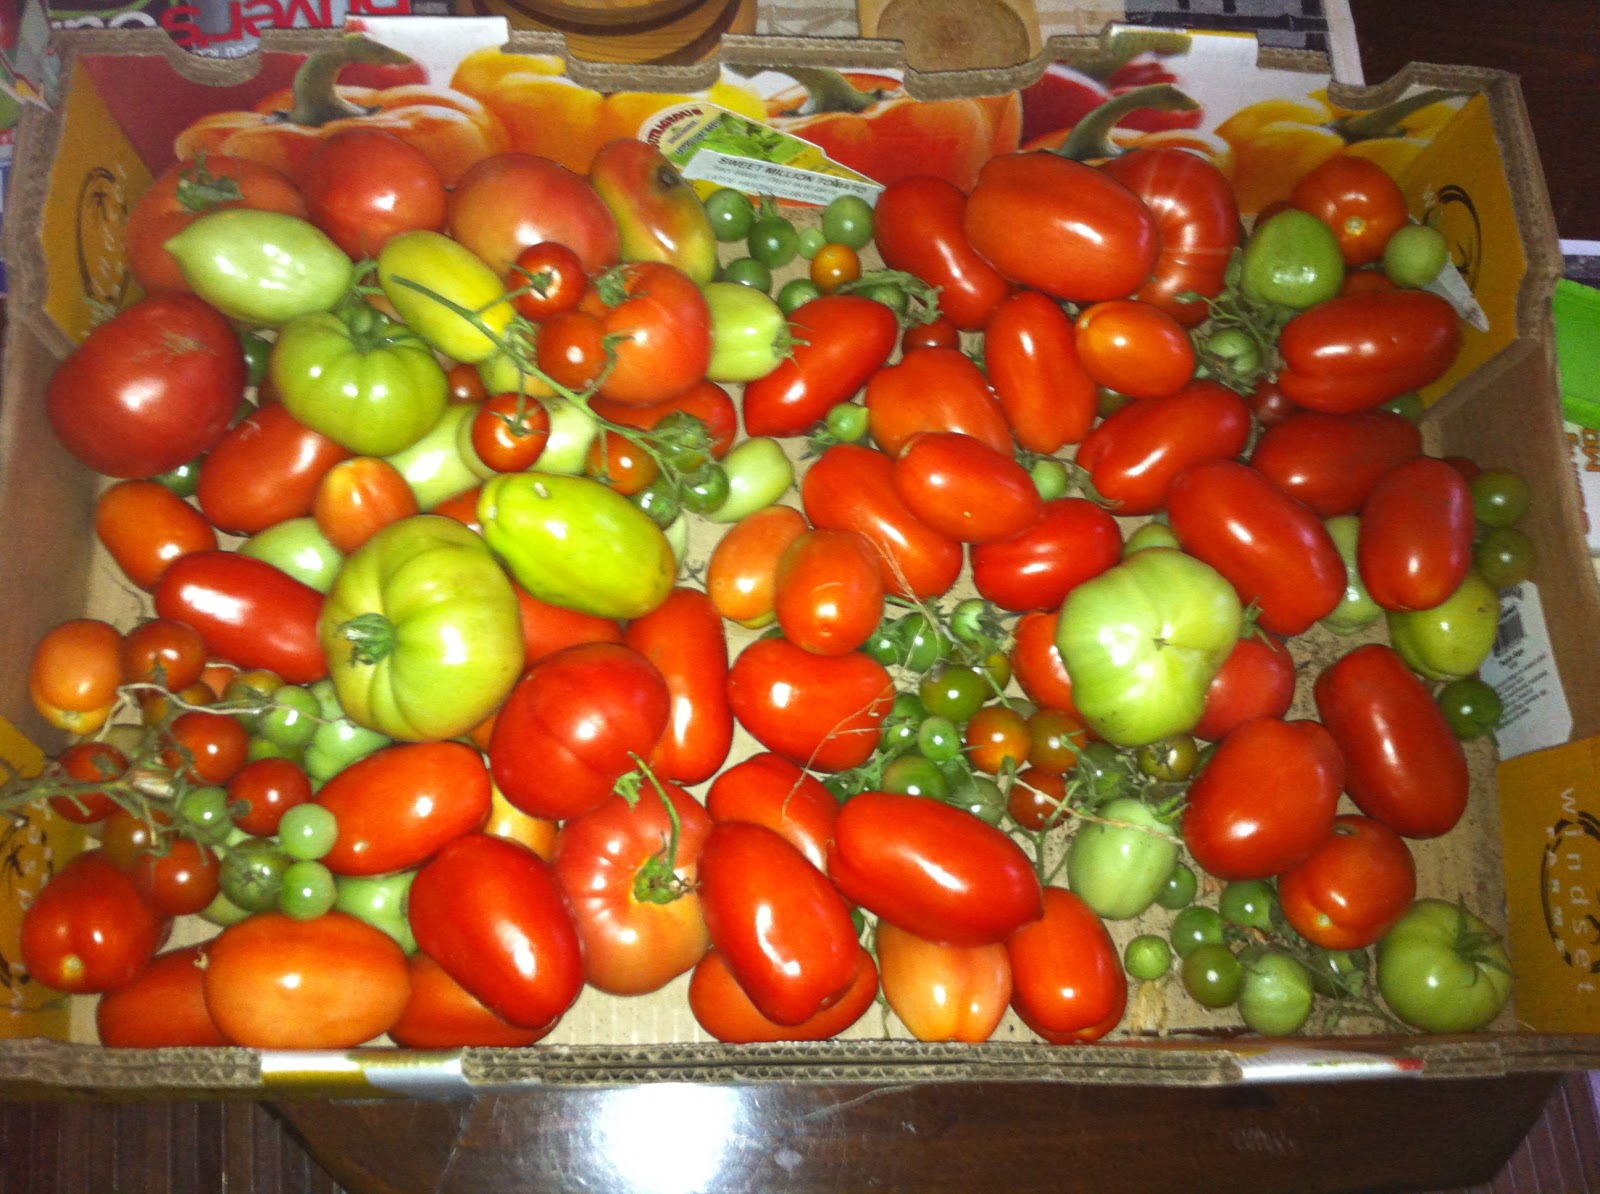
So, we had a few tomatoes on our hands. Our plants did really well this year and typically we only get cherry tomatoes. But this year we decided to grow some beefsteaks and romas. It was perfect, they all ripened at very different times, so we didn't have an overload all at once throughout the summer. But by October the frost was getting heavier and the romas still hadn't ripened so we pulled them inside. All of a sudden, they all ripened at once so we knew we had to do something. So salsa was the answer.

Now, I've never canned. My mom hasn't canned in over 20 years, but we decided to give it a go. She pulled out all the jars and rings and such that I never knew she even had and I got the joy of dumping out dust / bugs / and growing things out of jars that had sat in the crawl space for 10 years and in the garage for 10 years after that. It really makes me thankful for the dishwasher, as I know they were properly sanitized before we put any food in them.

That was the easy part though. The salsa was pretty basic to make as well (as long as you have a food processor), it was the actual canning that got interesting. My mom it turns out couldn't remember what to do, so within about 30 minutes we had to phone my Grandma 3 times, because even though she's not a big canner, she does make antipasta with a group of ladies every summer. So, she had a better idea than we did. Anyway, after the 3rd phone call we thought we had it figured out (I know, I could have just looked up online what to do, but I was seriously trying to get the tomato to pepper ratio just right and the canning was supposed to be my mom's job). Not much time after we hung up from the 3rd call, a knock came on the door and my Grandma wanders in. I think she figured it out that we had no idea what we were doing.

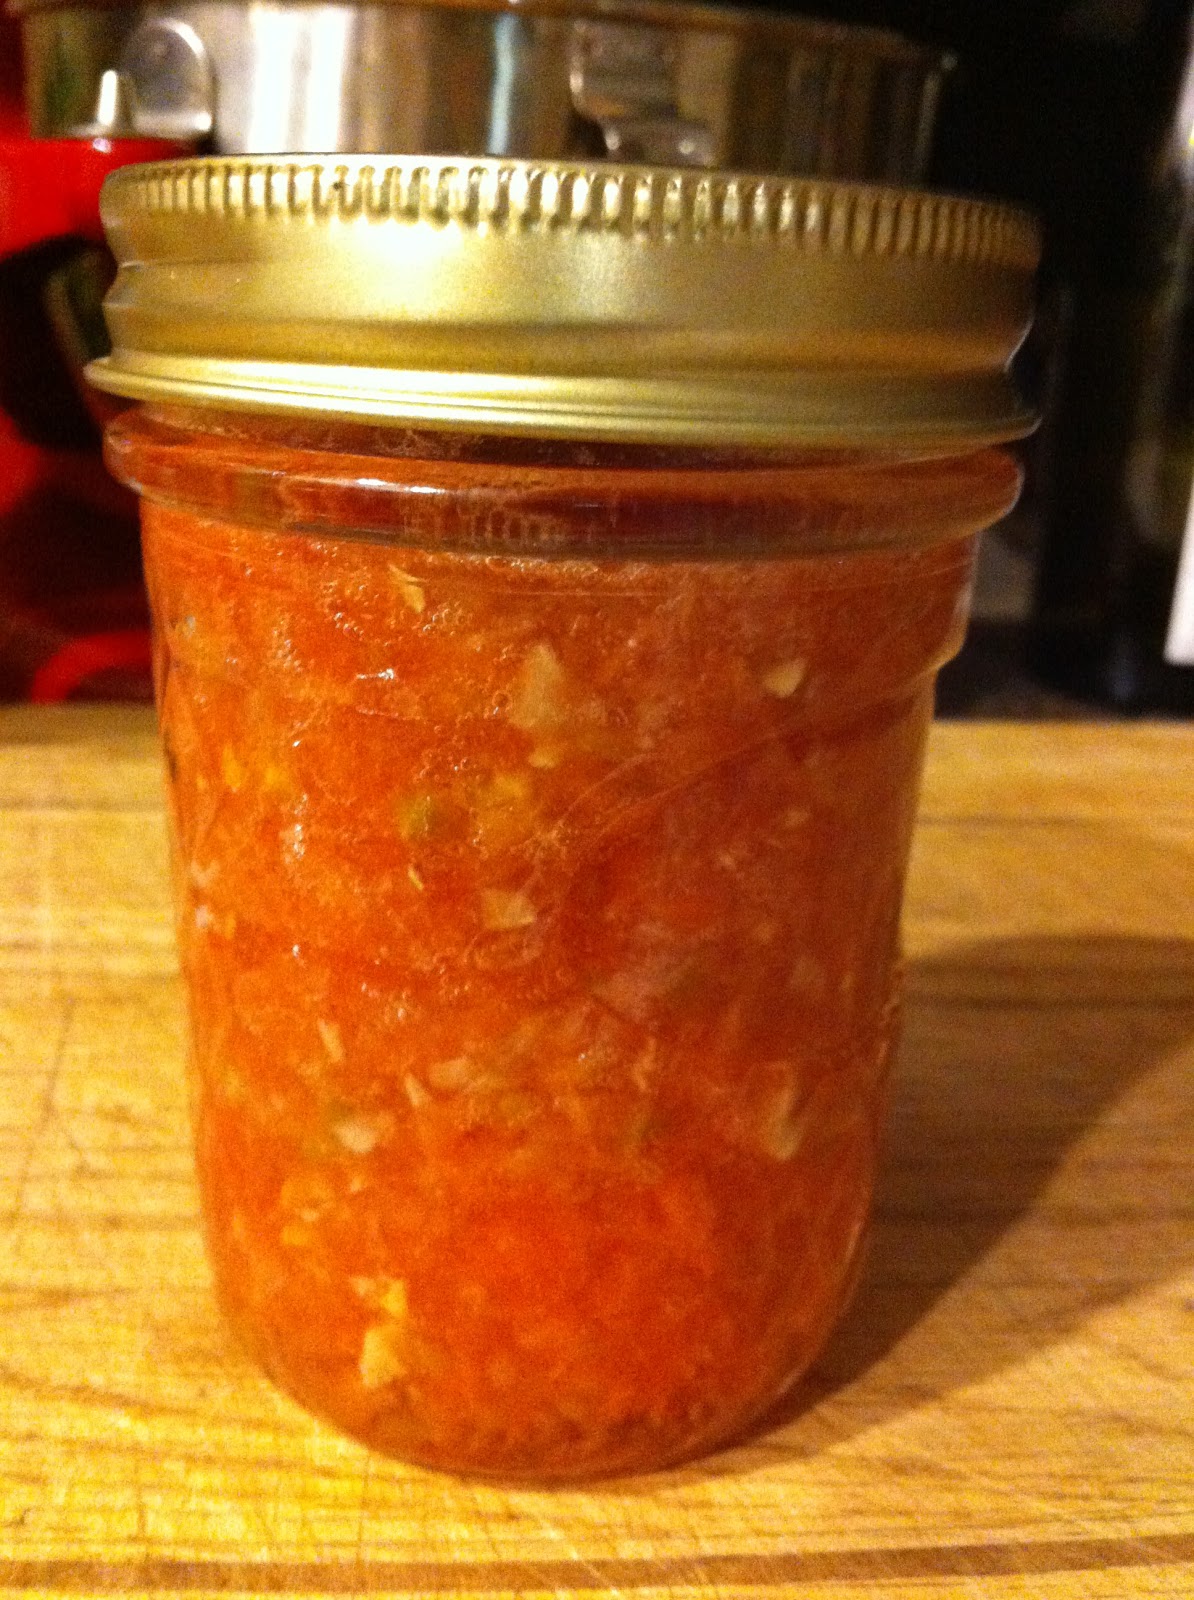
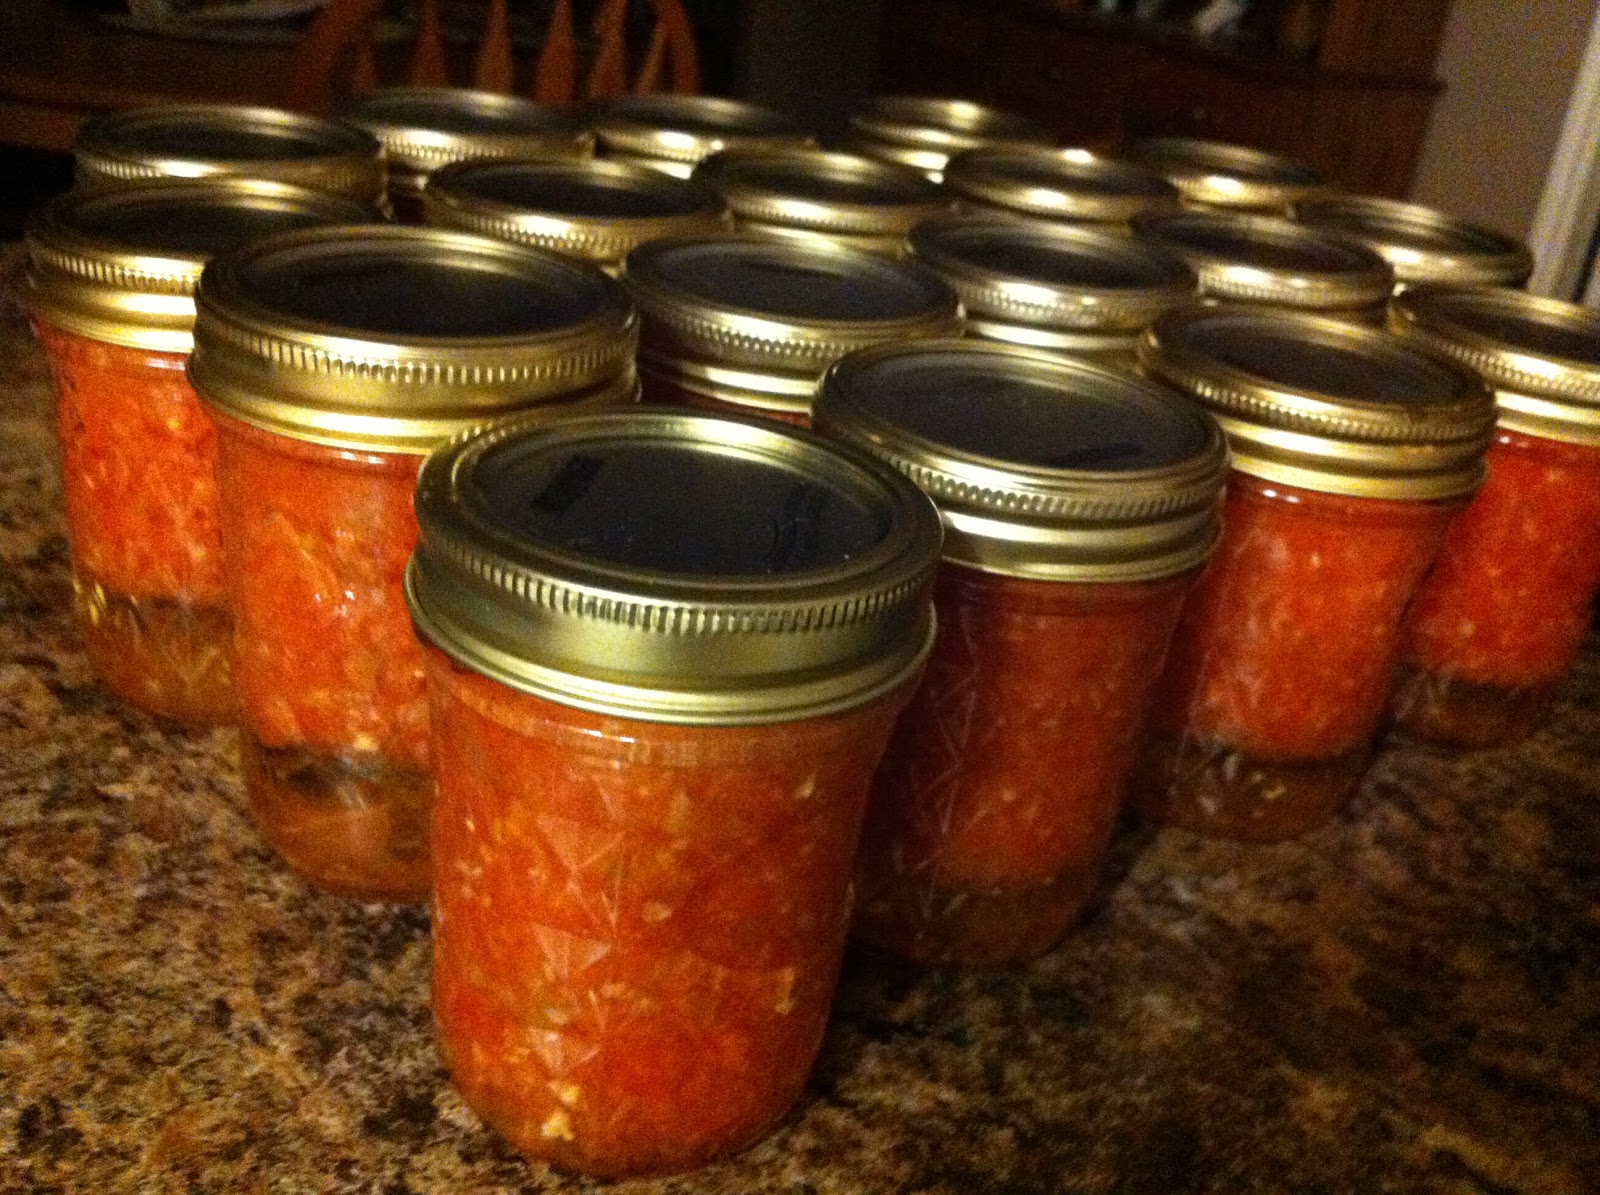
In the end, every single one of the 19 jars of salsa sealed, which I count as a success. Plus, the salsa tasted pretty darn good (although it does have a bit of a kick to it). The recipe I'm sharing is what I concluded after about 4 separate batches to be the best tasting ratios of ingredients for heat and consistency. Because I made so many batches I got 19 jars out of it. The recipe below makes about 3 jars, so adjust accordingly for how many tomatoes you have / how many jars you want.

One thing I really liked about this salsa was the depth of the flavours involved. Most salsa has just one flavour. You taste it on first bite and it's the same while swallowing and the aftertaste is the same as well. Well, this salsa is very different. You first taste tomato, then the salt comes in and finally after you swallow you actually taste the spice. Very unique.

I adapted the recipe from Frontera Fiesta.

Makes ~ 3 Cups of Salsa (3 Regular sized jars)


Ingredients

6 Tomatoes, skinned, deseeded and juiced (I used a mix of romas and beefsteaks)
1/4 White Onion
1-2 Cloves Garlic
1 Hot Green Pepper (Serrano or Jalapeno)
1 Tbsp. Lime Juice
1/2 Tsp. Salt

Directions

~Blanch tomatoes to help remove the skin. (For instructions on how to do this, see here.)
~Quarter the skinless tomatoes and squeeze juice and seeds out into a bowl. Reserve liquid for later (may need it if salsa is too thick).
~Prepare the onion and garlic, and remove the stem and seeds from the pepper.
~Run the onion, garlic and pepper through the food processor until they are finely minced.
~Add in the tomatoes and pulse 4-6 times or until you've reached the desired consistency.
~Top off with the lime juice and salt and pulse just long enough to mix. If salsa is too thick, you can add in some of the reserved juice.
~Store in the refrigerator or can if it's more than you can eat in a couple of days.

Enjoy!


Thursday, 25 October 2012

Carved Pumpkin Cake


For those of you who are excited that the fall classic of pumpkin flavoured everything has finally grown on me, well I'm sorry to disappoint you. For those few people out there like me who really don't want pumpkin loaf, or pumpkin muffins or pumpkin bread, etc. but still want a hint of fall, then keep reading.   Because this post is only made to look pumpkin, and isn't actually pumpkin flavoured. But if you were desperately in need of pumpkin flavour, I guess in a pinch you could make some sort of pumpkin cake instead of the regular white cake I used. Don't ask me how, I'm just suggesting it.

This is one of those recipes that isn't really a recipe, and that's a good thing because I just came across this picture I had taken years ago and I thought it was cute (even though there is a lot of junk in the background of the picture) and I wanted to share. So no recipe for the cake / frosting, I'm just giving you how-to instructions for assembly.

Now, I don't bake cakes very often, and when I announced I was going to bake this one in the spur of the moment, I think everyone in the house thought I was crazy. What did we need a cake for? And more importantly, what did we need with a pumpkin looking cake?

What You Need:

1 Cake (chocolate, yellow, white, it doesn't matter) baked in a bundt pan
White Frosting (tinted orange)
Mini Chocolate Chips (don't try and use the regular sized ones like I did, as you can see they don't make as delicate of a design / they take up a lot of space)
Something green for the stem (I used a green plastic cup, but get creative)

What To Do:

~Bake you cake and let it cool completely.
~Tint the frosting
~Frost the bundt on a plate
~Use the mini chocolate chips to make your 'carvings' for eyes, mouth, etc.
~Place your 'stem' in the hole of the bundt.

Enjoy


Monday, 22 October 2012

Sweet Potato Casserole


This was something I just 'had' to make. I meant to make it for Thanksgiving Dinner, but we ended up making 10 gallons of mashed potatoes, so this dish wasn't exactly needed. So I made it tonight, because I didn't know how it was going to turn out and so I made it because we had some leftovers in the fridge from last night incase it turned out to taste awful. The other option was to simply scrape the marshmallows off if it wasn't good. I never expected the marshmallow topping to be good, but again, I just 'had' to try the full blown sweet potato casserole. Anyway, just plain mashed yams taste amazing (no butter or milk or sugar needed), this dish tastes pretty darn good and the marshmallow topping just adds that little something extra (without making it too sickly sweet like I had expected it to), no need to scrape it off or turn to the leftovers.

I've never had the need to buy pumpkin pie spice, mainly because I don't like pumpkin pie, but this recipe called for 1 tsp. of it. Instead I used the cinnamon, all spice, nutmeg and ginger combination I listed below. Take your pick for which version you prefer.

Unfortunately, I copied this recipe down from a food blog some time ago before I had ever considered the possibility of food blogging myself. As such, I never copied down the source of this recipe and I was unable to find it by searching through google. So to the unknown blogger out there, I apologize and I thank you for this great tasting recipe.


Serves 12

Ingredients

4 lbs Sweet Potatoes (or yams as we call them here), 4 large or 6 if they're regular sized
1/4 C. Butter
1/4 C. Milk (I used vanilla almond milk)
2 Eggs
1/4 C. Brown Sugar
3/4 Tsp. Cinnamon
1/8 Tsp. All Spice
1/8 Tsp. Nutmeg
1/8 Tsp. Ginger
1/2 Tsp. Salt
2 C. Mini Marshmallows

Directions

~Scrub the yams clean, prick with a fork and bake until soft either in the microwave or in the oven (just as you would bake a regular potato).
~Once the yams are soft, allow them to cool (important step...don't make the same mistake as me, my fingertips were in rough shape because I skipped this step) and then remove the skins.
~Place the peeled yams in a mixing bowl and mash or process with the paddle attachment of your stand mixer.
~When smooth, add in all the remaining ingredients except the marshmallows. Mix until well combined and smooth.
~Scoop mixture into a greased 8x8 baking dish (or two loaf pans) and bake for 30 minutes at 350 degrees, or until heated through.
~Top with marshmallows and return to the oven for 5 minutes, or until marshmallows have melted.

Enjoy!

Saturday, 20 October 2012

Butterscotch Marshmallow Square (No-Bake)

Imagine this as a multicoloured square, not just orange as the picture depicts.

This is that square that I'm sure everyone has seen at some potluck function in the past. The one with all the coloured marshmallows impeded in a strange orangey-brown goop. Or maybe you saw one that was white marshmallows in chocolate (hello rocky road?). Well, this is my Grandma's go-to treat. She doesn't like to bake much, but she does this well and everyone enjoys it (how could you not, it's sugar, sugar and more sugar? Plus it has awesome bright colours.)

Ingredients

1/2 C. Butter
3/4 C. Peanut Butter
1 Pkg. Butterscotch (or Milk Chocolate Chips)
1 Pkg. Coloured Marshmallows (or white if making the chocolate version)
1 C. Rice Krispies

Directions

~Combine margarine and peanut butter in a large microwave safe dish and microwave on high until the butter melts.
~Stir and when smooth, add in the chips and microwave again until chips are soft enough to melt away by stirring.
~When mixture has cooled slightly, stir in the marshmallows and rice krispies until evenly coated.
~Spread into a greased 9x13 dish.
~Place in fridge to set.
~Cut into squares

Enjoy

Wednesday, 17 October 2012

Dairy Free, Creamy Scalloped Potatoes


I feel like I just accomplished the impossible. We just ate scalloped potatoes that had a rich and thick creamy sauce, without any cream in it. Plus, it looked exactly like what normal scalloped potatoes look like, minus some stringy cheese, but big deal. This was so cool.

I'm going to say Happy Easter now, just like I did when we sat down to eat. Yeah, I know I'm about 6 months too late (or early) but when you're sitting down to ham and scalloped potatoes what else can you say.

The texture of this dish was bang on and the flavour was there as well (which truly boggles my mind considering some of the ingredients that are listed to be used: tahini, rice vinegar??). You actually don't taste any of these 'different' ingredients when it's all said and done. They just blended in to give the right texture to the sauce. One thing I might do differently next time is add 1/2 tsp of salt to the sauce as it cooks (instead of just sprinkling some over the top before cooking), or a couple of cloves of garlic. Because it's missing the cheese it just needs a bit of something else to go with the 'cream' flavour. This is definitely a keeper.

I used the exact recipe that I found at Tessa the Domestic Diva and I added in my suggestions as optional ingredients.

Serves ~6

Ingredients

1 3/4 C. Chicken Broth
1/4 C. Mayonnaise
1 Tbsp. Nutritional Yeast
1 Tbsp. Tahini
1 Tsp. Rice Vinegar

*Optional* 1/2 Tsp. Salt

1/4 C. All Purpose Flour
5 Large Potatoes, peeled (I used Russets)
1 Onion, chopped finely
*Optional* 2 Cloves Garlic, minced
Paprika
Pepper

Directions

~Preheat oven to 350 F.
~Slice potatoes thinly using a mandolin, slicing attachment on a food processor or a knife.
~Chop the onion finely and mince the garlic.
~Arrange the potatoes, onion and garlic in a greased 9x13 baking dish.
~In a medium saucepan, combine all the ingredients from the chicken broth through to the salt and stir until smooth.
~When mixture begins to heat, whisk in the flour a little bit at a time, making sure to whisk out all of the lumps before adding more.
~Continue to whisk until mixture thickens and starts to bubble.
~Pour mixture over top the potatoes, and sprinkle with paprika and ground pepper.
~Bake for 1 - 1 1/2 hours or until fork tender and bubbly (cooking time will be dependent on how thin you sliced the potatoes, so watch carefully).

Enjoy


Monday, 15 October 2012

Basic Waffles


I have two confessions:

1) I didn't actually make these. I assisted (I guess the correct term would be prep-cook in the food world) my Dad because these are his 'special waffles' and I wanted to share this recipe with you because they are absolutely amazing (fluffy and light and everything a perfect waffle should be). Plus, I wanted to get all his hints and tricks for my own future reference (the ones that aren't written in the cookbook).

2) I haven't allowed myself to open my laptop for several days because I have found an internet black hole that is even deeper than Facebook, food blogging or even Pinterest. You say that's not possible, but it is. It's called travel planning. And I'm not just talking about finding an all-inclusive resort in Mexico. No, I'm talking full blown, three months backpacking through Europe planning. Basically I'll go search out one piece of information and hours later find myself cross eyed and my browser running at a snail's pace because I have so many windows open because this or that hyperlink sounded important. Yup, at least food blogging or Pinterest is largely about the pictures and the name or description of the item. ie. it's quick reading / looking. But with travel, you actually have to read the fine print, etc. etc. It's just been easier these last few days to avoid my computer. Instead I've been sticking to web browsing on my phone, because the tiny display ensures that I don't hang around too long.

Back to the food.

This recipe is from The Encyclopedia of Creative Cooking, edited by Charlotte Turgeon. It's one of those cookbooks from the 80's that is 800 pages long and has 3 recipes per page and 1 picture. You guys all know what I'm talking about. Well, most recipes we wouldn't dare try in it (some are a bit bizarre to say the least and the rest are just trying to make the ordinary housewife into culinary goddesses of the exotic), but this waffle recipe we come back to time and time again and don't even think of changing any of the ingredients. It just works as it is (except we use soy milk instead of regular milk).

Makes 6-8 waffles

Ingredients

2 C. All Purpose Flour
3 Tsp. Baking Powder
3/4 Tsp. Salt
2 Tbsp. Sugar
3 Eggs, separated
1 3/4 C. Milk
1/2 C. Vegetable Oil

Directions

~Set out two large bowls and sift the flour with the baking powder, salt and sugar three times (sift it first into the largest of the bowls if there is a bowl size discrepancy, 2nd time into the other bowl and the 3rd time back into the largest bowl).
~In the above bowl that is not holding the flour mixture, beat the egg yolks until frothy. Then stir in the milk and oil. Pour into flour mixture and beat with hand held mixer until smooth.
~In a third bowl (medium size), beat egg whites until stiff peaks form then fold into the batter. Don't stir, gently fold and don't over mix.
~Pour enough batter onto your greased and preheated waffle iron and bake according to manufacturer instructions.
~Serve immediately after pulling from the iron (if they sit, they'll loose their crunchy exterior which makes these waffles shine.)

Enjoy