Monday, 17 December 2012

Luscious Lemon Square


I was walking through Costco a few weeks ago and got really excited when I saw they had in cases of Meyer Lemons. I've heard so much about them, but I've never seen anyone get them in. So I scooped up a case with the intentions of making lemon curd with them. Well, they sat in the garage for a while and I went about my Christmas Baking, until one day I realized in a panic, I'd pulled all my Christmas Recipes, but I'd forgotten one very important one, Lemon Square! Then I got really excited because I knew I had these untouched Meyer Lemons just waiting to be used, and really, I needed to make something else besides curd, because I don't need 18 Lemons worth of curd. Then the harsh reality struck. You need an oven for Lemon Square.

No big deal, after months of the new oven being on back order, it was supposed to arrive in a weeks time. It didn't. Then we finally bought the same one from a different store and it was supposed to come in a weeks time. It did. But the delivery people didn't leave it because it was damaged. I think a few people were about to strangle a few other people if you know what I mean. Anyway, a few days after the latest disaster, I came home and we had a new oven. The store had loaned us a floor model until they could get us our actual oven. Thank god is all I can say.

To give you an example of how excited I was (and still am), last night I got home from an 8 hour shift at five o'clock. I was feeling really sick all day at work, but when I got home I felt perfectly normal (strangely enough). So I set out on a spree to finish up the Christmas Baking (I would have succeeded if I hadn't have ran out of Worcestershire Sauce, and then at eleven o'clock started feeling really sick again). I dusted the lemon squares that I'd made the night more, I cut them, photographed them and packaged them up. I defrosted my spiral cookies, cut them, photographed them and baked them. I then tossed together another batch of bits and bites but ran out of the sauce part way through so I had to abandon my efforts with only part of that batch baked. And, I dipped 160 Buck Eyes. By eleven o'clock my back hurt, I felt sick, tired and my hands were so cracked and sore from washing them too many times that I gave up and went to bed leaving a stack of dishes a mile high. But it was a successful effort.

Back to the Lemon Square and the Meyer Lemons. I knew everyone said these lemons didn't have the tartness of other lemons. After making both this square and my curd with them, I have to say they are definitely good, but as a true lemon lover, I think I'd like to stay with the bit of a kick that the traditional lemon offers. I'm really glad I tried them though, they just changed the flavours of these things a little bit too much. But, that being said, these were things I love for what they were before. Maybe if I made something utterly new with the Meyer Lemons, and didn't have anything to compare it to, I would enjoy them. Until then, I think I'll just stay with the typical lemon.

This recipe came from my next door neighbour. I have included the single batch recipe (makes 1 - 9x13 pan) with the crust doubled for extra thickness. Because this is a favourite every Christmas, I ended up doubling it again and making 2 trays.

Makes 30 squares.

Ingredients

Crust
1 C. Butter, softened
1 C. White Sugar
1 Lemon, zest
2 1/2 C. Flour

Lemon Layer
4 Eggs
1 2/3 C. White Sugar
3 Tbsp. Flour
1/2 Tsp. Baking Powder
1/2 Lemon, zest
6 Tbsp. Lemon Juice (Juice of 2 Lemons)
1 Tsp. Vanilla Extract

Icing Sugar

Directions

Crust
~In a medium bowl, cream butter, sugar and lemon peel.
~Gradually stir in flour to form a soft crumble dough. (Very important**Make sure there is no clumps of butter, otherwise when you bake it, you'll get pits in your crust were the butter chunk melted)
~Press evenly into the bottom of a greased 9x13 baking dish and pack down very firmly with your hands.
~Bake at 350 F for 15 minutes, or until crust just begins to take on a golden colour around the edges

Lemon Layer
~While crust is baking, in a large bowl, whisk eggs well.
~In a separate bowl, stir together sugar, flour and baking powder.
~Gradually whisk the sugar mixture into the eggs.
~Whisk in lemon zest, juice and vanilla and then pour evenly over hot crust and return to oven.
~Bake for 20-25 minutes or until top is lightly browned (if you have a hotter oven like I used to, you might want to bake at 350 F for 10 minutes then reduce heat to 300 F after that, to prevent it from browning too much - I didn't have to do this though with my new / temp. oven)
~Once cooled, sprinkle top with icing sugar (by placing a small amount of sugar in a sieve and tapping gently over top the bars).
~Cut into bars or squares.

Enjoy

**If you don't want the thicker crust as I have described (or you don't have enough ingredients on hand for a spur of the moment baking extravaganza), you can simply half the crust ingredients to return this recipe to it's normal amounts (don't half the Lemon Layer as it was never doubled).

Sunday, 16 December 2012

Xmas Swirl Cookies


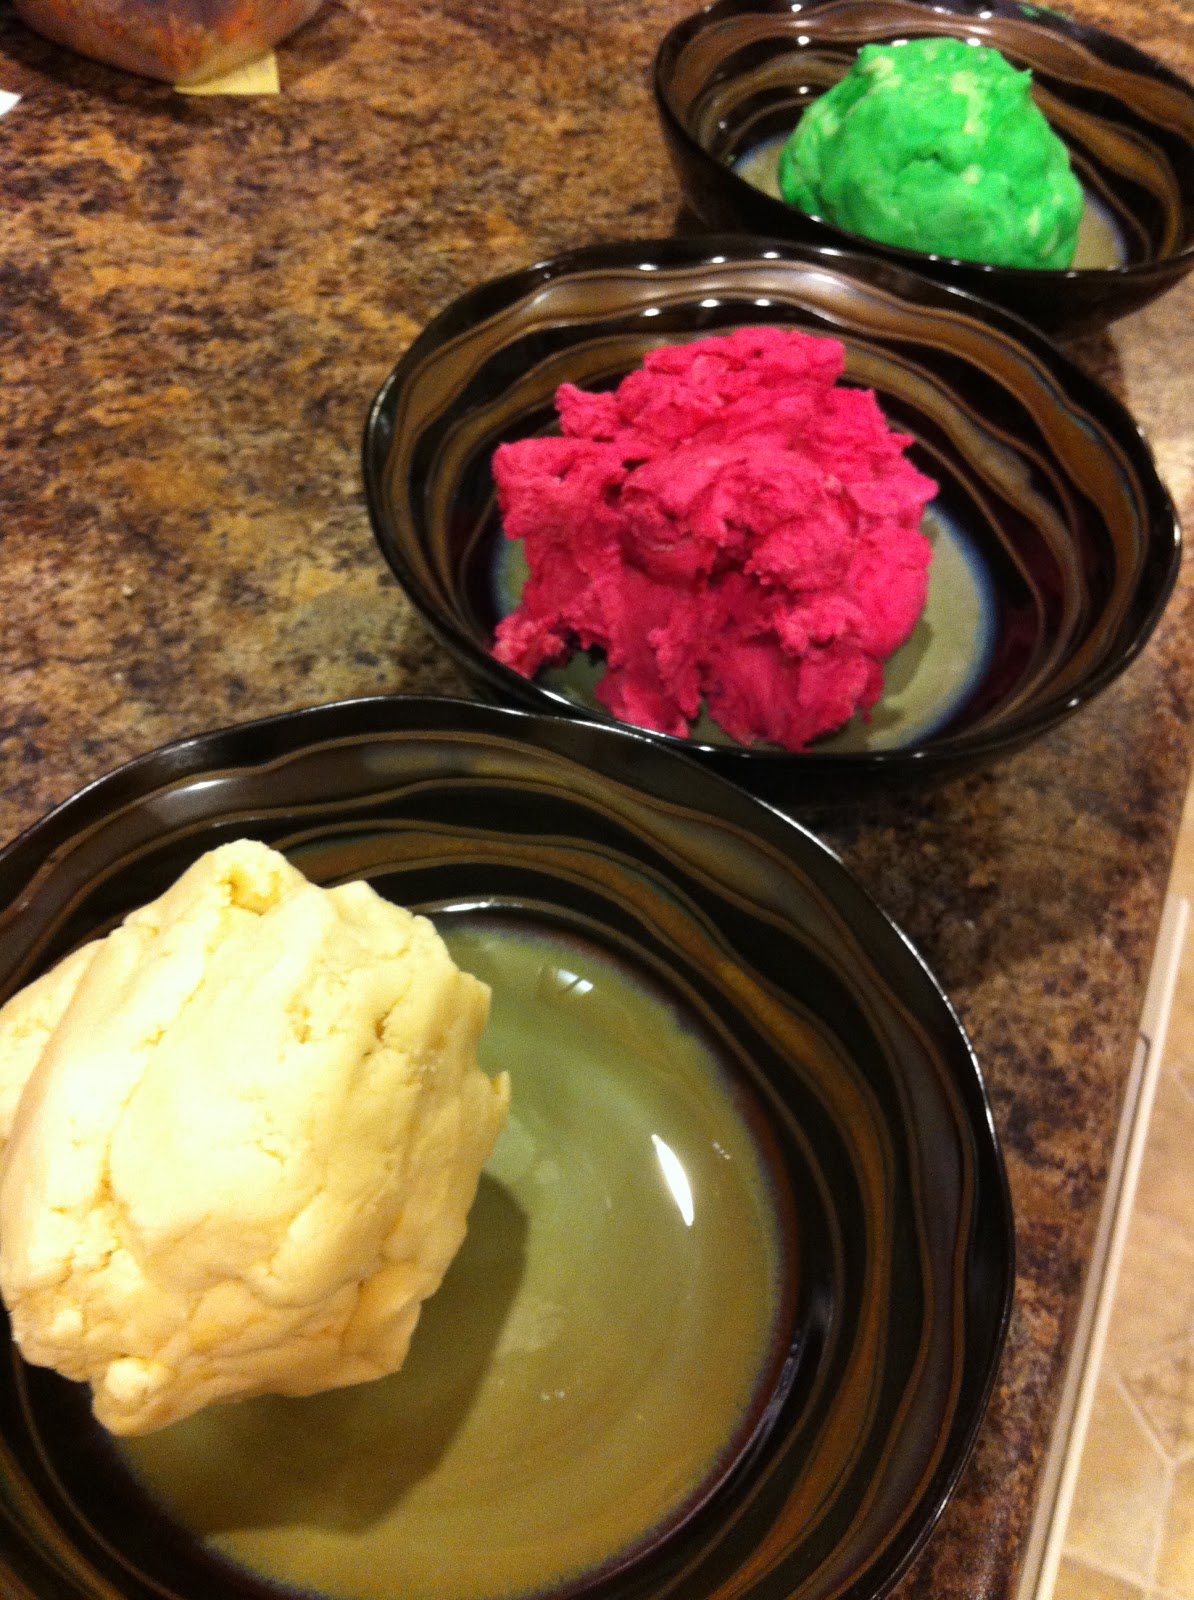
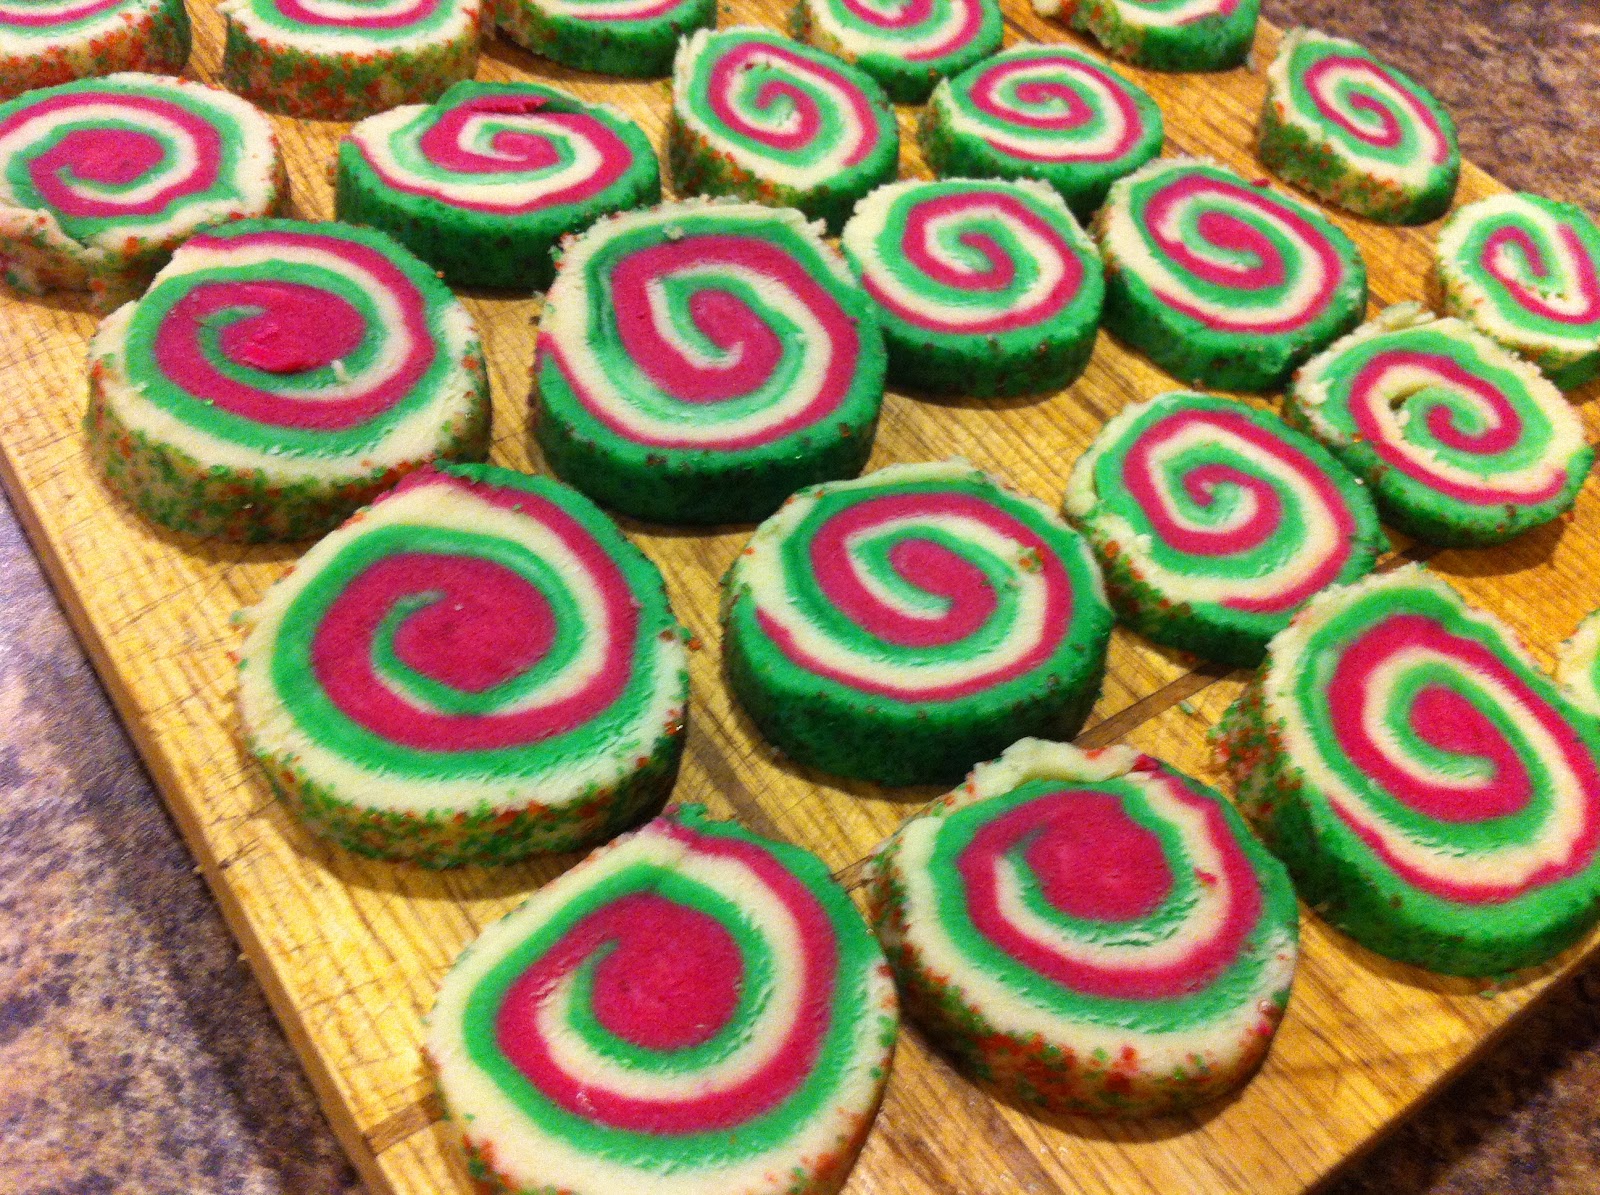
I made these cookies ages ago but never baked them because of the oven situation. What I did was I made them, rolled them up and then threw them in the freezer, to be cut and baked later. It was kind of frustrating to make as I was a bit over ambitious and I decided to go for three different colours instead of the two that most people shoot for. Anyway, in the end I did get them to roll, but I have to tell you it was a struggle and I was cursing them. I had my doubts that they were going to look good when I cut them after all of my difficulty rolling them, but they look beautiful and perfectly even.

To get enough cookie dough to facilitate me making three layers (and three colours), I increased the original recipe by 50%. That way I would have the same amount of dough for each colour that was originally called for, for the two colour recipe. Follow? Or is it way too early / late for that. Either way, just go with it, I'm going to explain my three colour way. If you want the two colour way, just follow the link below to the original recipe. Because of adding 50% more, the quantities are kinda different, but all doable values. Just warning you.

I substituted out the flavouring called for and put in peppermint extract in the green dough. It's not bad, but I think if I make these again (even though I like mint), I'll just stick with a bit more vanilla and call it a day. After all, the other two colours just tasted like regular sugar cookies so it was a bit different to have a bite of sugar cookie then a bite of peppermint sugar cookie.

One final note. The original poster commented that this recipe was not to be made in your KA Mixer. Instead you were supposed to use a food processor. My food processor wasn't going to be big enough for this amount of dough, plus I'm yet to find something my KA doesn't do well, so I disobeyed instructions and used the mixer.

Just a disclaimer, I had fun taking pictures and because the making process was spread over something like 4 days, I got a lot of pictures.

Recipe comes from Sprinkle Bakes.

Makes 3 dozen cookies


Ingredients

3 C. All Purpose Flour
3/4 Tsp. Baking Powder
3/8 Tsp. Salt
1 C. Icing Sugar
3/8 C. White Sugar
1 3/4 C. + 1/8 C. Butter
1 1/2 Tsp. Vanilla
3/4 Tsp. Peppermint (or other - maybe more vanilla) Extract
1/2 Tsp. Green Food Colouring
1/2 Tsp. Red Food Colouring
Sprinkles

Directions

~In large mixing bowl, combine flour, baking powder, salt and the sugars and mix to combine. 
~Add in the butter and process just until the dough turns crumbly.
~Add the vanilla and mix until a ball forms.
~Divide the dough evenly into 3.
~Place ball 1 in a bowl and reserve for later (white ball)
~Place ball 2 back in mixing bowl and add your peppermint extract and green food colouring and mix to distribute the flavour and colour. Put green ball aside.
~Place ball 3 back in cleaned mixing bowl and add the red food colouring and process just until colour is distributed evenly. 
~Roll each ball of dough out onto a sheet of wax paper, to an 1/8" thick. Cover with wax paper and transfer to a cookie sheet and place in the refrigerator to chill for at least 2 hours.
~When dough has chilled, remove from fridge and peel away the top sheets of waxed paper from the doughs.
~Place the white dough down first and brush the top surface with water (I forgot this step, maybe that was one of the reasons I had difficulty. Oops).
~Using the wax paper under the green dough, invert the green dough and place on top of the white dough. Pull away the wax paper. Press down to seal them together.
~Repeat the last two steps with the red dough on top of the green dough.
~Trim the edges so that each layer is even.
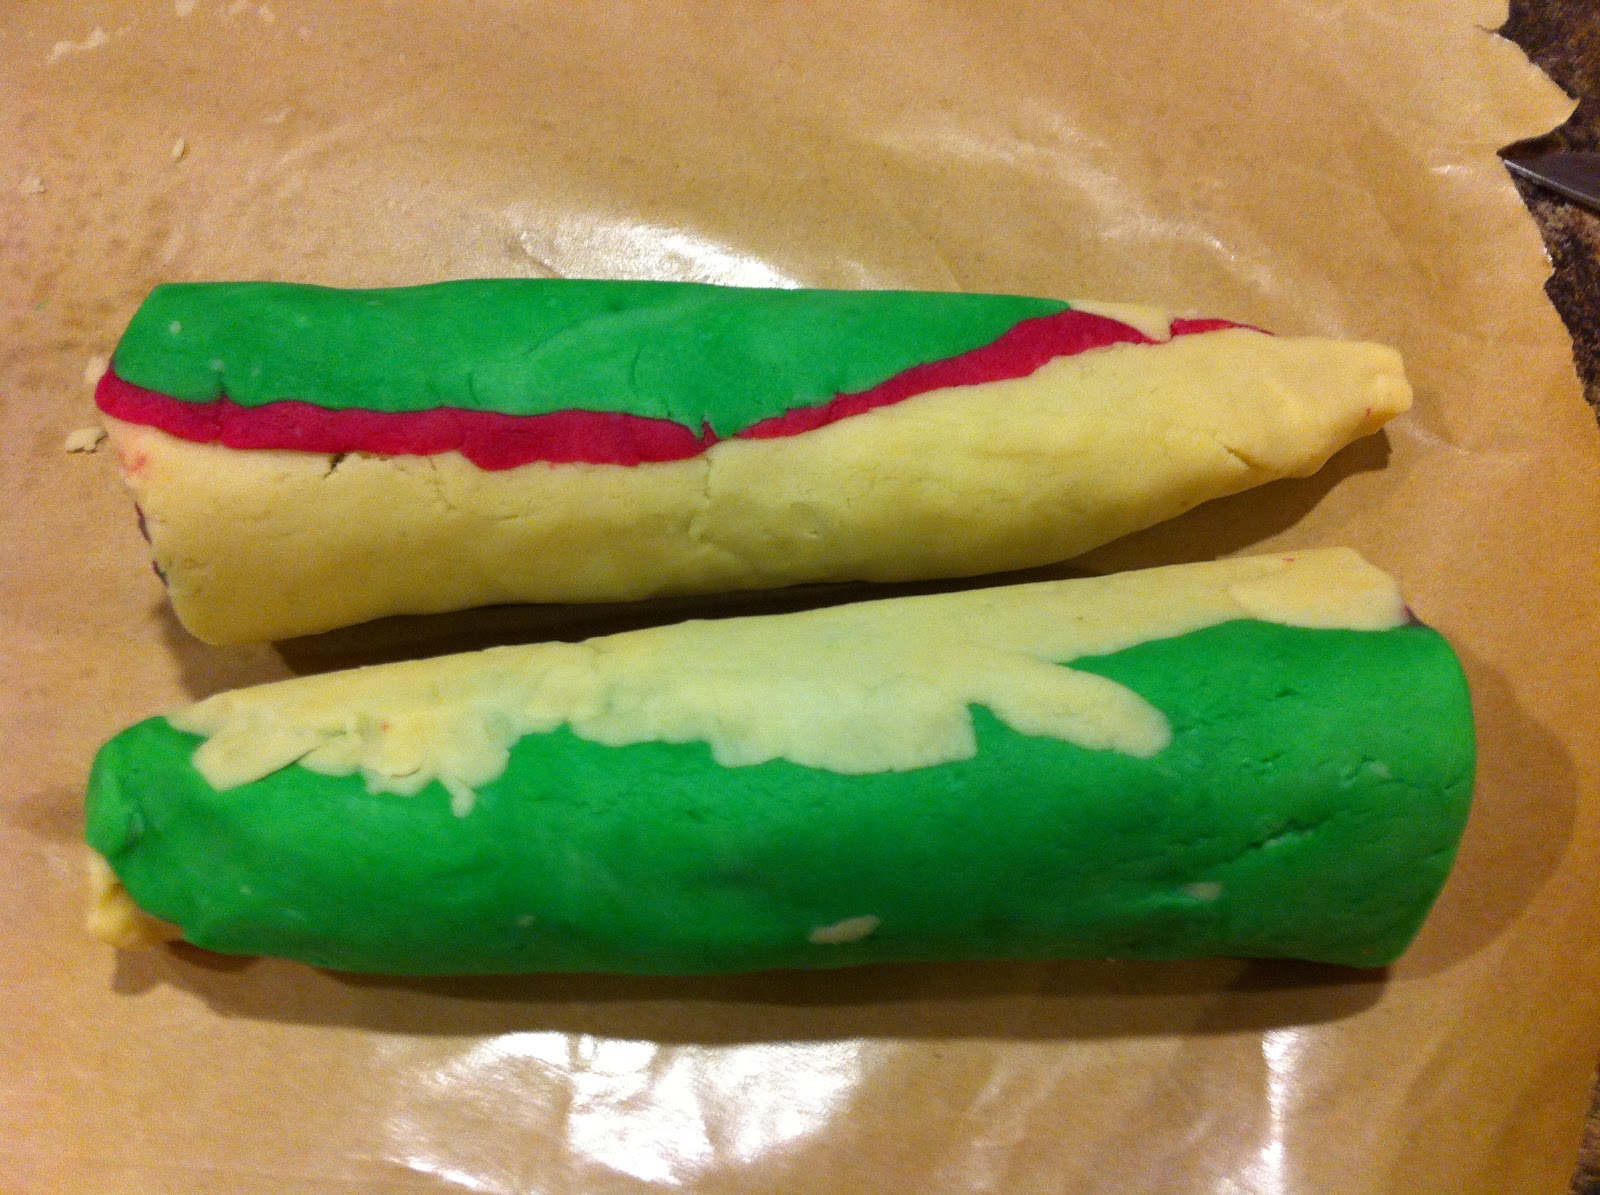
~When the dough has warmed slightly, roll up the doughs so you get a long roll. If the white layer tears as you roll, pinch and patch it back together. (You won't be able to tell once you cut it into slices anyways).    **I found it easiest to cut the rectangle of dough into two before rolling it, otherwise it was going to be too long of a roll and very awkward to work with. So cut the rectangle half way down the longest part of the rectangle to make two shorter long sides.
~You can now get rid of the last piece of wax paper that was underneath the white layer.
~Once you have your log, roll it a couple of times with both hands along the countertop the make sure everything is adhered together properly.
~Roll your logs into sprinkles and press in gently with your hands to make sure they have stuck.
~Wrap logs in plastic wrap and chill until firm enough to slice. Or alternatively you can place in the freezer and defrost when needed (which works beautifully when you had no oven to bake things in).
~When log is chilled, cut into slices either with a knife or preferably use dental floss (strange but it works amazingly). These cookies don't rise or expand so what size you slice is going to be the size that you pull out of the oven.
~Bake in a preheated oven at 325 F until the white portions of the cookies have just started to turn golden. Approximately 15-20 minutes.

Enjoy (and pat yourself on the back for accomplishing a lengthy and difficult recipe that actually turned out well in the end.)


Saturday, 8 December 2012

Orange & Almond Brownie Batter Truffles


Every Christmas it seems I crave good truffles. For a long time, I wanted to make a vanilla truffle, but a few attempts later, I think I've given up because I can't for the life of me find a decent recipe. The thing is, every year we make Buck Eyes, and they always look so amazing and professionally done sitting there on the platter. The only problem is I'm not a peanut butter fan, so even though they look amazing, they don't taste amazing to me. So that brings me to the non-peanut butter truffle hunt. Because I want something pretty and professional looking for myself too.

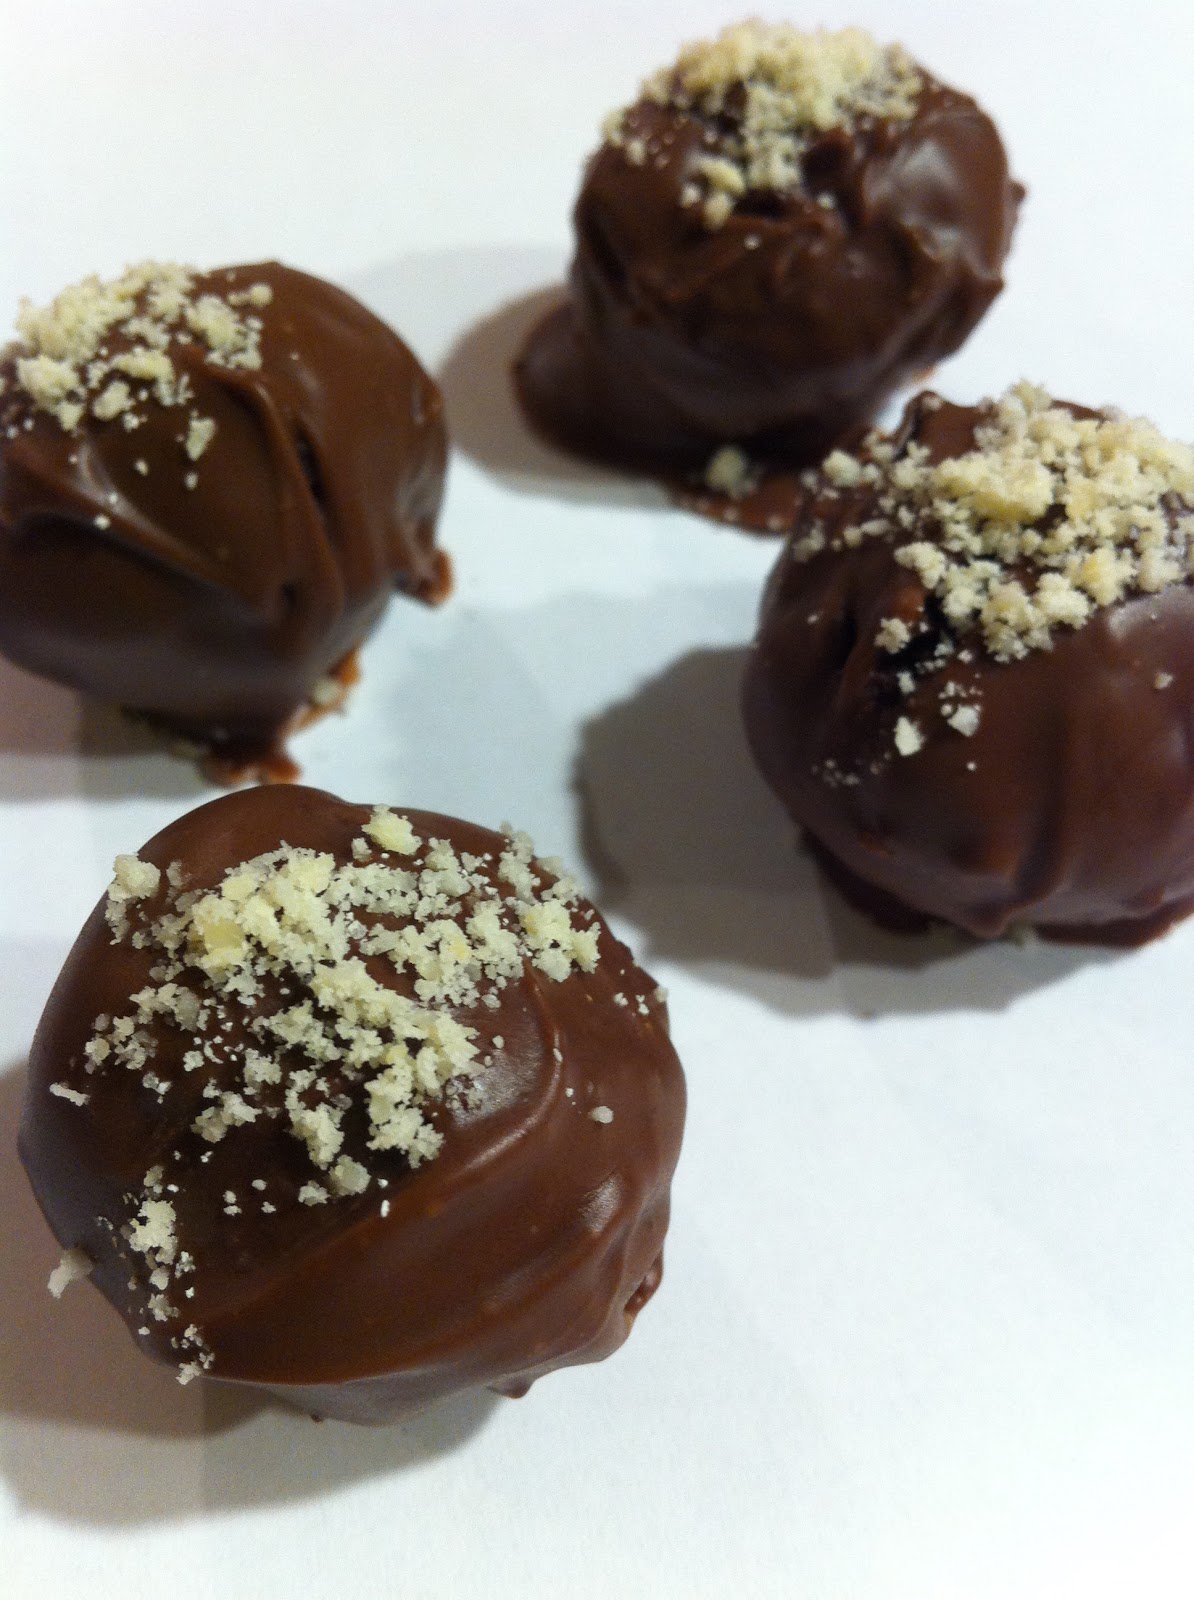
Now, I found this recipe over at Confessions of a Cookbook Queen and put my own little spin on it. It originally called for the truffles to be dipped in almond bark, but as I was not running to the store and only making these because I had a little bit of time to kill and all the other ingredients in my panty, I decided to forgo the almond bark. Instead I just used regular dipping chocolate and added a bit of almond extract into the truffle. Then, that got me thinking. I'd just reached past the orange extract, something I don't normally use often and I love orange truffles so it was an easy 2+2=yummy truffles. Anyway, I just had a dribble left in the bottle, so I used 1 tsp. of the orange extract. Next time if I had a bit more I might increase to 1 1/4 tsp just for good measures. I was going to try that this go, but replace the extra little bit with a bit of orange liqueur, but what do you know, we're all out of that too. Surprise, surprise. Maybe next time a hint of peppermint would bring on the holiday spirit also.

One important thing to remember if you decide to make multiple batches / flavours of these truffles is that once they are dipped you need to put some sort of marking on the outside of them so you know which flavour is which. Get creative, but try to keep things consistent from batch to batch, year to year ie. we always use a white chocolate drizzle on our Buck Eyes.

Some suggestions for the garnish:
~Orange zest (I used this for the orange flavour)
~Chocolate sprinkles
~White chocolate drizzle (I use this for buck eyes)
~A white chocolate dot
~A sprinkle of coconut
~A sprinkle of ground almond powder (I use this for the almond flavour)

One of the greatest things about this recipe is that they were so incredibly easy. No oven, no double-boiler, not stove-top cooking, and all the ingredients will be in your pantry if you ever do even the most basic of baking. Feel free to dabble around in the flavour combinations, or if you just like plain, just use 2 tsp of vanilla as the flavouring.

Makes 2 1/2 Dozen

Almond Truffles
Orange Truffles

Ingredients

Almond Truffles
1/2 C. Cocoa Powder
1 C. Sugar
1/2 C. Flour
2 Tsp. Vanilla
1/4 Tsp. Almond Extract
1/2 C. Butter, melted
Milk Chocolate Dipping Chocolate
Garnish

Orange Truffles
1/2 C. Cocoa Powder
1 C. Sugar
1/2 C. Flour
1 Tsp. Vanilla
1 1/4 Tsp. Orange Extract
1/2 C. Butter, melted
Milk Chocolate Dipping Chocolate
Garnish

Directions

~In a medium bowl, combine the dry ingredients.
~In a microwave safe dish, melt butter. Mix in extracts.
~Pour wet ingredients into dry and mix to combine.
~Roll batter into bite size balls and place on a wax paper lined tray.
~Melt chocolate and dip truffles into chocolate and garnish right away (unless garnishing with the melted white chocolate. You'll have to wait for the milk chocolate layer to set first.)
~Place back on the wax paper lined tray and refrigerate to set.

Enjoy

Friday, 30 November 2012

Quinoa Yam Patties


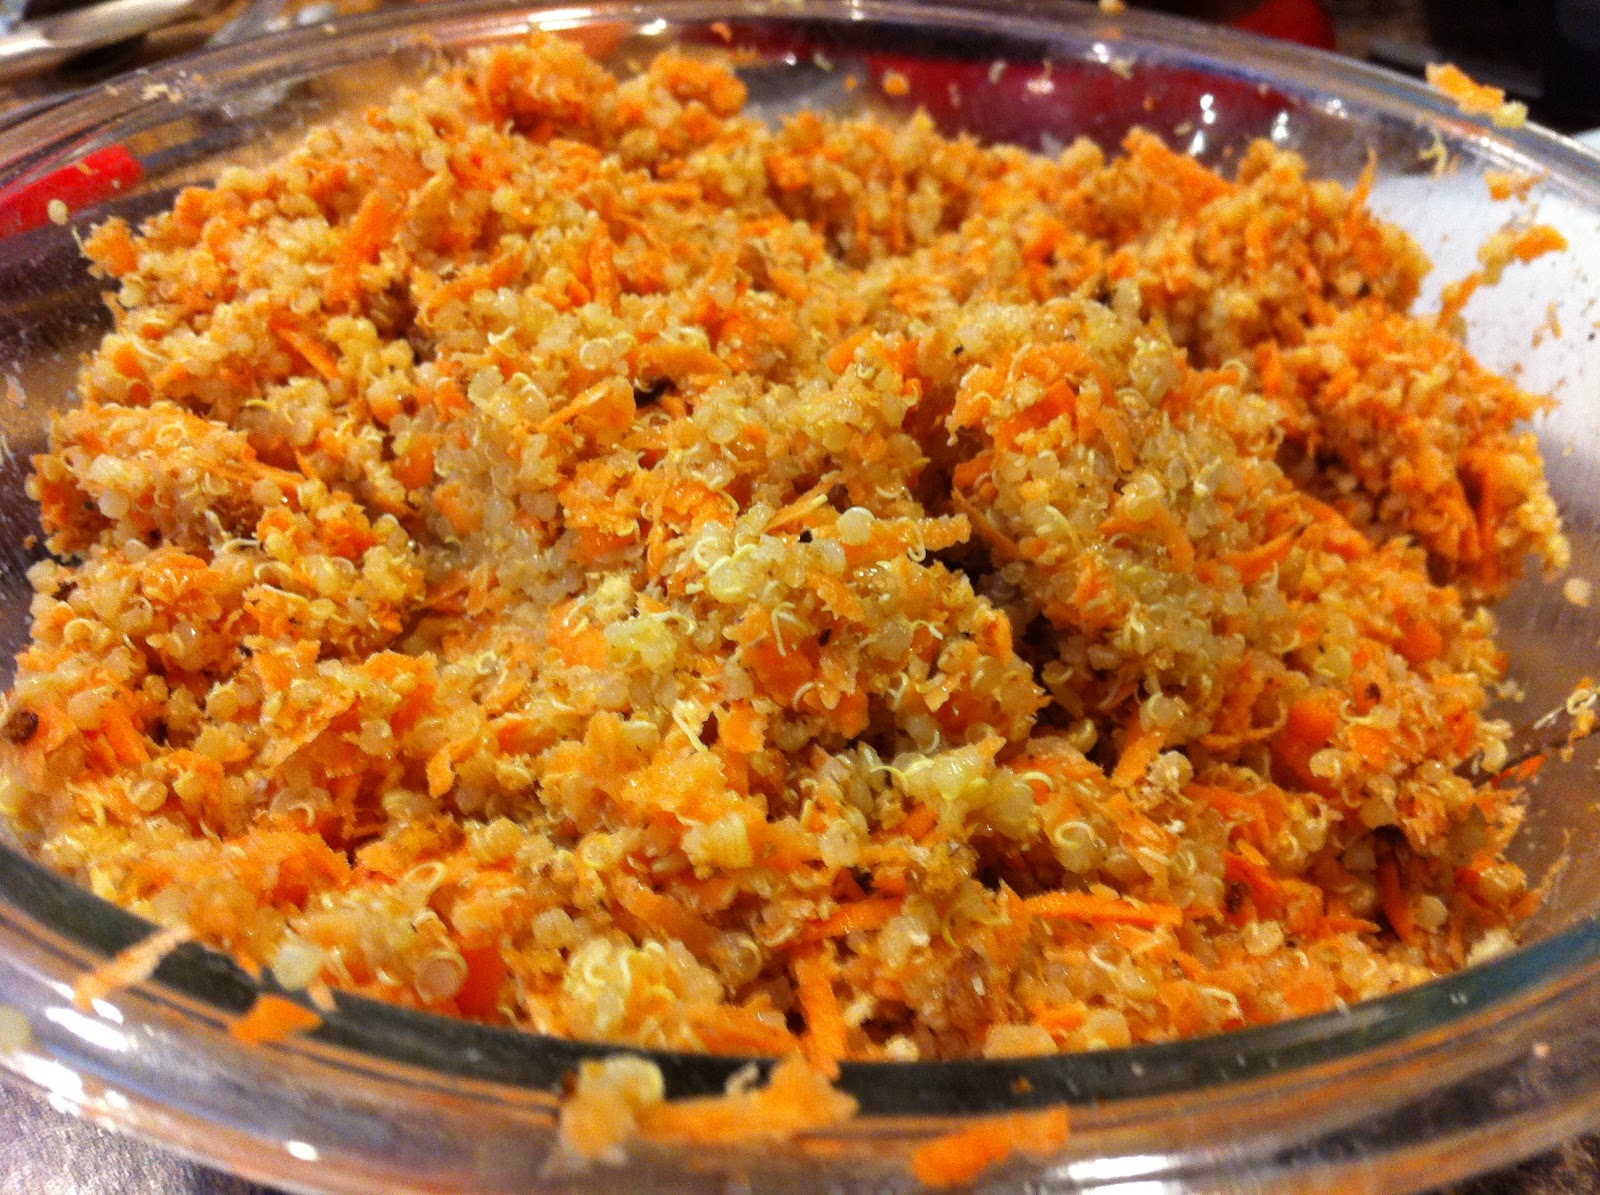
These didn't really form like I had expected them to. Nor did they taste like I had expected either. That's not to say that they were bad (we wouldn't have eaten them for 3 nights straight if they were bad), they were just different. I had originally decided to make them one morning. It seemed like a great idea (but they seemed to take all day to make, so a bit time consuming to say the least), and I really would have liked them to be ready for lunch, but they weren't. So dinner rolled around and I must admit, dinner time is when I always confirm that I could never be vegetarian. I don't need bacon or sausage for breakfast, or sandwich meat for lunch, but I do think dinner should contain meat. So, I didn't truly enjoy these the first night. But I do have to say, they were quite filling and had some decent flavour going (then again I just ate it by itself on a plate with a bit of thai sauce as we didn't have buns or burger fixings.)

The key thing to remember for this recipe is to let it cool completely in the fridge before trying to form patties. I didn't at first and that's what caused my nightmares. They went together much better the next day after they had sat.

So I guess the main question is, would I make these again? And I would have to say I honestly don't know. I really liked the idea of them, but what I imagined them to taste like, wasn't what they actually tasted like. So, even though they didn't taste bad, it's sometimes hard to overcome something that is different.

I adapted this recipe from In Sock Monkey Slippers. The idea to add the tahini came from Made to Create.

Makes 5 Patties


Ingredients

1 C. Water
1/2 C. Quinoa
1 1/2 C. Yams, shredded (about 1/2 large yam)
1 Egg, beaten
1/4 C. Bread Crumbs
1/4 C. Bran
1 Clove Garlic, minced
1/2 Tsp. Tahini
Salt 
Pepper
Olive Oil

Directions

~Rinse the quinoa and place into a pot of boiling water (1 C.)
~Simmer on low heat until all the water is gone (times vary depending on brand of quinoa), 10-15 minutes
~Allow quinoa to cool.
~Peel and shred the yam with a cheese grater.
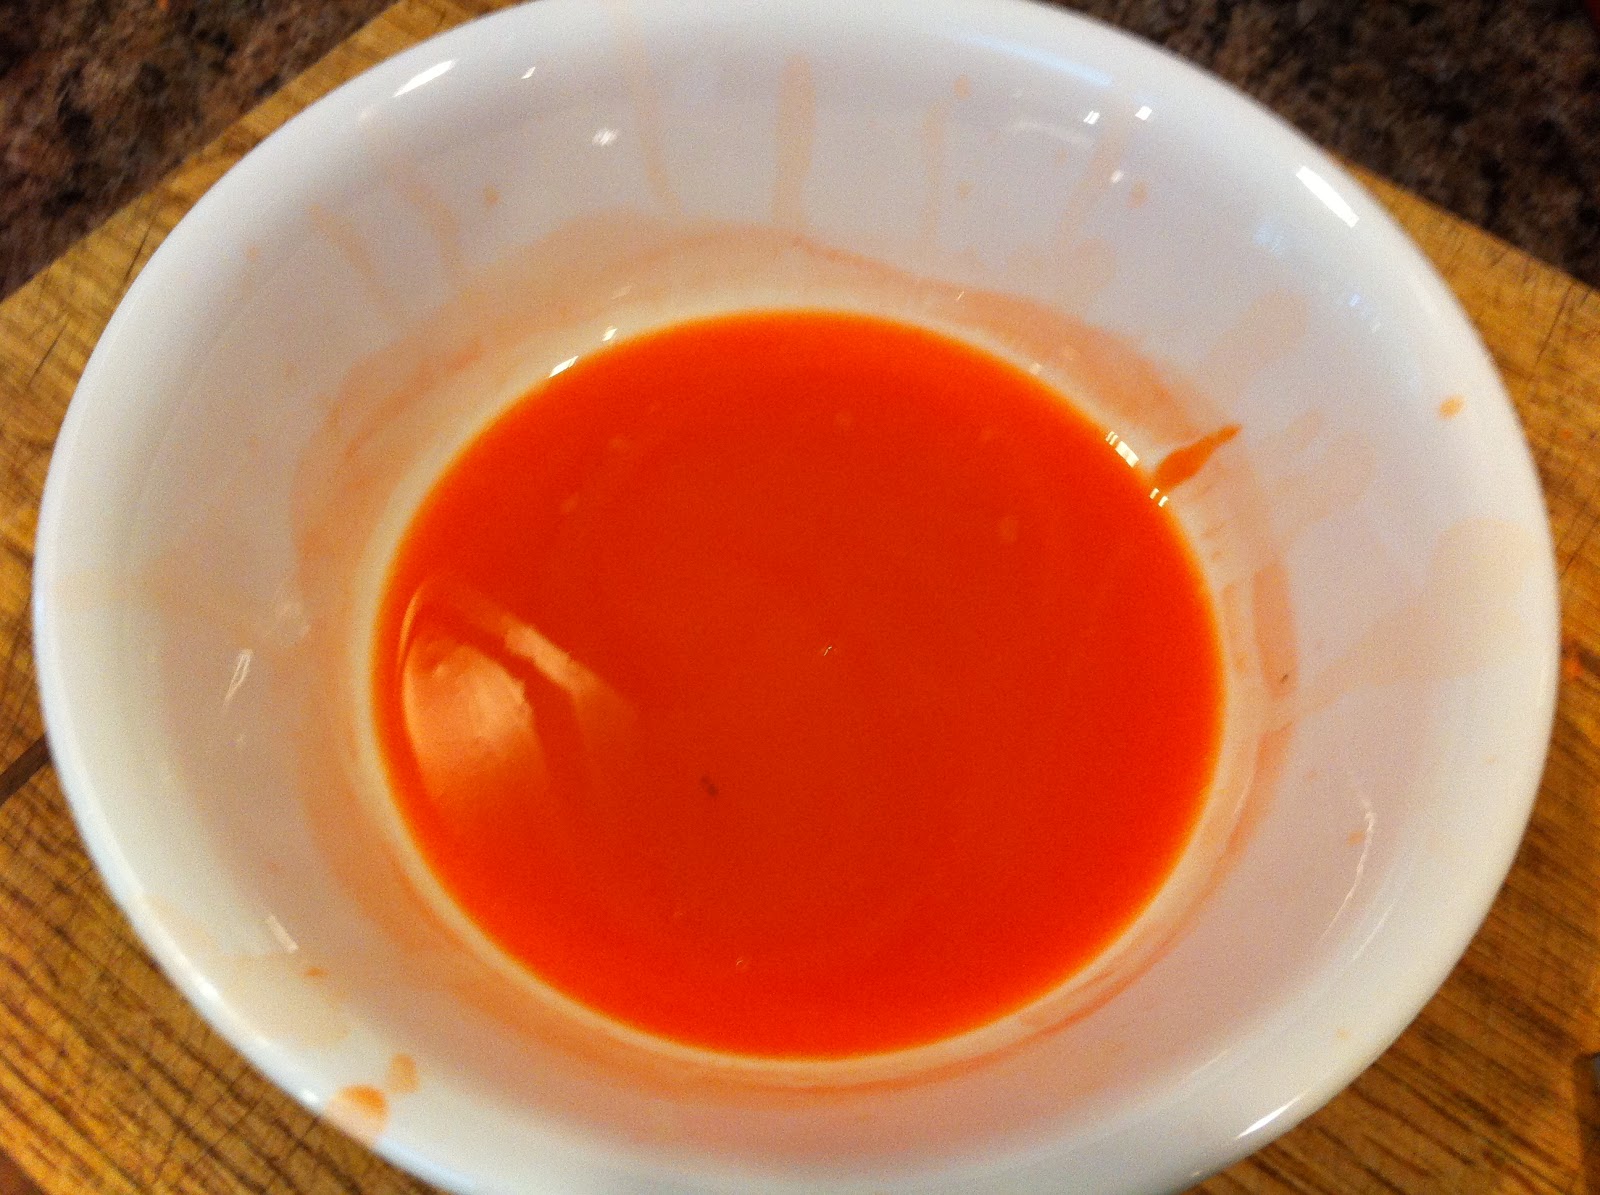
~Place the yam in a piece of paper towel and squeeze out the extra liquids (isn't it an amazing colour??)
~In a large bowl, combine the quinoa, yam, egg, bread crumbs, bran, garlic, tahini, salt and pepper.
~Mix well and then place bowl in refrigerator to cool.
~When cool, form into patties.
~Heat skillet (or grill) and the oil, and cook burgers until they are golden on both sides and crispy.

Enjoy

Never would have thought Yam Juice would be this vibrant and solid of a colour. Just thought I'd share :)

Thursday, 29 November 2012

Snowballs (No-Bake)


Welcome to Part II of my Xmas baking. These are an absolute favourite of mine either fresh or straight out of the freezer. Either way they are probably my top Christmas treat. As proof of this statement I'm going to let you in on a little secret...I tripled this batch...and this is only one of the many recipes I plan to make for Xmas, and I don't have a lot of people to feed.

This recipe was my Grandma's recipe. It is one of the few recipes of hers that we actually have. Unfortunately, most of them she just kept in her head and never wrote down. I guess it's a good one to have: chocolate, butter and sugar, what more could we ask for? These are very similar to most no-bake cookies / hot rods in their ingredients list, but they taste nothing, I repeat, NOTHING like the typical no-bake cookie. These are amazing and they have a unique flavour all to themselves, that no other no-bake cookie can compare to in my eyes.

Makes 3 1/2 dozen chocolate drops

Ingredients

Bowl #1
3 C. Rolled Oats
1 C. Coconut (flaked)

Bowl #2
1/2 C. Butter
1/2 C. Milk
2 C. Sugar
6 Tbsp. Cocoa
1/2 Tsp. Vanilla

~1 C. Medium or Fine Coconut (additional)

Directions

~Heat the contents of Bowl #2 and stir to combine.
~Add to Bowl #1 and mix.
~Cool for about half an hour and then roll into balls
~In a ziplock bag, toss the additional coconut with the balls (do this as soon as you roll each one, otherwise they will cool too much and the coconut will not stick).
~Allow to finish cooling on a tray before storing.
~Can be stored at room temperature or in the freezer (and can be served at room temperature or frozen).

Enjoy

Wednesday, 28 November 2012

Nanaimo Bars (no-bake)


Ucluelet, Tsawwassen, Esquimalt, Cowichan, Squamish, Sechelt, Qualicum, Haida Gwaii, Zeballos, Sointula, Nootka and Naniamo. Yes, these are actually words, even though my spell check disagrees with me (saying only two of them are spelt correctly). But, they are not just words, they are places. You probably can probably only pronounce one of them though, maybe not even that. But I'm pretty positive though that even if you can't pronounce it (or spell it), you will still recognize it. Yes, I'm talking about Nanaimo, as in the Nanaimo Bar, Nanaimo. While I'm not from Nanaimo I do live not too far from it, and from all the other places I listed as well.

But this post isn't going to be a lesson about small-town BC, no it's about a custurdy, chocolatey, goodness. The recipe that I'm sharing is my Mom's recipe. I have no idea if it's the 'actual' recipe or not. If you go to the City of Naniamo's website, they have a whole page dedicated to one of my favourite treats, but they too don't know the exact origin of it and are asking anyone to come forward that does. This recipe is very close to the recipe that they do have posted on their site. It is the recipe that was decided on by the city as 'the best' Nanaimo Bar recipe. There are several slight variations on this recipe, and then some more extreme ones.

The butterscotch flavour is one of those extreme variations that I am not a fan of. So, that is why I'm making this square now, when I used to be able to get a perfectly good tray of them for relatively cheap at the grocery store.

For most of my life, we never made Nanaimo Bar at home. The local grocery stores made a large tray of it for a good price, and Costco had it on even better. Well, just over 5 years ago, the go-to grocery store closed, and we started buying the bar at other places. For awhile it was good, then I started tasting hints of butterscotch. Well, at first everyone didn't believe me, but eventually people agreed that these other bars weren't as good. But it still wasn't worth making it ourselves because it wasn't all that bad, and the price was still good. Well, we hadn't bought it in awhile and we bought a tray about a month ago. I've never seen Nanaimo Bar hang around for long in our house and usually I devour it myself. I had half a piece and thought I had just wasted my nighty dessert allowance on something that was absolutely flavourless. It was awful, so I decided that this was too simple of a thing to make to warrant buying it's now disgusting store bought variety (unfortunately, I think this is one of the last good home made tasting things that has gone the way of over processed crap (excuse my french). Now it's just another package of Chips Ahoy or Peak Freans or Deep and Delicious Cakes in the grocery aisles.

I'm going to share the single batch version of this recipe, which is to be made in a 7"x11" pan (who has one of those right?). Anyway, I doubled it and thought I could just get away with having a thick batch in a 9"x13" pan, but as I'm realizing now, I usually double an 8"x8" to get a thick 9"x13", that explains why I had way, way too much. Sorry, just typing with my train of thought there. So, what I ended up with was 1 - 9"x9" (square silicone dish) & 1 - 8"x8" tray that were the perfect thickness, as a doubled batch. Or just go with the single and have a thick 8"x8" or scrounge up the mysterious 7"x11" pan. Whew, enough with the numbers now. So, I present to you the first Xmas baking of the season, duh duh duuuhhhh!!!!

Makes: 25 squares


Ingredients

Base Layer
1/2 C. Butter
1/4 C. Sugar
5 Tbsp. Cocoa
1 Egg, beaten
1 Tsp. Vanilla
2 C. Graham Wafer Crumbs
1 C. Coconut ( I used flaked, if you don't want the base as chunky, use medium)
1/2 C. Nuts (I used 2 Tbsp. Ground Almond Powder instead)

Middle Layer
1/4 C. Butter
3 Tbsp. Milk
2 C. Sifted Icing Sugar
2 Tbsp. Custard Powder
2 Tsp. Vanilla

Top Layer
1 C. Chocolate
4 Tsp. Butter

Directions

Base Layer
~Melt the first 3 ingredients in a large saucepan.
~Add egg and vanilla and whisk to help prevent the eggs from forming chunks as you heat the eggs.
~Add in the last 3 items
~Spread in a greased 7"x11" pan, pack it down firmly and put in the fridge to set, while you prepare the next layer

Middle Layer
~Combine all the ingredients in mixer bowl and beat (with paddle attachment on speed 2), until combined and fluffy (I tried to do this by hand and it felt like I was trying to mix cement by hand, so use the mixer please).
~Spread over Base Layer and place in freezer until solid (otherwise the top layer will just mix into the middle layer)

Top Layer
~In a microwave safe dish, melt chocolate and butter together.
~Spoon mixture over the Middle Layer and working quickly as the frozen layers will cause the chocolate to harden, smooth the chocolate.
~With a knife, run tracks through the chocolate where you'll want to cut the squares. This prevents the top layer from cracking when you cut it (or at least helps prevent it)
~When chocolate has hardened, cut into squares.

Enjoy

Sunday, 4 November 2012

The Inside-Out S'more Bars


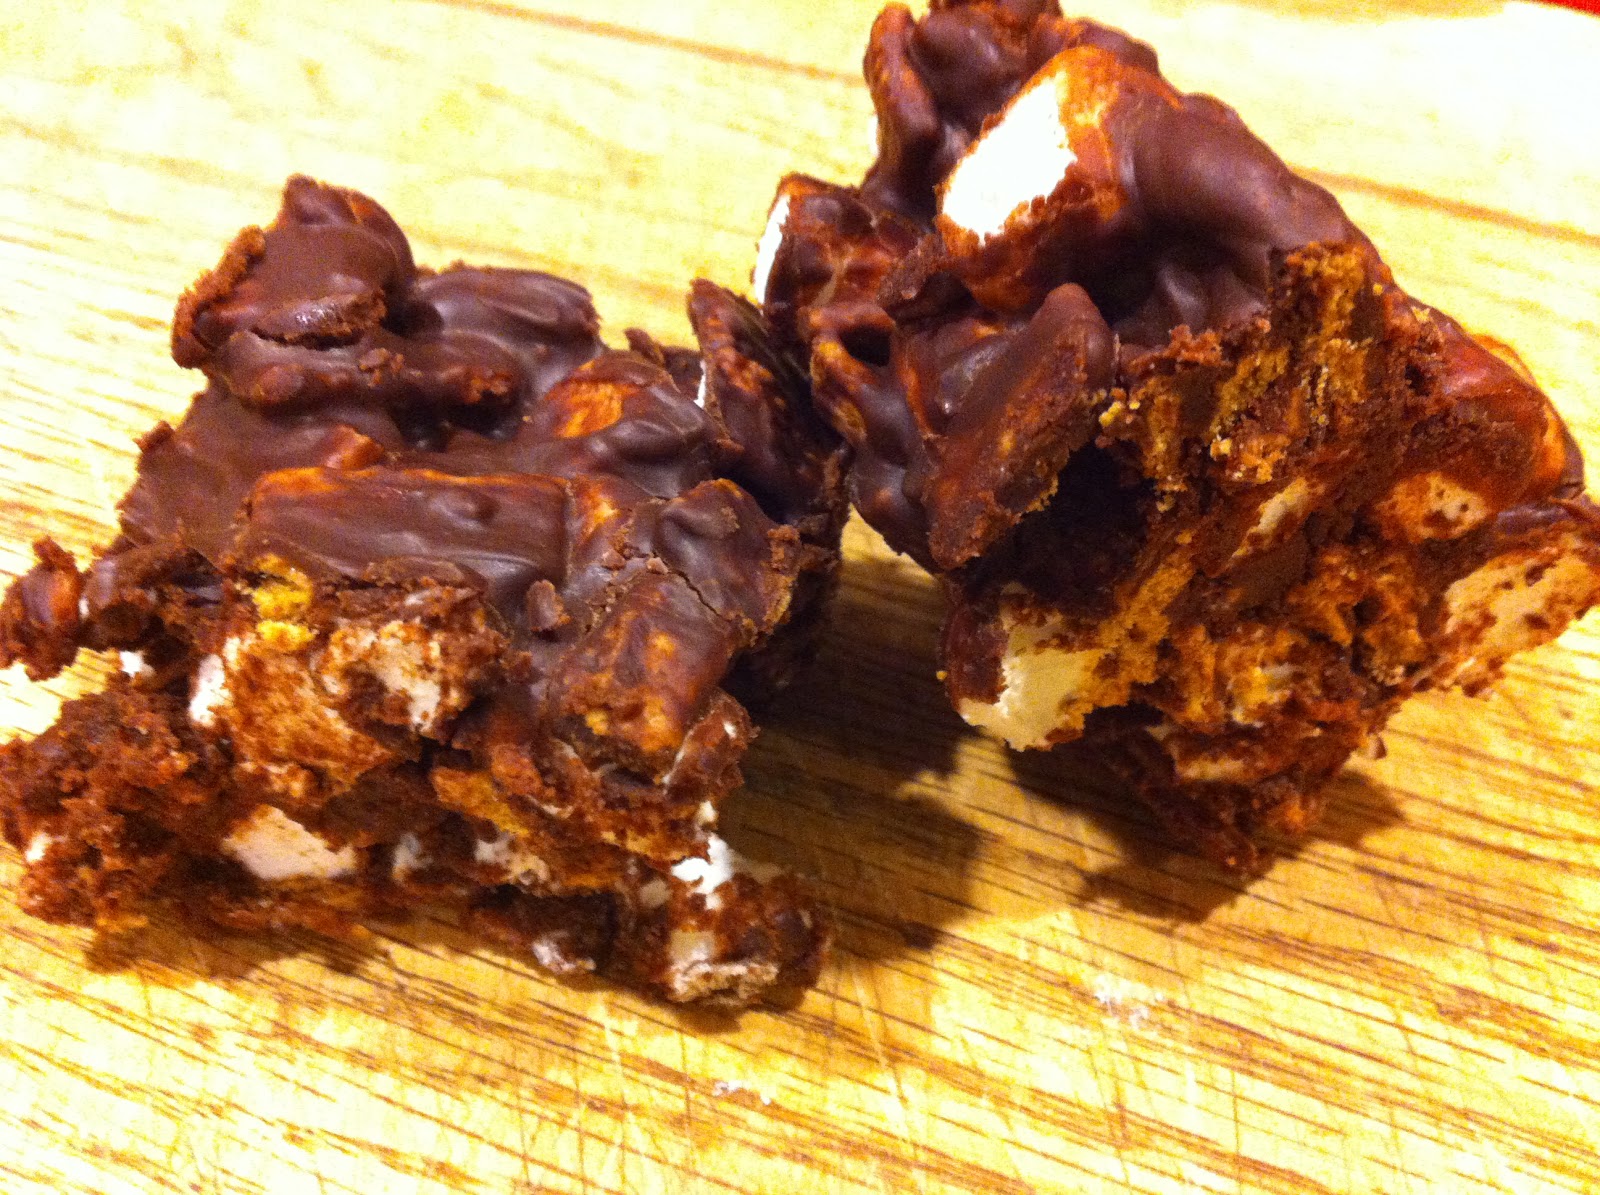
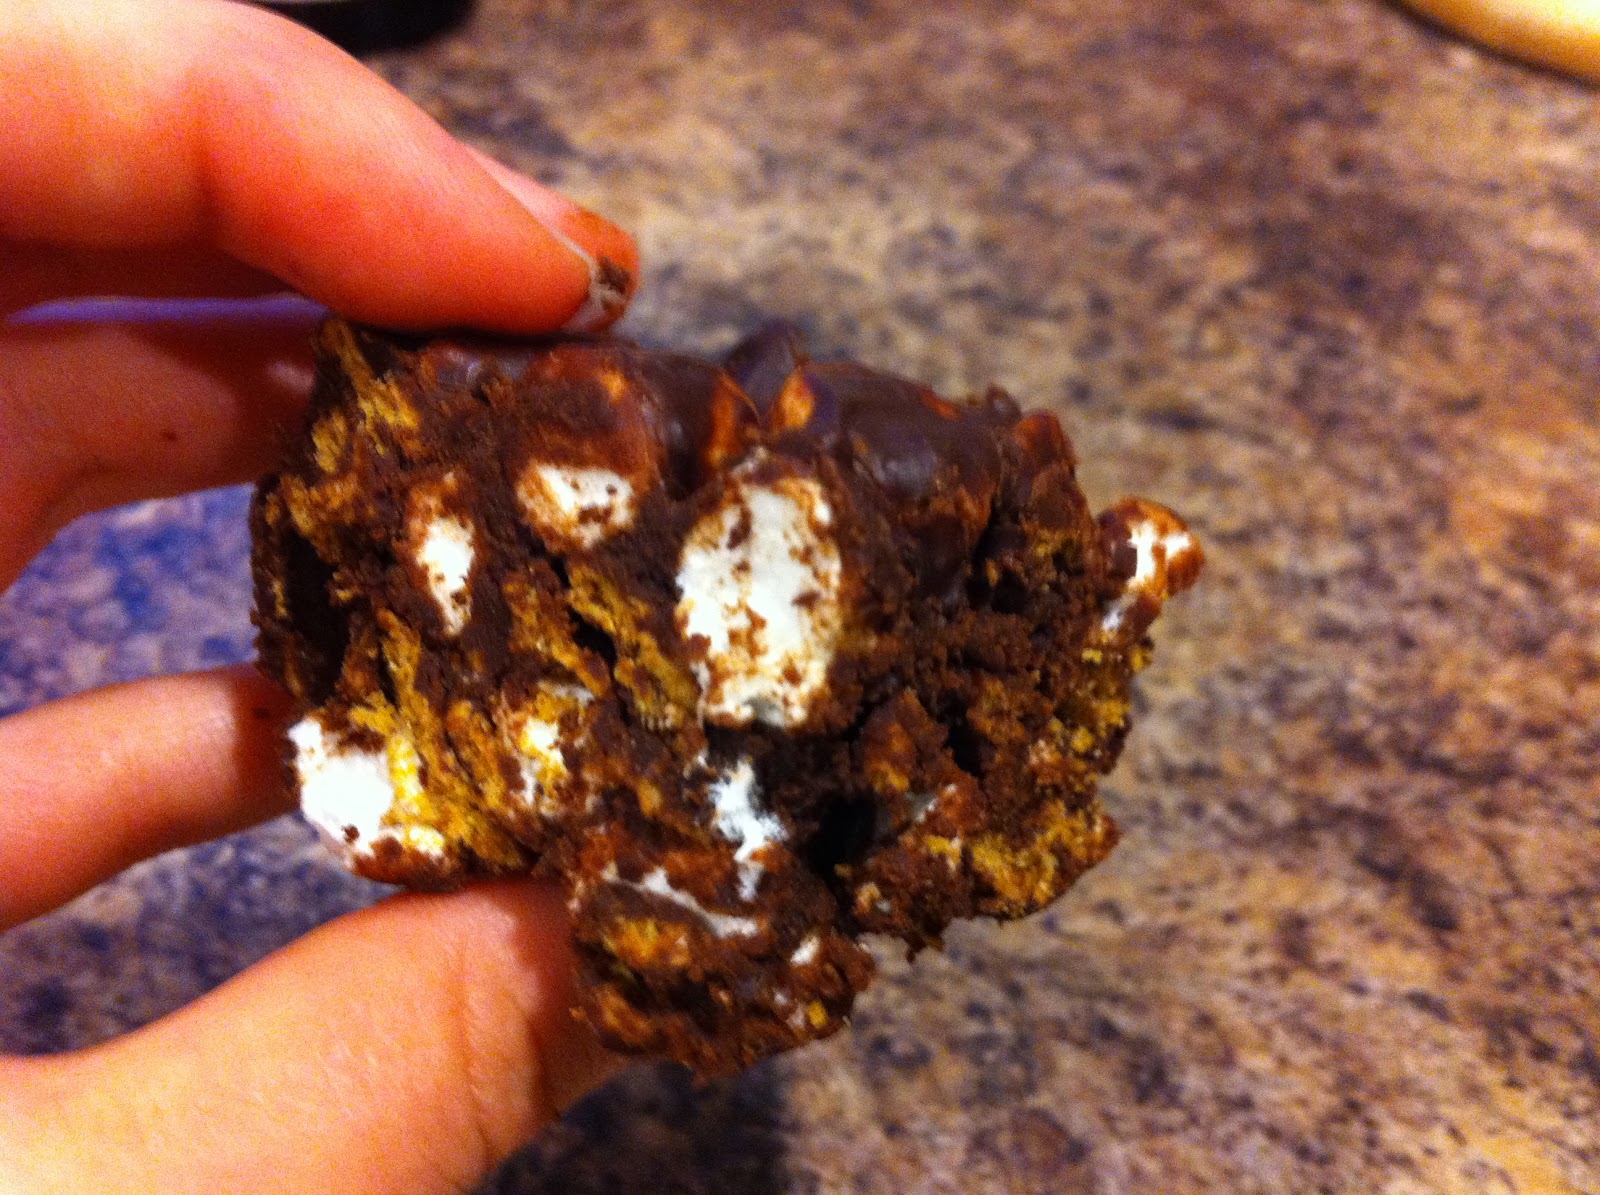
Now to most of you, these may not look inside-out, but to me they do. Let me explain. My Mom makes a s'more square that is basically the same as Rice Krispie square, just with Golden Grahams. So she melts the marshmallows and stirs in the chocolate chips and cereal. The reason I don't make that type of square is because I really struggle timing it right. I either end up with marshmallow goop that is cooled too much and so nothing will mix into it, or too hot and so the chocolate melts and instead of having chocolate chips, you get a gooey chocolate flavoured marshmallow mess. So, this recipe is a lot safer for me (but I'd still like to share the recipe for her S'more Square, I'll just snap a picture of it one day when she makes it to show you). It's safer because you have melted chocolate and whole marshmallows (instead of melted marshmallows and whole chocolate chips - see, inside-out) and marshmallows need a lot more heat to melt than chocolate does (or so I've experienced).

This recipe was adapted from the Nestle Toll House recipe.

Makes 16 Squares


Ingredients

1/2 C. Milk
1 Tsp. Vanilla
1 3/4 C. Milk Chocolate Chips
3 1/4 C. Mini Marshmallows
1 1/2 C. Golden Grahams (or graham crackers cut into bite size pieces), 

Directions

~In a large microwave safe dish heat milk and vanilla until almost boiling (~2 minutes)
~Stir in the chocolate chips and return to microwave until fully melted (~30 sec)
~Make sure there is no lumps in the mixture and everything is thoroughly mixed, then set it aside to cool for ~5 minutes, or long enough so the marshmallows won't melt.
~Add in the marshmallows and stir to evenly coat.
~Mix in the graham crackers / cereal.
~Spoon into a greased 8x8 pan and cool in the refrigerator for 1-2 hours.
~When set, cut into squares. 
~Can be stored at room temperature.

Enjoy