Thursday, 20 September 2012

Blueberry Swirl Ice Cream


My poor dog. She may have had to experience a bit of a spill in the kitchen. Now typically that wouldn't be a problem. Either she would quickly clean it up, or one of the humans would be mean and shoo her away and then clean it up themselves. No, this time clean up was not easy. You see I spilt hot custard on my beautiful dog's back. Luckily her furs so thick I don't think she felt anything (plus it wasn't like I dropped the whole pot on her, it was more like a quarter size dollop that dropped off the sieve as I moving it to the sink.) If she hadn't been in her usual spot (the mat right at the sink) she could have avoided this accident but hello, have you tried to keep a dog out of the kitchen? I mean, there's food in there, come on.

Unfortunately for Kona, the custard landed on a part of her back that she was unable to reach to lick away. I swiped at it with a towel but all I managed to do was spread it around. So now she has a lovely crusty patch on her back. Oh well, it's experience (or maybe that's when there's mud on a truck). She sheds so much that it really doesn't matter. I'm sure she has about a three day turn around time on fur, so I'm sure by the weekend she'll be back to her pretty little self.

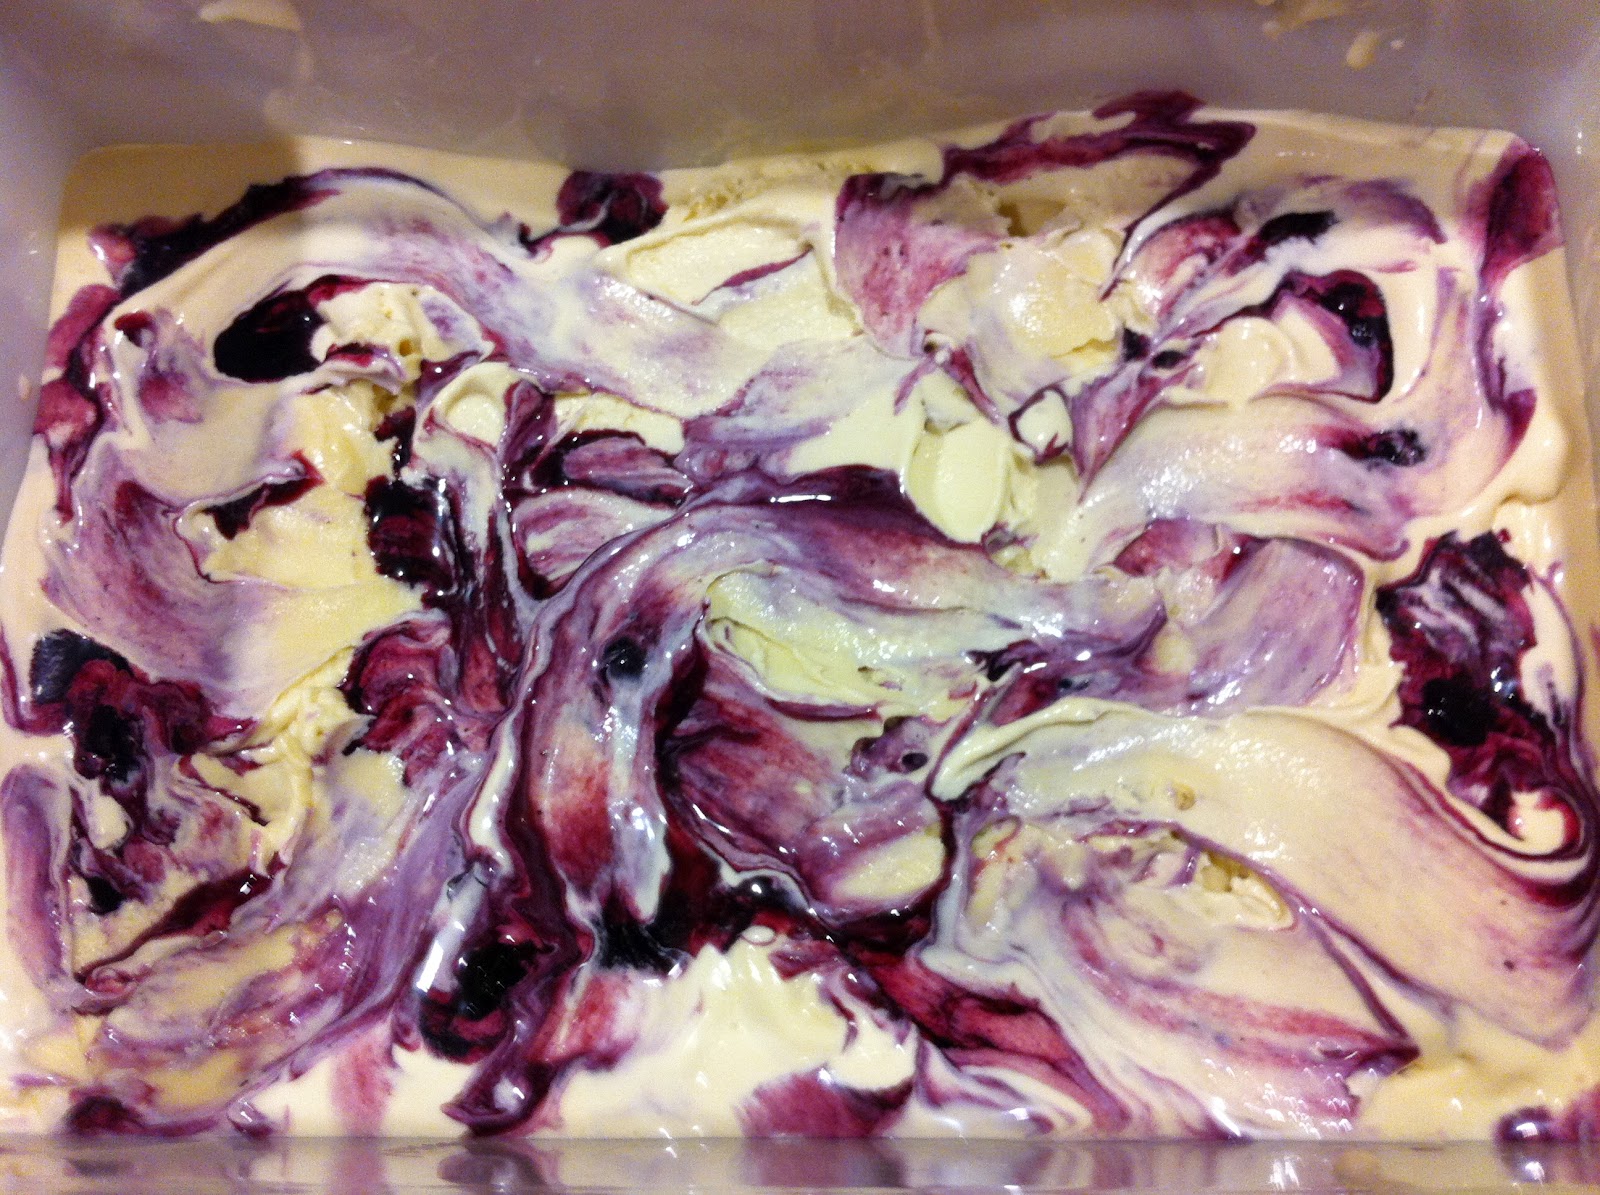
By the way, this vanilla ice cream recipe is AWESOME! I was so happy with the way it turned out, because it actually resembles ice cream (unlike the ice milks that I've made in the past).

I used David Lebovitz vanilla ice cream recipe and the blueberry sauce was adapted from Dollface Delights (a blog name that makes me think of my pup who's given name by her breeder was called Kinkel Delight).


Ingredients:

For the ice cream
1 C.Half & Half
A pinch of Salt
3/4 D. Sugar
2 C. Heavy Cream
5 Egg Yolks
2 Tbsp. Vanilla

For the blueberry swirl  (Cut these measurements in half if you don't want any leftover sauce.)
2 C. Blueberries
2 Tbsp. Orange Juice
3/4 C. Sugar
2 Tsp. Cornstarch

Directions

For the ice cream
~In a medium saucepan, heat the half & half, sugar and salt.
~In a bowl, whisk together the egg yolks.
~Pour about half of the warmed cream mixture into the yolks, whisking constantly.
~Place yolk and cream mixture back into the saucepan.
~Cook over medium-low heat, while stirring constantly and scrapping the bottom of the saucepan with a spatula
~When the mixture thickens and coats the spatula, strain the mixture through a sieve into a bowl.
~Add in the cream and vanilla. Stir
~Refrigerate mixture to chill thoroughly.

For the blueberry swirl
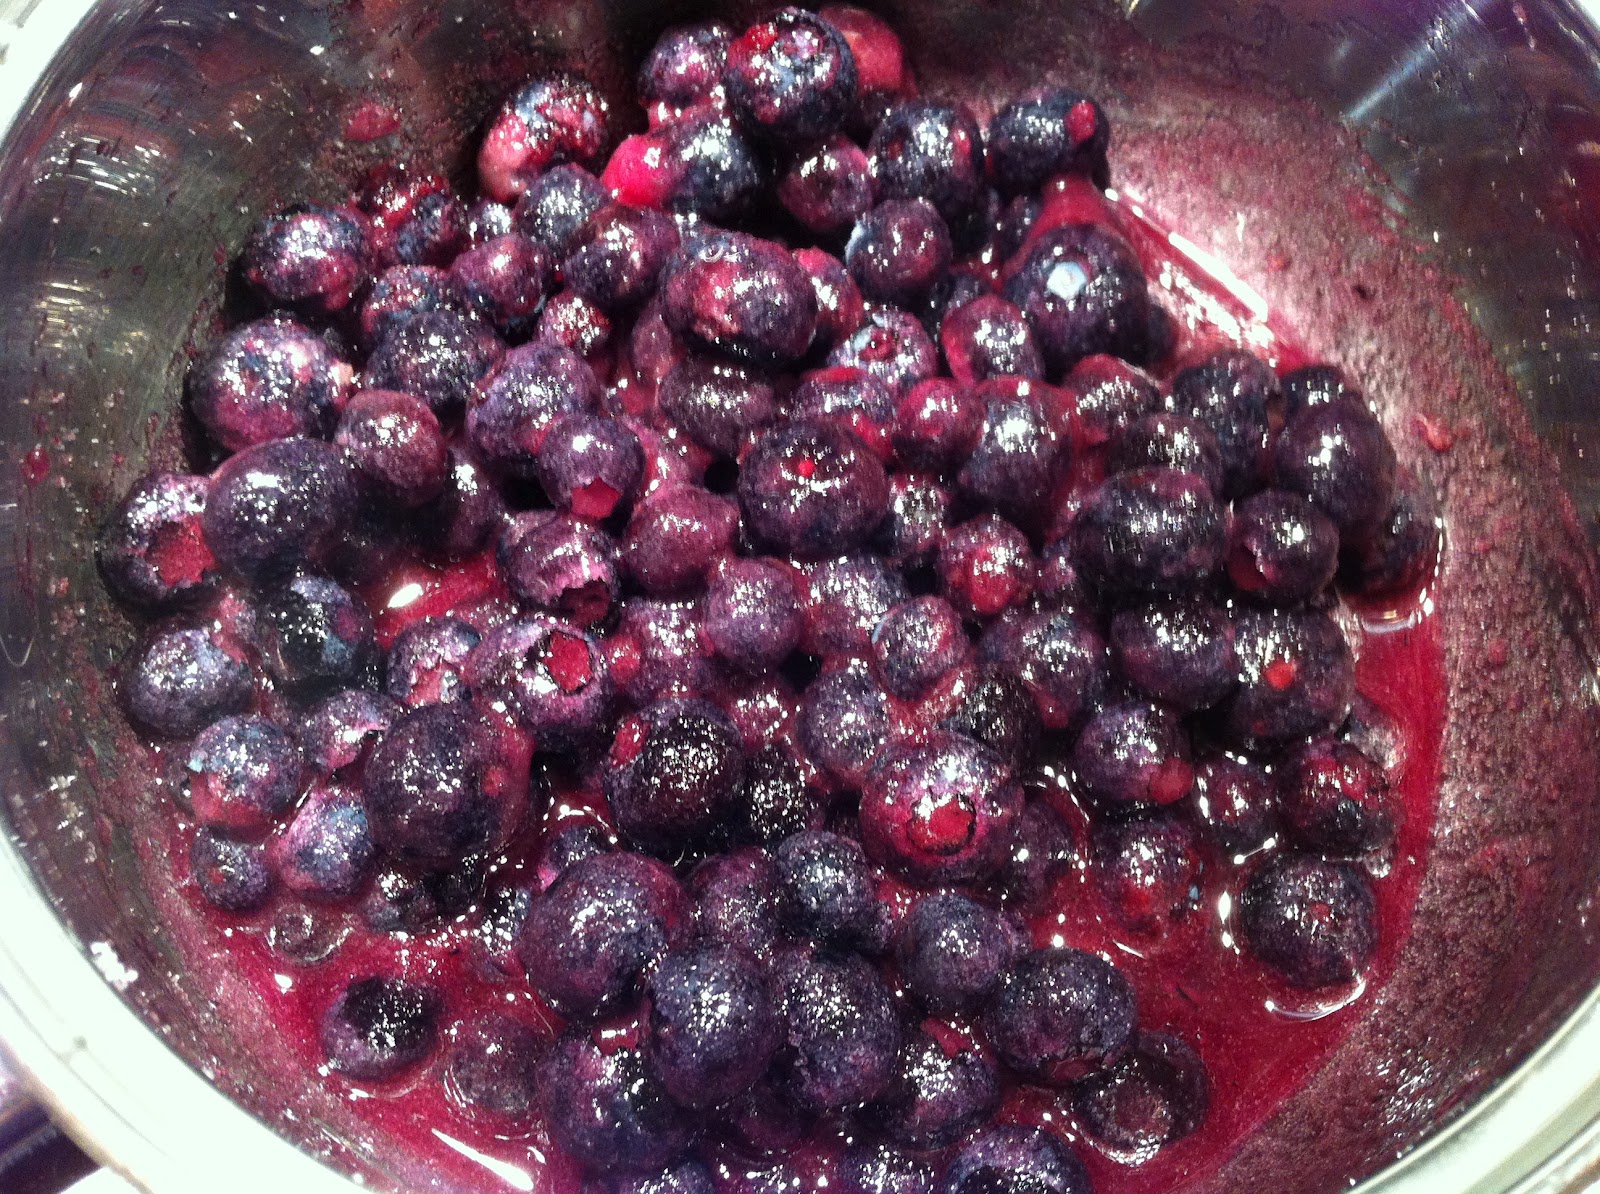
~Place berries, juice and sugar in a saucepan and cook on medium heat until berries burst and mixture cooks down. Stir constantly as to prevent burning.
~If too liquidly scoop a couple spoonfuls of the liquid into a small bowl and add in the cornstarch (or a ratio of the cornstarch) and whisk to get rid of the lumps. Pour back into saucepan and stir.
~Refrigerate sauce until it is cooled through.

Assemble the swirl
~Place ice cream custard into ice cream maker and freeze according to manufacturer's instructions.
~When ice cream is done, place a layer of cream in a container and place blueberry syrup by the dollop on top. Layer more cream and gently spread it out, making sure not to mix the two layers too much then repeat with more syrup. Continue until you run out of ice cream and syrup.
~Gently swirl with a spoon the top two layers together.
~Place ice cream in freezer.

Enjoy


Wednesday, 19 September 2012

Grilled Tomatoes


Our tomatoes are finally ripening much to the little tomato addict's (and peanut butter, cheese, peas, bananas, garlic...addict's) delight. Yes, that would be my dog. You know, I think she only likes her little bite of steak she gets occasionally because we smother it in garlic. The steak, well it just messes with her being a vegetarian. I believe she's truly a vegetarian at heart.

Back to the tomatoes. It's amazing some days that I get any fruit off the plants because Kona runs up, grabs a tomato off the plant and runs to go eat it on the grass. It's not just tomatoes though. She sits under the raspberry bushes and aggressively nips each individual berry off the bush. Then there was the pea fiasco a few years ago. Let me tell you first, that we don't plant peas any longer. The first summer we planted them, Kona ran and picked the peas off the vine. Then the next summer, she got so excited that there were going to be peas in the garden that she ripped the vines right out of the ground and started flinging and chasing them around the back yard. Unfortunately, she pulled all the vines out before they produced any actual peas (the vines themselves must to a dog smell the same as the peas).

Moral of the story is: My dog is a vegetarian.

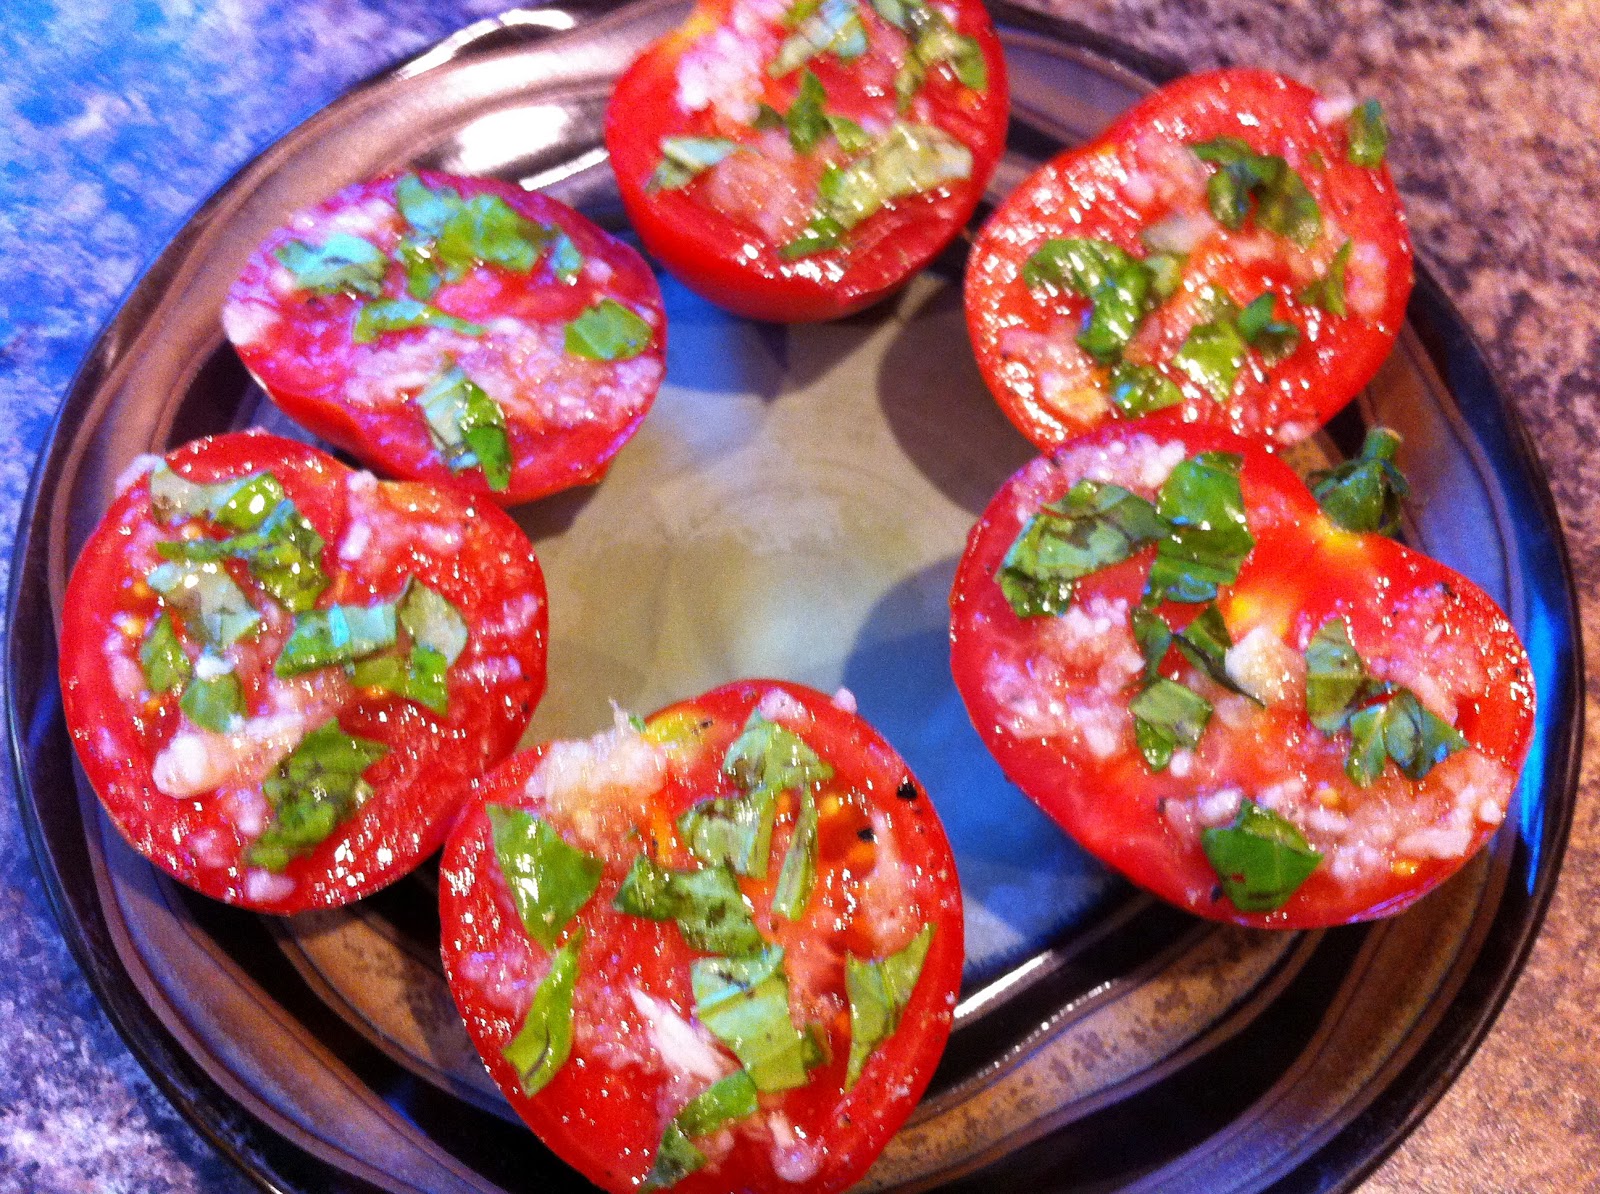
Back to the tomatoes. I was able to wrestle a few nice looking tomatoes out from under her nose and I decided to grill them. Typically I do these on a pan under the broiler, but because our oven is still broken and we were BBQing, I did them out on the grill instead.

Serves 3

Ingredients

3 Tomatoes
2 Cloves Garlic, minced
2 Leaves Fresh Basil
1/2 Tbsp. Olive Oil
Salt
Pepper

*Optional*
Feta Cheese

Directions

~Wash tomatoes and slice in half.
~Brush flat surface with oil.
~Spread the garlic and finely chopped basil over the oil.
~Season with salt & pepper
~Lightly brush over the top again with oil.
~Sprinkle with feta cheese if desired.
~Place on a baking sheet and under the broiler or directly onto the grill and grill until tomatoes soften and warm through.

Enjoy

Tuesday, 18 September 2012

Banana Soft Serve


Yes, I finally had to try this and I'm really glad I did because it's a dairy-free, vegan friendly, diet worthy ice cream (or yogurt). It was so, so simple. The only problem was I've discovered (and so has my dog) that we actually like frozen banana chunks better than normal banana. When frozen they are so incredibly creamy. Yum. It's amazing we had any left over for the actual 'ice cream'.

Then when I finally got around to putting the frozen chunks in the food processor, I was really glad that I'd read somewhere that it will take quite a bit of time for the bananas to whip. If I hadn't have read that, I may have just given up because all the bananas did for a long time was crumple into course chunks. Eventually though it miraculously (or maybe it was just because the chunks melted slightly) stopped being crumb like and whipped up into this beautiful, fluffy soft serve. You want to know what was even more amazing? It tasted that much better than I had thought it would. I was expecting it to just taste like banana (which it did), but it was more of a lighter taste, like a banana flavoured ice cream would taste like. I'm telling you, it tasted like there were other flavours and ingredients at work here, but there weren't. It's hard to explain.

I've seen this 'recipe' on many, many blogs, so I'm not going to post a link to credit one blog in particular.

Ingredients

Banana

*Optional* 
Chocolate Chips
Nutella
Peanut Butter
Chocolate Sauce
Caramel Sauce
Nuts
Sprinkles
Granola
Fruit / Berries

Directions

~Peel bananas and slice into chunks
~Freeze chunks.
~Process frozen banana in a food processor until a crumb forms then keep processing until banana begins to whip.
~If you wanted any mix-ins, add them and pulse briefly to combine.

Enjoy


Sunday, 16 September 2012

Raspberry Pancakes


I know that every person that spends any time in the kitchen has that one fear. Be it pastry, yeast breads, or pancakes. Yup, I'll make bread a few times a week and if I had a need for a pie I wouldn't have a problem with making one. But pancakes, those are my nemesis. Pancakes are my Dad's specialty. The first day that everyone is all together at the cabin is always pancake day. Now I've never seen him make pancakes from scratch though. He always buys that Aunt Jemima Buttermilk Pancake Mix (I am not being compensated for this, and all opinions are my own) and adds eggs and oil and vanilla soy milk and then more pancake mix. His batter looks like paste as there is no measuring going on, just dumping things in (or so it would appear). I know a double batch is never enough, usually he ends up tripling or quadrupling. Anyway, if we have company they always take their first bite of pancake and you can see them thinking how can this taste like this, it comes from a box? Wanna know the secret? Of course you do. It's the soy milk. Vanilla, fat free soy milk. Even though it's fat free, it is still a million times richer, creamier and vanillaier than regular milk. Resulting in the best buttermilk pancakes (minus the buttermilk) that you could ever image. Then to top it off, they're cooked on a gas stove on an ancient old cast iron griddle (instead of the electric griddle we have at home). The end result is a pancake that looks like it's burnt to snot, but actually doesn't taste one bit charcoaled.

My dad even got one of the neighbourhood kids in a jam because he got the poor kid to confess that the pancakes were better than the ones his mom made. Of course that didn't go over so well with her.

So you can probably see why pancakes are my nemesis. I could count on my one hand how many times I've tried to cook pancakes and I could also tell you how many times I've wrecked them (those numbers would be equal). I either end of having them raw in the centre, or like shoe leather they are so tough because I'm trying to avoid the rawness. Yup, not good.

Today I decided to tackle them though, and while they weren't raw or tough, they were slightly burnt (and you could taste it because electric heat and teflon is not as forgiving as a flame and cast iron). All-in-all though, I was pretty happy and I will be making these again, probably with some slight adaptations (such as the addition of some lemon zest and a bit more lemon juice). The original recipe was intended to be a raspberry streusel pancake, which sounds amazing (plus it had coconut oil and coconut milk in it, yum), but I didn't go that route. When I have a chance I might make the original recipe just as it was written, but for today I decided to change things up and go raspberry lemon (you know it's my fave right?) instead.

Please check out the original Raspberry Streusel recipe at Baking Serendipity (who got it from Two Peas & Their Pod), as it still does look truly awesome and mine has been adapted a bit from the original.

Makes ~10 pancakes (1/3 C. batter each)


Ingredients

2 1/2 C. Whole Wheat Flour
2 Tbsp. Sugar
2 Tsp. Baking Powder
1 Tsp. Baking Soda
Pinch of Salt
2 C. Vanilla Almond Milk
2 Eggs
1 Tbsp Olive Oil
1/2 Tbsp. Vanilla
1 Tsp. Lemon Juice
Zest of 1 Lemon
1 C. Raspberries

Directions

~Mix dry ingredients (flour, sugar, powder, soda & salt) in a large bowl.
~Add in the wet ingredients (milk, eggs, oil, vanilla and lemon juice) & stir.
~Wash & smash raspberries with a fork then fold berries and lemon zest into batter. (It's okay if the batter is slightly lumpy.
~Scoop batter (I used a 1/3 C. measuring cup to transfer the batter) onto a hot and greased griddle or skillet.
~Flip when bubbles in the centre burst.
~Cook the other side until it is golden brown.

Enjoy!


Nutrition Facts
Per 1 Pancake
Makes: 10 (1/3 C. Batter) Pancakes
Calories: 160
Carbs: 29g
Fat: 4g
Protein: 6g

Friday, 14 September 2012

Grilled Apple Cheese Sandwich


Not much to say about this except it was just something I had to try. I've heard (and seen) about all these recipes / ideas for fancy schmancy grilled cheeses. Now I've in the past had a grilled cheese with ham on it or even tomatoes, both of which are pretty good tasting, but I always found the addition to the sandwich made the cheese go kind of funny (aka it never melted properly / went stringy as it should / etc). But, I like apple and I like grilled cheese and I though I should give it a try. I used a really flavourful apple (I know because I sampled a few slices before making the sandwich), but I can honestly say that I really didn't taste the apple on the sandwich (maybe that's a good thing if you're trying to sneak in a fruits & veggies serving for the kiddos). So, my verdict is, I'm going to stick with plain old grilled cheese sandwiches.

Makes 1 Sandwich

Ingredients

2 Slices of Bread
1/2 Tbsp. Mayonnaise (yes I used it for once)
2 Tsp. Butter
1/4 of an Apple, thinly sliced (skin can be left on)
3-4 slices of Cheese

Directions

~Preheat either a frying pan or a panini press/grill.
~Spread mayonnaise on one side of one slice of bread.
~Place apple and cheese slices on top of the mayonnaised side of the bread.
~Put the second slice of bread on top.
~Butter the top outer side of the sandwich.
~Flip sandwich over and place buttered side down onto heated pan / grill.
~Butter the top surface.
~Grill until both sides are golden brown and the cheese begins to ooze around the edges.
~Pull off of heat and allow to sit for a minute.
~Slice in half.

Enjoy

Thursday, 13 September 2012

Jello Shots


I don't know if this post is really appropriate for a food blog, but I'm going to post it anyways, because I don't want to forget the flavour combinations I used. Anyway, the pictures are rather fuzzy (not because we had consumed any shots before pulling out the camera (honest - we were making them okay, not eating them yet), but because I never actually had any intention of posting these pictures to the blog when I took them.

So the flavour combinations I used were:

Watermelon Jello & Gin
Orange Jello & Malibu
Lime Jello & Tequila
Lemon Jello & Tequila
Grape Jello & Vodka

Unfortunately, we never got to try the green shots. They sacrificed themselves when the top shelf of the fridge decided to take a nose dive and the entire plate of green shots (the ones I'd most been looking forward to) followed. Let me tell you, what a mess. We had glass shards from the plate from one end of the kitchen to the other, half congealed jello in interesting places, and a dog that decided it would be a good idea to come in and see what all the commotion was about. So, after all that I didn't get to try the ones I wanted to, so we decided to make some yellow ones to replace them. They were okay, not my favourite. I'll definitely be trying to try the green combo again.

The orange combo was great, and I loved the taste of the watermelon jello, but I think I'd mix with vodka next time. It was my first time trying gin and all I can say is it tastes like paint thinner. Which isn't really on my food bucket list of things to try. The grape ones were fine, I'm just not a big artificial grape fan, but I made them for a friend kind of as a joke because her drink of choice for a long time was grape juice and vodka.

So, now you're probably wondering how much alcohol you actually need to put into the jello. Well, it's really pretty simple.

1 (3 oz) pkg Jello
1 C. Boiling Water
1/2 C. Cold Water
1/2 C. Alcohol

I spent a bit of time trying to track down some containers to make the shots in. Everyone I know said just use dixie cups, but I didn't want to have a tiny bit of jello in a large paper cup. Finally I tracked down something perfect. Medicine cups. You know the little plastic 1 oz cups that come with the children's liquid Tylenol, etc. Well, I didn't go and buy 100 bottles of Tylenol to get all the medicine cups. I work at a pharmacy, and what do you know, you can buy those handy little, multipurpose things by the 100 pack. You know what's even better? They cost me under a buck for the whole sleeve. Now before you go and judge me, I must inform you that I wasn't the only one scooping up a few sleeves of these things. And it wasn't just medicine cups either. One girl was eyeing up some 20 & 30 ml oral syringes that she was going to try and experiment with. The verdict's still out on whether they worked or not.

Anyway, how to make these things. Right, I guess I should get to that.

Each batch (1 box of jello) makes ~15 - 1oz shots.

Ingredients

1 (3 oz) pkg Jello
1 C. Boiling Water
1/2 C. Cold Water
1/2 C. Alcohol

Directions

~Boil water.
~Place jello powder and boiling water in a medium sized bowl. Stir until jello crystals have dissolved.
~Pour in the cold water.
~Allow the mixture to cools slightly (or the alcohol will evaporate - or so I am told)
~Add in the alcohol. Stir.
~Transfer jello into individual serving cups. (I found the easiest way to do this was to pour the liquid into a liquid measuring cup that has a spout and use that to pour into the individual cups.)
~Place cups onto plates and put plates in the fridge to set (about 4 hours).

Enjoy (responsibly!)


Wednesday, 12 September 2012

Beef Udon with Peanut Sauce


In the past I've attempted to make Thai / Asian Food, and it usually turns out less than stellar. This recipe on the other hand was anything but mediocre. Plus, as an added bonus, it looked pretty (it actually looked exactly like the dish I had last weekend at the local Japanese Restaurant that cost me $12. So score for restaurant quality looking food). I think what made it look so professional was that the carrots were cut into matchsticks, and the beef was cut really fine (instead of chunked liked we normally cut meat), and we used cabbage. I know you're probably thinking eww cabbage, and I typically think that way, but it really worked in this recipe.

One thing I may do for next time I make this is slightly reduce the peanut butter measurements and increase the thai sauce amount to compensate, because when it was really hot I didn't notice so much, but as it cooled down I found that the peanut butter began to become a bit sticky. Not that that's really a bad thing or anything, it's just for me that doesn't like peanut butter (I sure seem to be using it a lot lately though, ironically), I found it a bit strong. But, I think the main thing I don't like about peanut butter is the after taste, and this recipe did not have that after taste, so I enjoyed it. Also by reducing the peanut butter proportion, you'll be saving a lot of calories. I never really though about it when I was making it, but the original recipe didn't call for any meat and the reason why is because the peanut butter probably supplies what protein you need for the meal. So with both the peanut butter and meat in this dish, you're looking at a wopping 43g of protein per serving (hmm, I guess I do protein dishes well. I come by it naturally though, I always tell my Mom she's a protein addict.) Unfortunately, the calories and fat are also wopping numbers in this dish, but it tastes good (and it is your whole meal after all, so you shouldn't feel the need to consume any additional calories on top of this).

It's recipes like this one that make me with I had 6 hands so I could be manning all the different frying pans and woks at the same time, but even more so I wish I had a bigger stove. I've never understood people's obsession with gas ranges (because I cook on one at my cabin and I just never thought it was that great. Then again, we make toast and boil water on the stove at the cabin, we never stir-fry, etc. there so I guess that's why), that is until I start making recipes like this. More importantly, I understand why people want the extra wide, 6 burner ranges. A little 4 element electric stove just isn't good enough when you have 1 wok and 2 frying pans going (or trying to go) at the same time.

Recipe adapted from Damn Delicious who adapted from Recipe Girl .

Serves 4

Ingredients

1/2 C. + 1 Tbsp. Water
6 Tbsp. Reduced-Fat Creamy Peanut Butter
3 Tbsp. Brown Sugar
3 Tbsp. Soy Sauce
3 Tbsp. Rice Vinegar
1/4 Tsp. Ground Ginger (or 1 1/2 Tsp. Fresh Ginger, grated)
5 Tsp. Olive Oil (divided)
1 Tsp. Cornstarch
1 Tbsp. Thai Sauce
4 Cloves Garlic, minced
3 (7 oz) Packages Udon Noodles
1 C. Carrots, julienned
1 Small Onion, diced
1 C. Green Cabbage, shredded
1 C. Mushrooms, diced
1 lb Beef, sliced thin
*Optional* Sesame Seeds

Directions

~Prepare your vegetables and meat, set aside.
~In a large sauce pan, combine water, peanut butter, sugar, soy sauce, vinegar, ginger, 2 Tsp oil (reserving the rest), cornstarch, thai sauce and garlic, and bring to a boil. Whisk to get rid of the lumps as you heat.
~Cook udon noodles according to package instructions (or if they just need heated like mine, skip this step and place the noodles directly into the hot sauce and heat there.)
~Place noodles into sauce mixture and heat on low until mixture is heated through.
~Meanwhile, heat a wok and place part of the remaining oil into the hot wok. Add your carrots and stir-fry for ~30 seconds.
~Add the onions to the carrots and fry until they begin to soften.
~Next add in the mushrooms. After a quick stir, add in the cabbage. Keep on the heat until everything has just started to soften, then remove from the heat.
~Heat a frying pan, and add in the remaining olive oil. When oil is hot, cook your meat until it is cooked through.
~Transfer meat and vegetables into the noodle and sauce mixture and stir to combine.
~Serve with a sprinkle of sesame seeds if desired.

Enjoy


Nutrition Facts (per serving)
Serves: 4
Calories: 673
Carbs: 72g
Fat: 26g
Protein: 43g